EasyTalk USB Tools
Vaddio EasyTalk USB Solution - Document Number 342-0449 Rev A Page 24 of 48
Step-by-Step Installation Instructions
EasyUSB Mixer/Amp Installation:
Locate the EasyUSB Mixer/Amp in a centralized location within the conference room within 6 feet of the PC
(unless optional USB Extension kit is installed). Follow steps below to install devices:
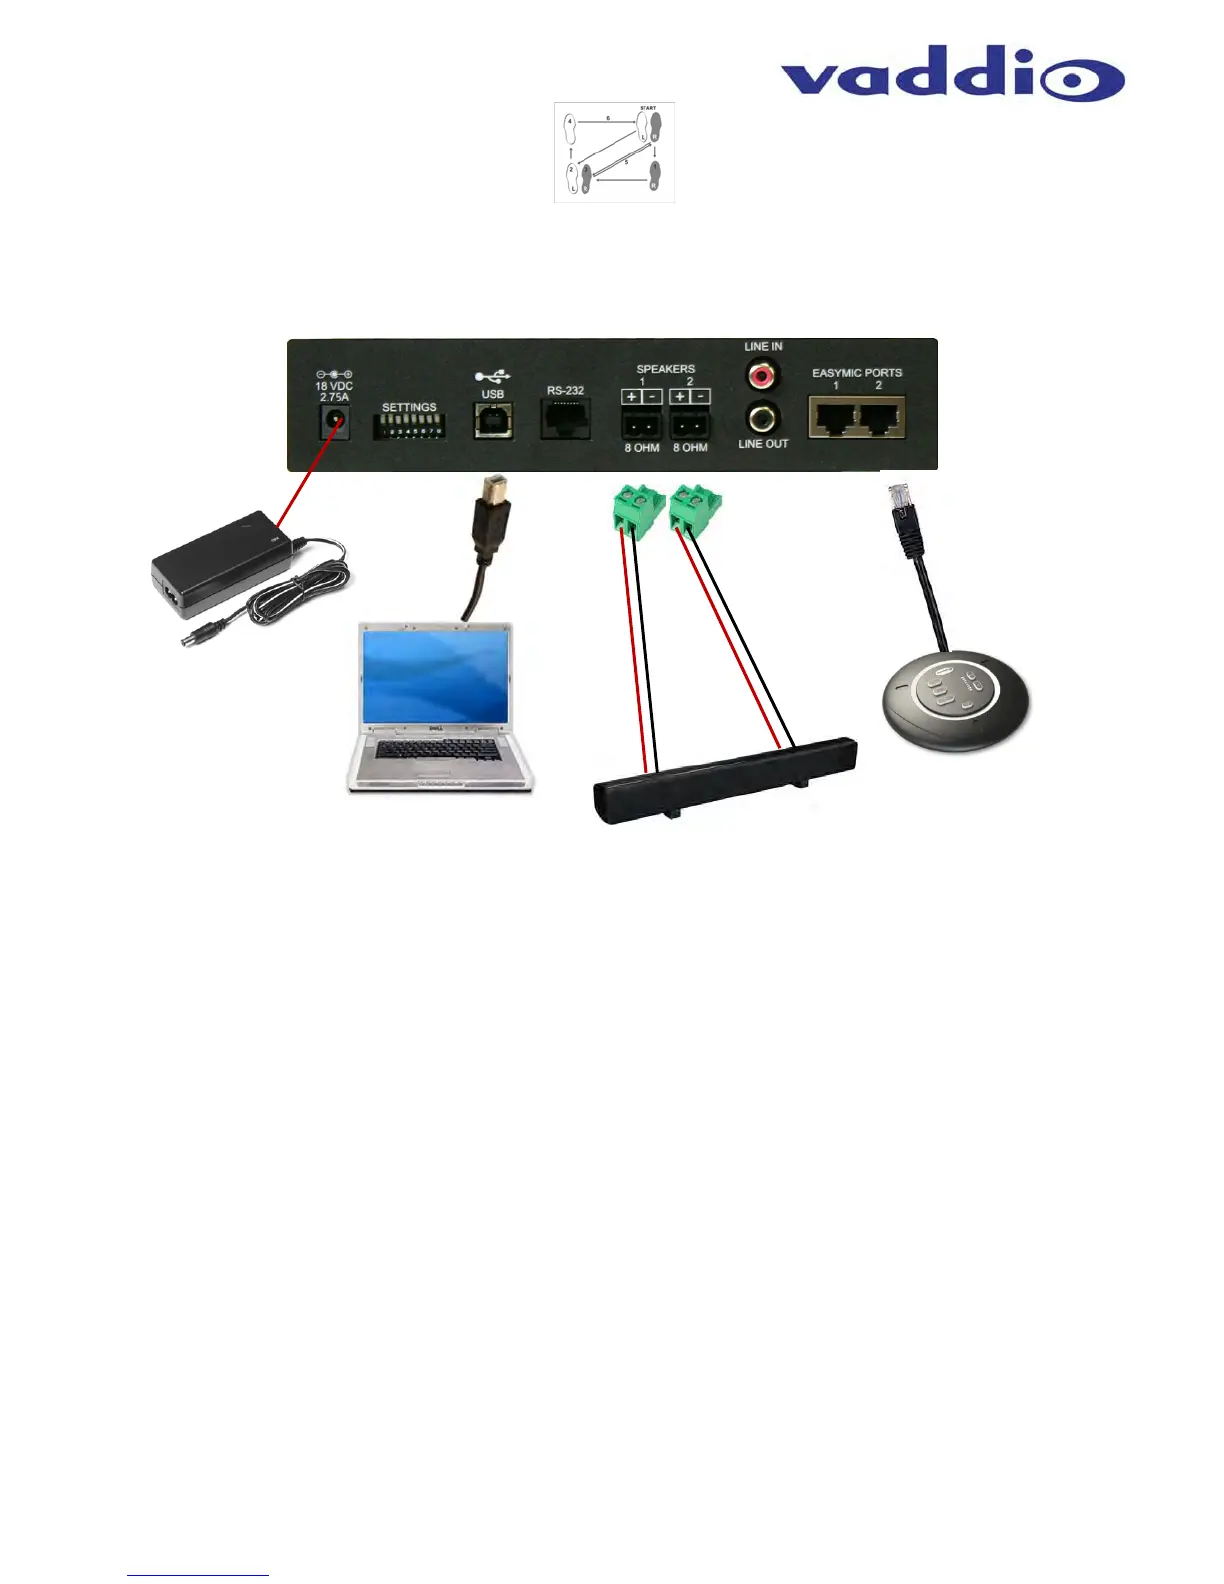
Diagram: Basic System Connections
STEP 1: Plug 18 VDC power supply included in package into the EasyUSB Mixer/Amp. The Power LED on the
front panel should light solid blue when powered.
STEP 2: Plug USB Type-B Male connector of the included cable into the EasyUSB Mixer/Amp. Plug the Type-A
Male connector into the PC USB port. Once the Mixer/Amp and PC are connected, the PC will recognize the
EasyUSB as a sound device in the operating system.
STEP 3: Connect the speaker wire to the 2-pin phoenix-type jacks included in the pack-out. Screw the terminal
on the phoenix-type jack to secure the wire in the connector. Ensure positive and negative terminals are
maintained between the EasyUSB Mixer/Amp and the loudspeaker. Reversing terminal arrangement between
channel 1 and channel 2 on the amplifier will result in “out of phase audio” that will sound hokey at best. Plug the
2-pin jack into the speaker jack on the EasyUSB Mixer/Amp. Connect the speaker wire to the loudspeaker.
Repeat process for second speaker channel.
STEP 4: Plug the RJ-45 on the provided 25’ (7.62m) CAT-5e cables to the EasyMic Ports on the rear of the
EasyUSB Mixer/Amp. Connect the other end of the CAT-5e cable to either the EasyMic MicPOD or the EasyMic
Ceiling MicPOD Interface Module. Once connected, the front panel LED will light a solid blue color. Maximum
cable distance between the EasyUSB and EasyMic device is 100’ (30.48m). Repeat process for second
EasyMic connection (if required).
EasyUSB
Mixer/Amp
Rear Panel
EasyMic MicPOD or
EasyMic Ceiling
MicPODs
EasyTalk
Sound Bar
PC with
UC Client
Software
USB 2.0
Cable
Power
Supply
STEP 1
STEP 2
STEP 3
STEP 4