0020288151_04 Operating and installation instructions 25
2. Fit the outdoor temperature sensor to the wall base as
shown in the figure.
3.5.6 Checking the reception strength of the
outdoor temperature sensor
1. Press the selection button on the system control.
◁ The installation assistant switches to the OT
sensor reception strength function.
Condition: OT sensor reception strength < 4
▶ Find a new installation site for the outdoor temperature
sensor where the reception strength is ≥ 4.
▶ Proceed as described in "Determining the reception
strength of the outdoor temperature sensor at the chosen
installation site (→ Section 3.5.3)".
3.6 Installing the system control
Determining the system control's installation site
1. Choose an installation site that meets the following
requirements.
– Internal wall of the main living room
– Installation height: 1.3 m
– Not in direct sunlight
– Not affected by heat sources
Determining the system control's reception
strength at the chosen installation site
2. Press the selection button .
◁ The installation assistant switches to the System
control reception strength function.
3. Go to the chosen installation site for the system con-
trol.
4. Close all doors behind you on the way to the installa-
tion site.
5. Press the wake-up/sleep button on the upper side of
the unit if the display is off.
Condition: The display is on, The display shows Radio communication
interrupted
▶ Make sure that the power supply is switched on.
Condition: The display is on, System control reception strength < 4
▶ Find an installation site for the system control that is
within the reception range.
Condition: The display is on, System control reception strength ≥ 4
▶ Mark the position on the wall where the reception
strength is sufficiently high.
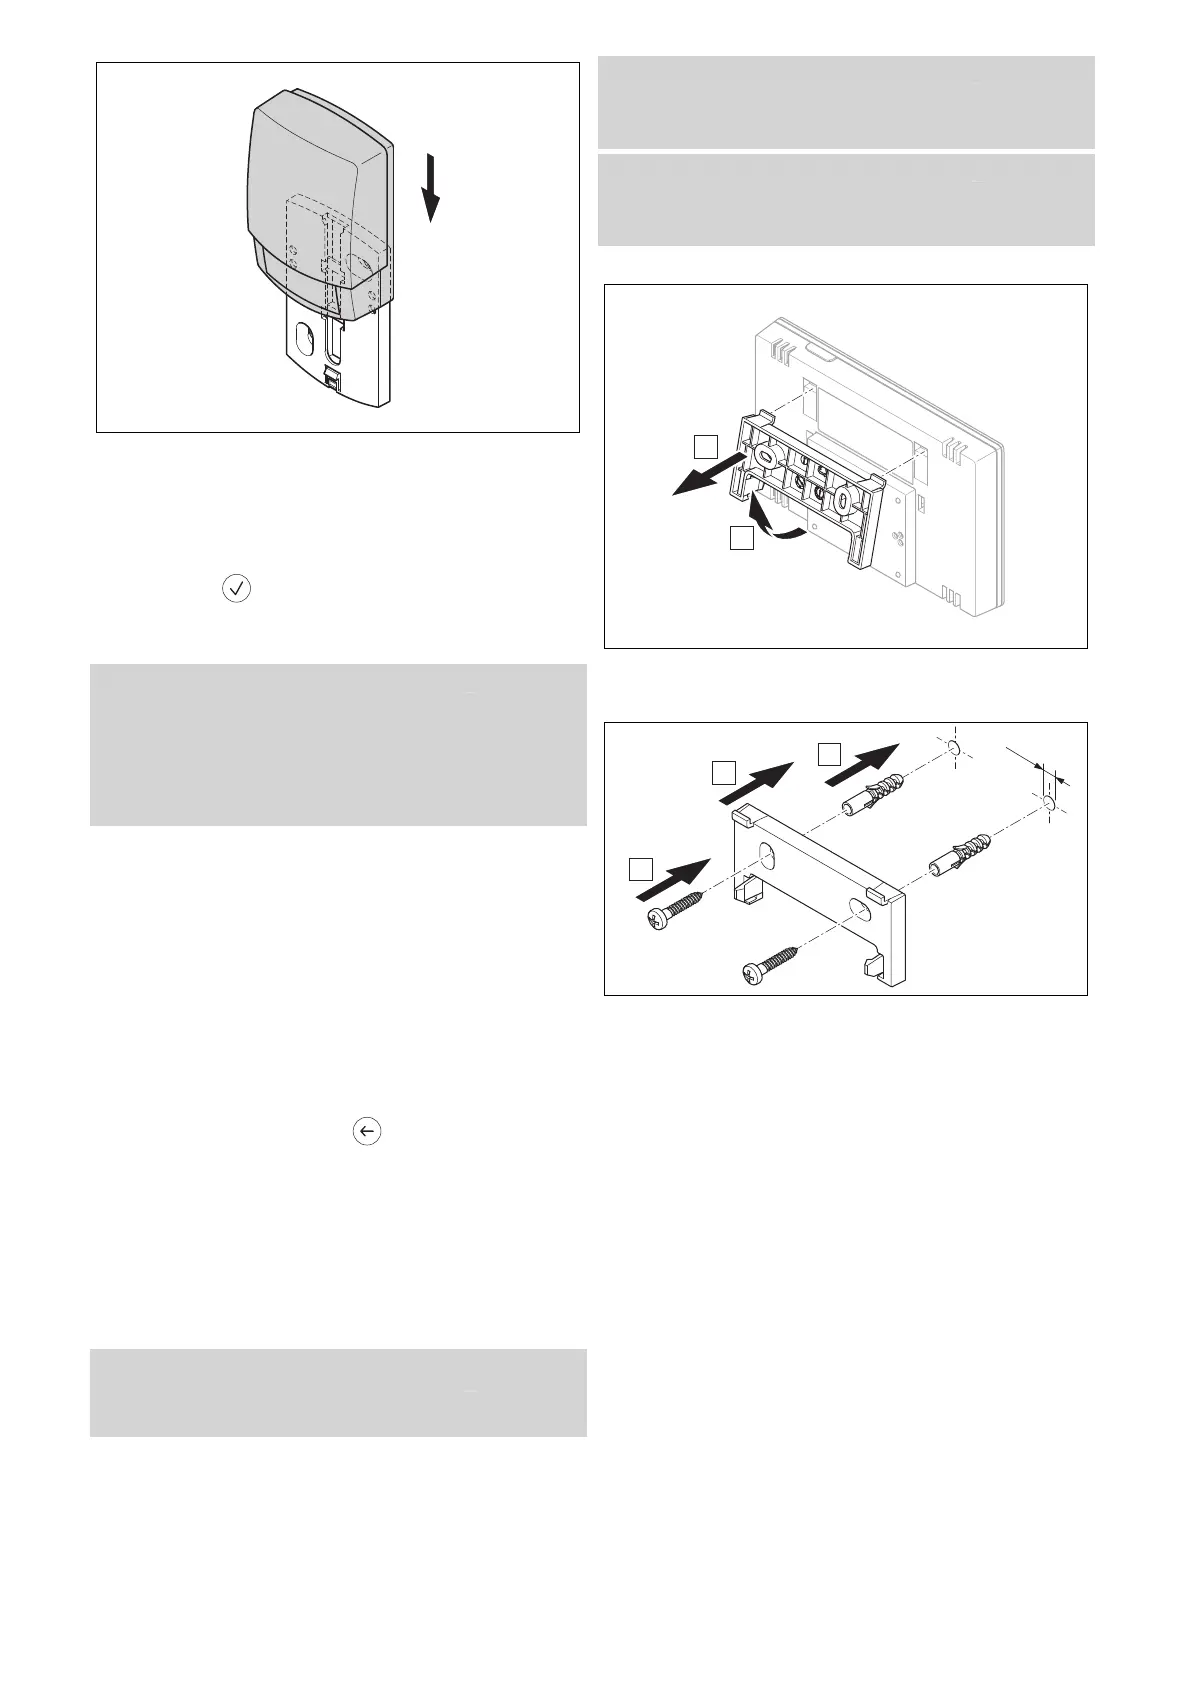
Attaching the unit mounting bracket to the wall
6. Remove the unit mounting bracket from the system
control as shown in the figure.
7. Secure the unit mounting bracket in accordance with
the figure.