56 Operating and installation instructions 0020288151_04
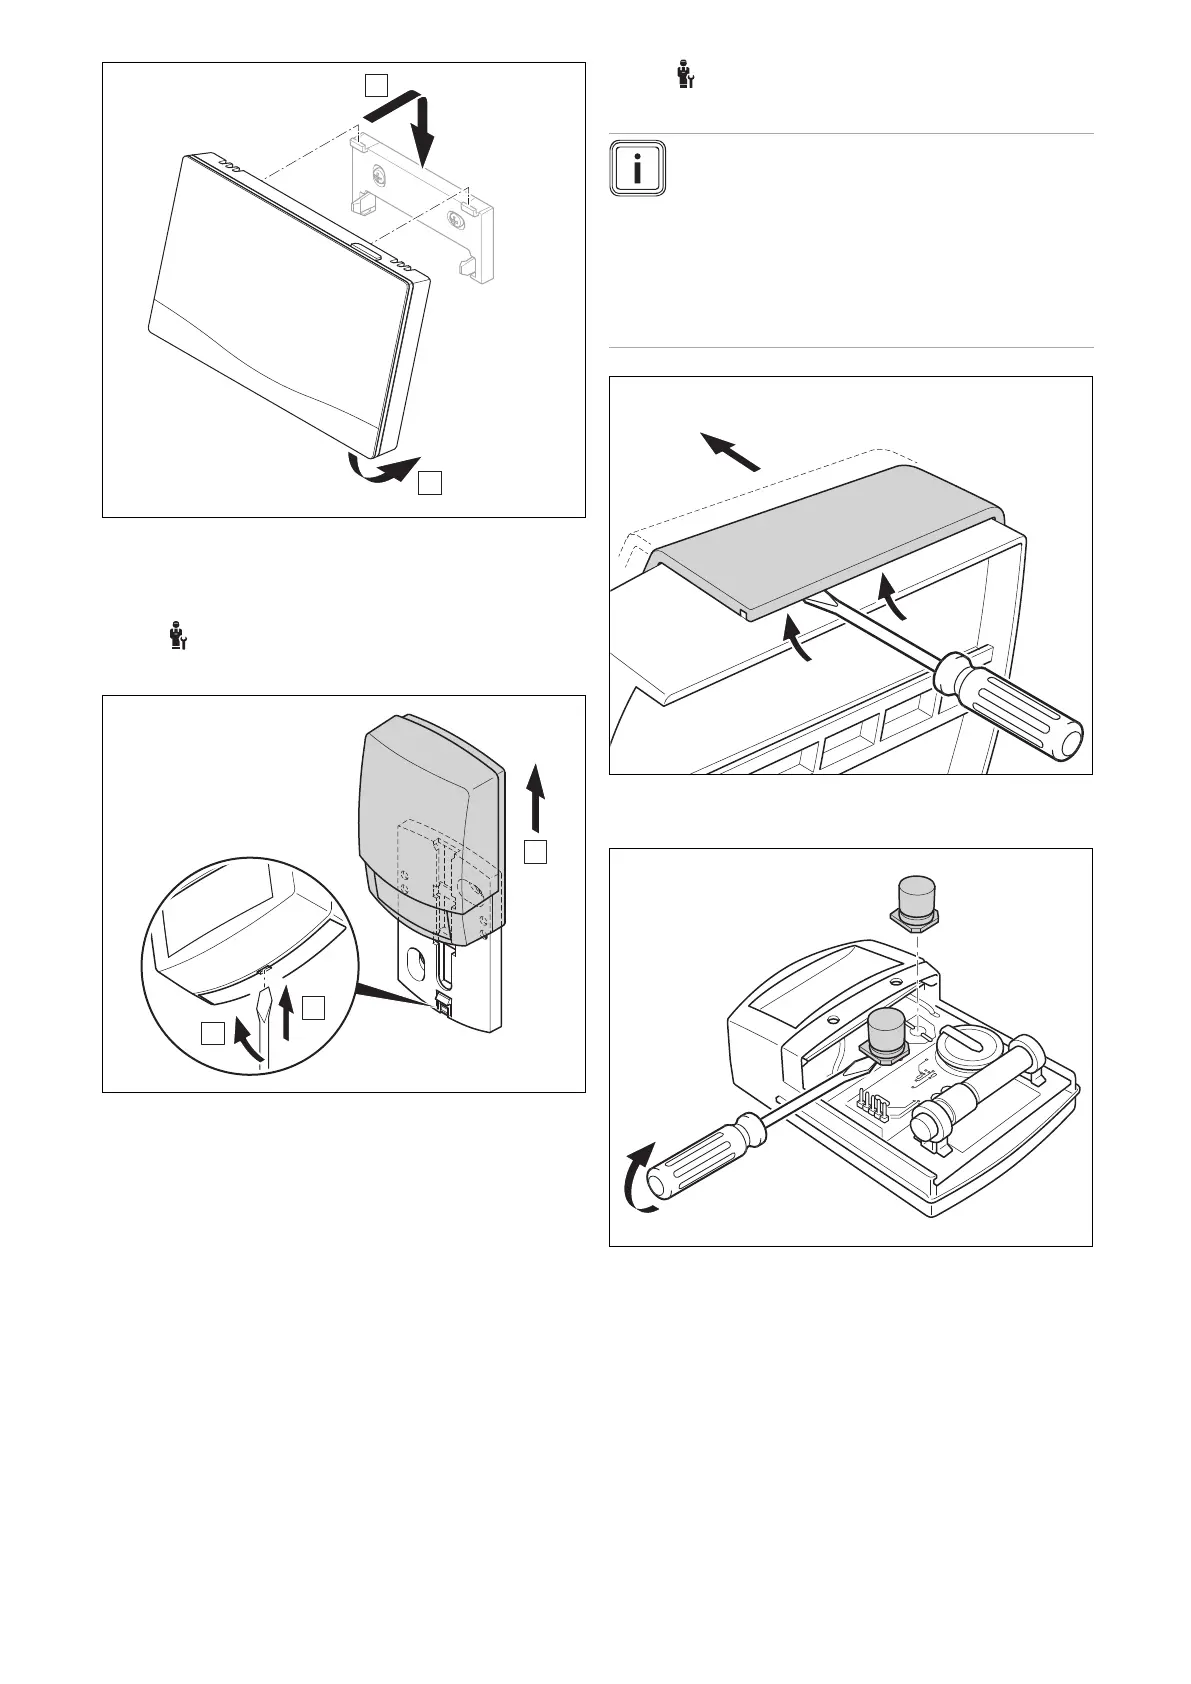
7. Clip the system control into the unit mounting bracket
as shown in the figure, making sure that it clicks into
place.
6.6 -- Replacing the outdoor temperature
sensor
1. Remove the outdoor temperature sensor from the wall
base as shown in the figure.
2. Unscrew the wall base from the wall.
3. Dispose of the outdoor temperature sensor.
(→ Section 6.7)
4. Mount the wall base. (→ Section 3.5.4)
5. Press the pair button on the radio receiver unit.
◁ The pairing process starts. The LED flashes green.
6. Start up the outdoor temperature sensor and fit it to the
wall base. (→ Section 3.5.5)
6.7 Disposing of a defective outdoor
temperature sensor
Note
The outdoor temperature sensor has a reserve
power supply lasting approximately 30 days. Dur-
ing this time the outdoor temperature sensor con-
tinues to send radio signals even if defective. If
the outdoor temperature sensor is defective and
within range of the radio receiver unit, the radio
receiver unit receives signals from the defective
yet intact outdoor temperature sensor.
1. Open the outdoor temperature sensor as shown in the
figure.
2. Remove the capacitors as shown in the figure.