86 Rainger Linear
MAINTENANCE
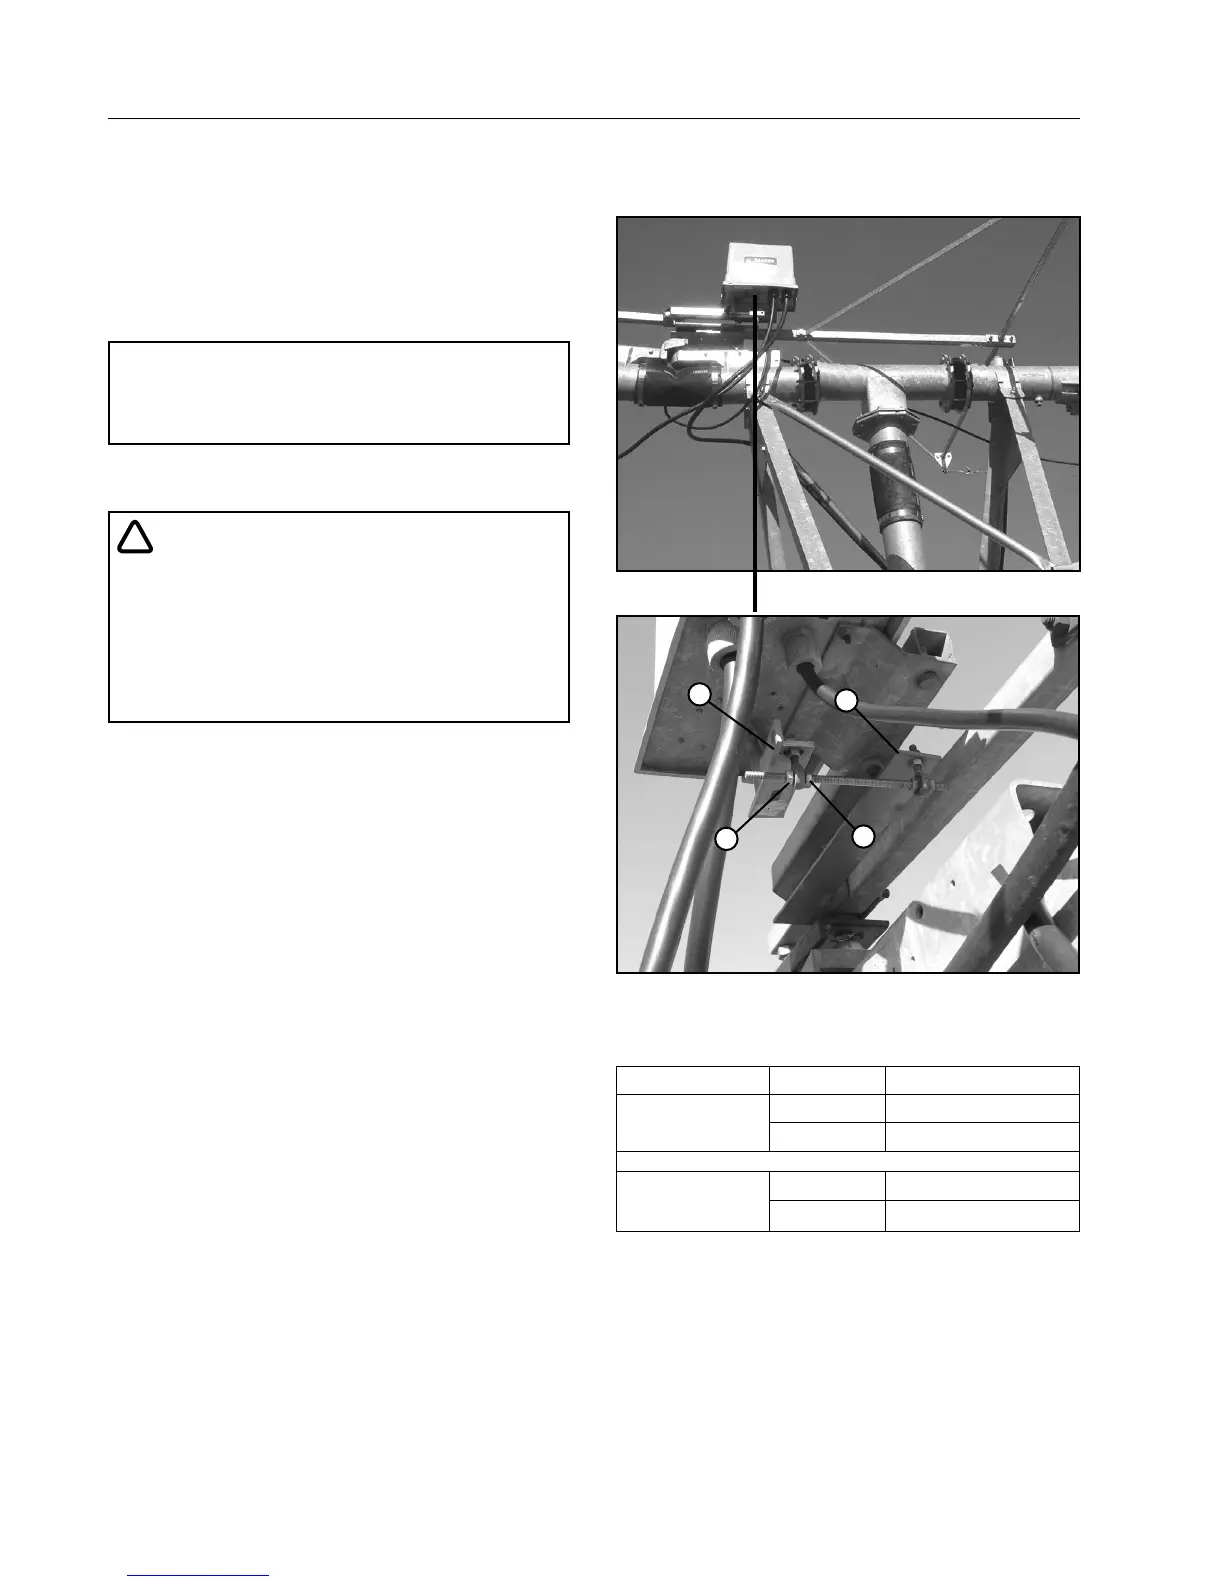
Machine Alignment
Floating Alignment Adjustment
When a machine is equipped with floating alignment
the tower box is located on the yoke and tower box
support with a mechanical linkage between the tower
box switch pivot arm and the yoke control rod. See
Figures 86-1 and 86-2.
NOTE
• All adjustments shown are made from the
tower box side of drive unit.
1. Adjust nuts #1 and #2 as needed. Refer to Fig-
ures 86-2 and 86-3.
!
CAUTION
• NEVER ADJUST NUTS #1 AND #2 MORE
THAN 1/4 TURN AT ONE TIME.
• ALWAYS RE-TIGHTEN THE JAM NUTS AND
ALLOW THE TOWER TO CYCLE TWICE
(START AND STOP) TO DETERMINE IF THE
TOWER IS STILL LEADING OR TRAILING.
2. Adjust nuts #1 and #2 until the tower is in align-
ment.
3. Continue the Three Tower Method of alignment
down the entire length of the machine making
adjustments as necessary to individual towers.
Figure 86-1
Clockwise
Counter-clockwise
1
2
3
4
1
2
3
4
Figure 86-2 1. Nut
2. Nut
3. Yoke Control Rod
4. Switch Pivot Arm
Direction of travel Condition Adjust Nuts
Forward
Leading Bow **Counter-clockwise
Trailing Bow *Clockwise
Reverse
Leading Bow *Clockwise
Trailing Bow **Counter-clockwise
ADJUSTMENT CHART
Figure 86-3 * Clockwise - Adjust the nut further onto the
threaded rod.
** Counter-clockwise - Back the nut off the
threaded rod as if removing it.