9.2 Fitting to wall.
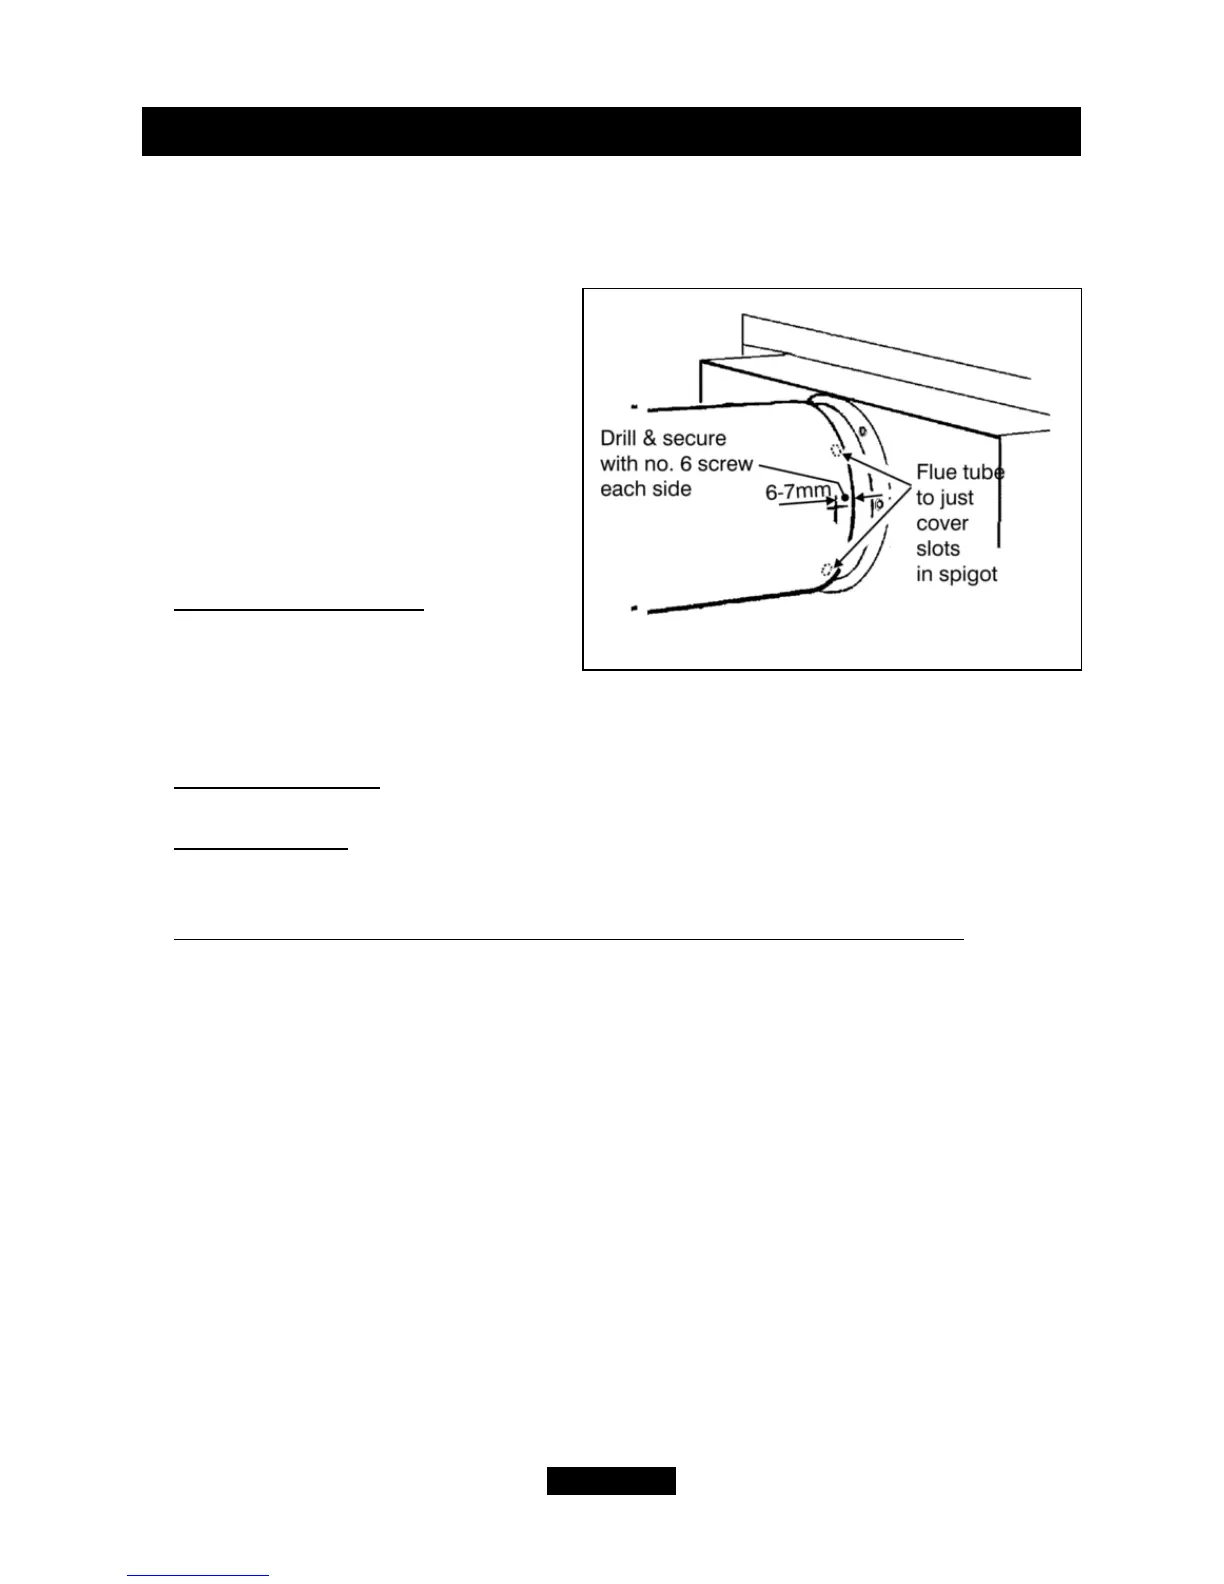
- Fit the flue tubes firmly over the spigots at the rear of the fire. Make sure that the
seam on the flue tube is not at the bottom. Push on until the outer (air) tube just
covers the slots in the appliance outer spigot (See figure 18).
- Secure the flue to the fire by drilling
through the outer flue tube and outer
spigot at a distance of between 6mm &
7mm from the cut end of the outer flue
tube and securing with the two self
tapping screws supplied (See figure
18).
- Seal the flue unit all round the
circumference of the outer spigot with
the tape supplied.
- Timber frame buildings
: Offer the
fire complete with flue unit through the
insulating sheet (mentioned in section
8.3). Fit a drip collar round the flue positioned so that it will be located in the centre of
the wall cavity (See figure 17). The drip collar can be made by wrapping a non-
corrosive wire round the flue or moulding a bead of mastic round the flue.
- Case fixing to wall: Offer the fire complete with flue unit through the wall, Insert
the four fixing screws and tighten.
- Cable retention:
Fit the eyebolts onto the cables. Thread the cables through the
appliance case sides as shown in figure 15. Offer the fire complete with flue unit
through the wall. Pull the cables taut.
- Timber frame building with combustible outer leaf (e.g. shiplap boarding)
: A metal
or other non-combustible end plate must be fitted on the outside of the wall. The plate
must be concentric with the flue and at least 254mm (10in) square or diameter (See
figure 17).
- Seal the outer flue tube to the outside surface of the wall with fireclay or cement.
Make sure that the slots in the flue terminal are not closer than 8mm to the wall and
are not obstructed by cement.
Page 28
© GDC Group Ltd. 2014
INSTALLER GUIDE
Figure 18. Flue securing