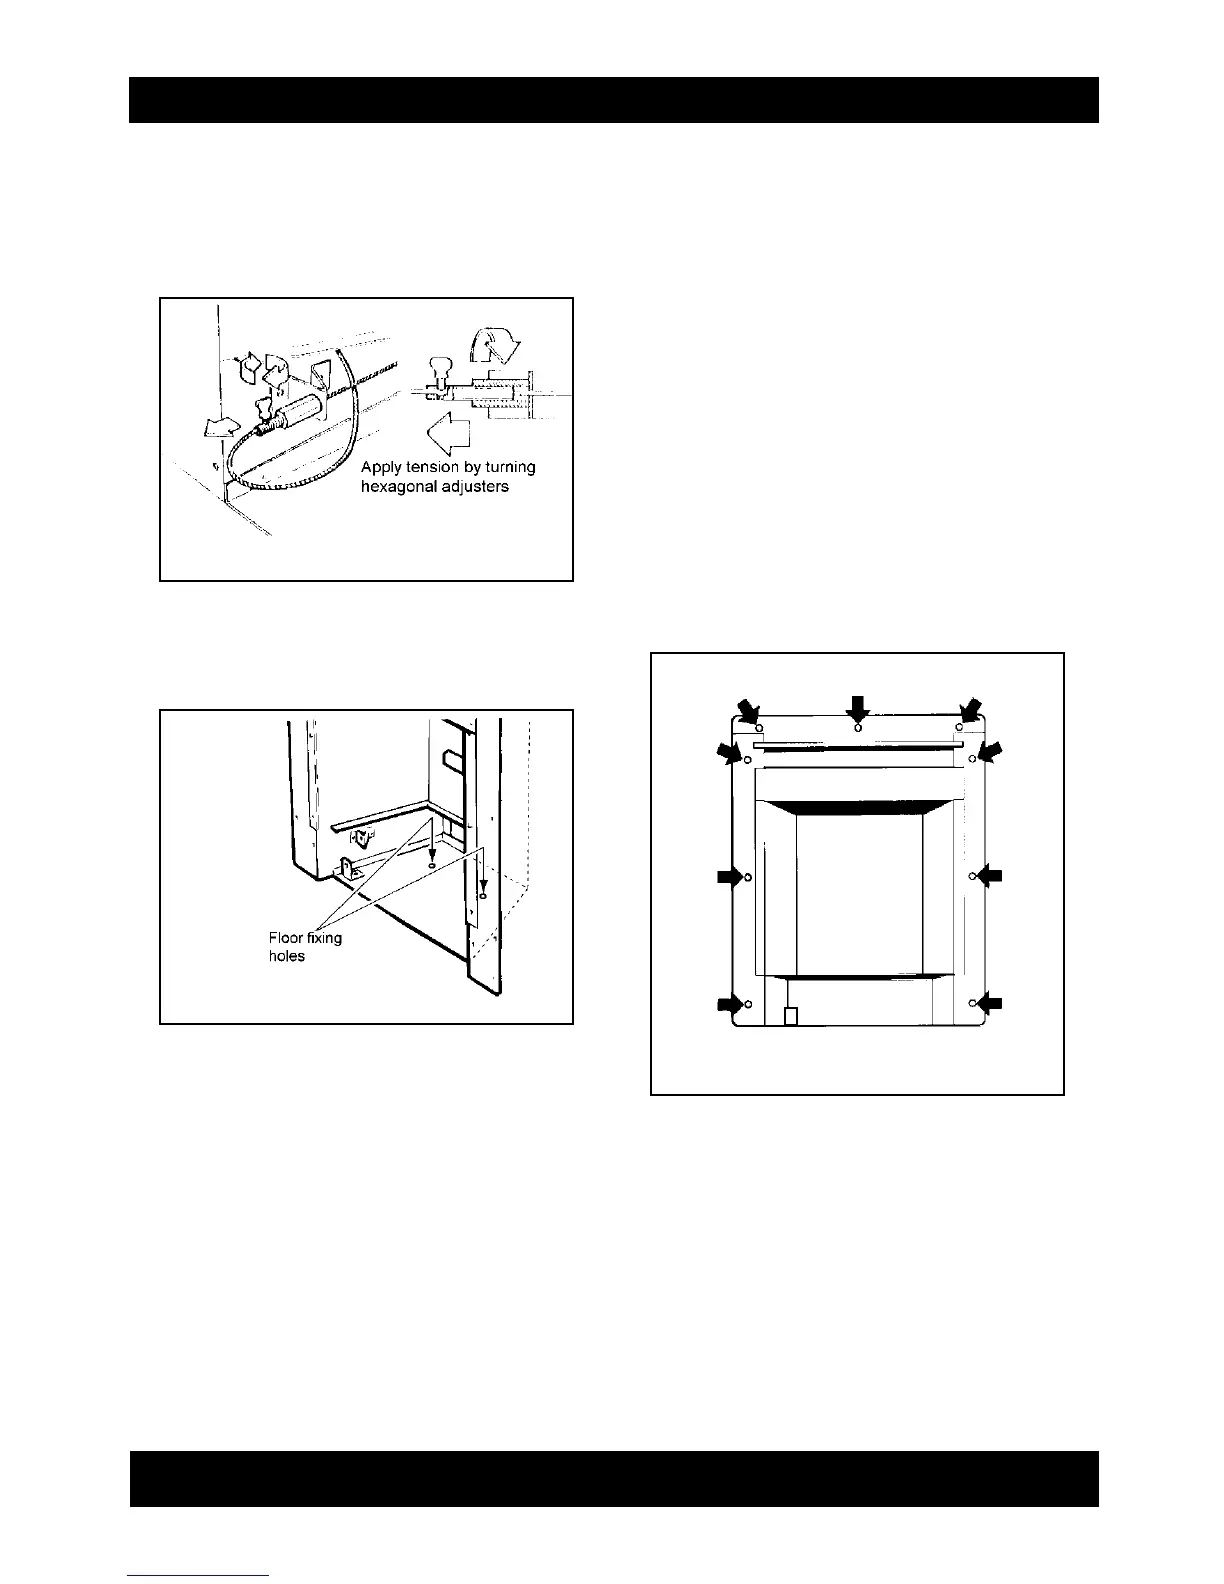
Tighten the screws in the retainers so
that they clamp the cables in position.
Apply tension to the cables by turning
the hexagonal adjusters by hand (see
figure 22).
7.1.2.9 Drill a hole into the fireplace floor
through each of the two holes in the
base of the convection box. using a
no.12 masonry drill (see figure 23).
7.1.2.10 Insert a fibre plug into each hole. Use
the rawlplugs supplied with this
appliance - Never use plastic plugs
instead of the fibre plugs supplied. Fit
a woodscrew in each plug and tighten.
7.1.2.11 Inspect the fit of the convection box to
the fireplace surround. If it is aligned
squarely and the sealing is satisfactory,
fully tighten the cable retainers.
7.1.2.12 If the convection box is not correctly
aligned, release the tension on the
cables by slackening the screws and
turning the hexagonal adjusters fully
anticlockwise. The convection box
should then automatically realign itself.
Pull each cable taut again and push the
cable retainers back against the “V”
brackets. Again, tighten the screws in
the retainers and apply tension to the
cables by turning the hexagonal
adjusters clockwise as far as possible.
7.1.2.13 Push the free length of the cables
inside the convection box so that they
are available to allow easy removal and
refitting of the appliance during
subsequent service calls.
7.2 INSTALLATIONS WITH SPACER KIT 617K
7.2.1 There are 9 indented positions on the
front flanges of the convection box.
Drill a 5.5mm hole through each indent
(see figure 24).
7.2.2 Place the convection box unit into the
installed spacer kit opening. Align the
9 drilled holes with the holes in the
spacer unit sides and top.
If a concealed connection is being used,
make sure that the supply pipe enters
the convection box through the slit in the
rear seal.
7.2.3 Attach the convection box to the spacer
unit with the 9 machine screws supplied.
Page 14
INSTALLER GUIDE
figure 22 Lower cable retention
figure 23 Floor fixing
figure 24 Spacer attachment points
 Loading...