EasyManua.ls Logo

Valor PORTRAIT User Manual

Valor PORTRAIT
20 pages
To Next Page IconTo Next Page
Page #1 background imageLoading...
Page #1 background image
4002418-07
569 Ledge Front
INSTALLATION INSTRUCTIONS
CSA approved for use with Valor Models 530I Heaters ONLY
Notes: This kit must be installed or serviced by a quali ed
installer, service agency or gas supplier. These instructions are to
be used in conjunction with the main installation instructions
for Valor heater model 530I.
The installation of this kit affects the framing and method of
installing the 530 heater.
Installation Sequence
1. Frame the cavity.
2. Install the heater with stud brackets, stand-offs, insulation, wall switch
kit, and cement board.
3. Gas t and vent heater.
4. Drywall only (no tile, etc.).
5. Assemble and install the mounting frame.
6. Install nishing material (tile, etc.). Finish around or under 570 Finishing
Plate if using it.
7. Install the trim panel tted with the barrier screen.
INSTALLER
Leave this manual
with the appliance.
CONSUMER
Retain this manual
for future reference.
HOT GLASS WILL
CAUSE BURNS.
DO NOT TOUCH GLASS
UNTIL COOLED.
NEVER ALLOW CHILDREN
TO TOUCH GLASS.
WARNING
!
A barrier designed to reduce the risk of burns from the hot viewing
glass is provided with this appliance and shall be installed
for the protection of children and other at-risk individuals.
PORTRAIT
© Copyright Miles Industries Ltd., 2013.
Question and Answer IconNeed help?

Do you have a question about the Valor PORTRAIT and is the answer not in the manual?

Valor PORTRAIT Specifications

General IconGeneral
BrandValor
ModelPORTRAIT
CategoryFireplace Accessories
LanguageEnglish

Summary

Installation Instructions

Warning: Hot Glass Hazards

Critical safety warning about touching hot glass surfaces and burn risks.

Installation Sequence Overview

Outlines the sequential steps for installing the appliance.

System Component Overview

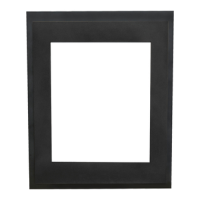
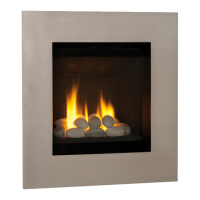
Visual identification of all components included in the installation.

Dimensions & Clearances

Critical measurements and clearance requirements for proper installation.

Mantel Clearance Guidelines

Table detailing mantel depth and height clearances for safe placement.

Framing and Wall Preparation

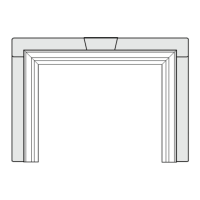
Guidelines for framing the opening and preparing the wall area.

Wall Finish Thickness

Specifications for wall finish thickness relative to the opening.

Attaching Stud Brackets and Baffles

Steps for fitting brackets, baffles, and stand-offs to the appliance.

Mounting the Appliance

Procedure for securing the appliance to the wall studs.

Touch Control Wall Switch Installation

Instructions for installing the wall switch and connecting the receiver.

Receiver Wiring and Battery Installation

Details on connecting the receiver, switch wire, and inserting batteries.

Cement Board Installation

Steps for correctly installing the cement board on the appliance.

Drywall Opening Preparation

Specifies the dimensions for the drywall opening.

Mounting Frame Assembly

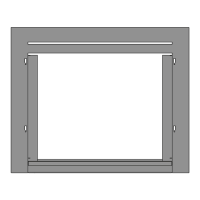
Step-by-step guide to assemble the fireplace mounting frame.

Mounting Frame Installation

Securing the assembled mounting frame to the appliance.

Wall Finish Application

Instructions for applying finishing materials around the appliance.

Maintenance

Cleaning Front Trim and Barrier Screen

Guidance on cleaning the fireplace trim and barrier screen.

Barrier Screen Safety and Replacement

Safety notes and replacement information for the barrier screen.

Wiring Diagram

Electrical Connections Overview

Diagram illustrating the electrical layout and component connections.

Repair Parts List

Replacement Parts Identification

A list of available replacement parts with their respective part numbers.

Related product manuals