Do you have a question about the Valor L2 SERIES and is the answer not in the manual?
Warning about hot glass and burn risks.
Safety warnings regarding fire and explosion hazards.
Instructions for units that have been submerged in water.
Prohibition of using the appliance with solid fuels.
Maintaining clearance from flammable materials.
Mandatory use of specified vent system and prohibitions.
Information on hot surfaces and supervision of children.
Recommendation for installing a physical barrier for child safety.
Advice on keeping remote controls away from children and battery removal.
Critical warning about extremely hot surfaces.
Instructions for initial fireplace operation and potential odors.
Explanation of the safety device that monitors pilot flame.
Guidance on cleaning mineral deposits from glass.
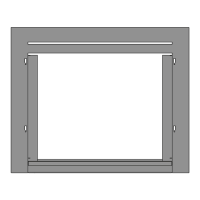
Step-by-step instructions for removing the fireplace window.
Instructions for properly reinstalling the fireplace window.
Critical safety warning for correct window installation.
Procedure for inspecting pilot and burner flame appearance.
Instructions for safely replacing batteries in the unit.
Location of the information card for operation and rating details.
Guidance on contacting suppliers for service and replacement parts.
Overview of available control methods: remote and wall switch.
Methods to prevent unintended fireplace activation.
Procedure for turning off the fireplace, including pilot light.
Steps to turn on the fireplace using the remote control.
Steps to turn off the fireplace using the remote control.
How to set the appliance to pilot flame mode.
Instructions for adjusting the flame height with the remote.
Controlling flame output for low and high fire settings.
Changing temperature units and clock format.
Procedure for setting the current time on the remote.
Explanation of Manual, Temperature, and Timer modes.
Configuring the desired temperature for daytime use.
Configuring the desired temperature for nighttime use.
Setting automatic ON/OFF times for the fireplace.
Programming the start time for the first daily period.
Programming the end time for the first daily period.
Programming the start time for the second daily period.
Programming the end time for the second daily period.
How the appliance behaves with no communication or flame height change.
Conditions under which the appliance automatically shuts off.
How to identify and address low battery status.
Procedure for re-synchronizing handset and receiver.
Controlling fireplace functions via a wall switch.
List of essential components for fireplace installation.
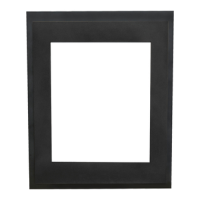
List of available optional accessories for enhancement.
Critical safety warning before lighting the appliance.
Step-by-step guide for lighting the fireplace.
Procedure for shutting off gas supply to the appliance.
Requirements for installing CO detectors in Massachusetts.
Specifications for approved CO detectors.
Mandatory signage requirements for gas vent terminals.
Inspection requirements for gas appliance installations.
Exemptions from specific Massachusetts venting regulations.
Manufacturer's responsibilities for provided venting systems.
Certifications and compliance with industry standards.
Technical specifications for different models and gas types.
Information on gas supply connection and pressure requirements.
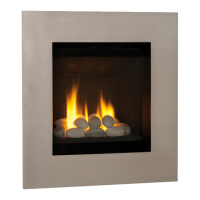
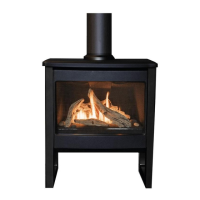
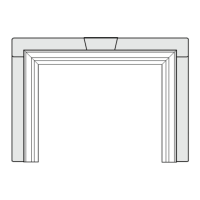
Diagram and description of the fireplace components.
Guidelines for applying wall finishes around the fireplace.
Detailed diagrams and measurements of the fireplace unit.
Recommended placement and clearance zones for the appliance.
Clearance requirements for combustible mantels.
Clearance requirements for combustible sidewalls and mantel legs.
Specifications for framing the fireplace opening.
Requirements for non-combustible cement board coverage.
Framing details for installations with a partial shelf and top vent outlet.
Guidelines for vertical venting configurations.
Guidelines for horizontal venting configurations.
Converting the appliance for top or rear vent outlets.
Approved materials for venting the appliance.
Instructions for sealing vent pipe joints.
Procedures for venting through combustible materials.
Diagram of rear vent termination setup.
Components for horizontal vent termination.
Components for vertical vent termination.
Guide to interpreting the venting chart.
Chart showing valid vent setups based on rise, run, and restrictor.
Information on the vent restrictor's function and location.
Steps for adjusting the vent restrictor for optimal performance.
Requirements for vent terminal placement and clearances.
Table of minimum clearance distances for various terminal locations.
Table showing minimum vertical height based on roof pitch.
Overview of using co-linear venting with specific adapters.
Specific guidelines for co-linear venting installations.
Measurements for the co-linear adapter.
Visual examples of co-linear vent terminal setups.
Crucial instructions for qualified installers.
Information required from the homeowner before installation.
Steps for safely unpacking the fireplace unit.
Instructions for installing the appliance standoffs.
Procedure for converting the vent outlet from top to rear.
Steps for positioning and securing the appliance in the framing.
Guidelines for planning and applying wall finishes.
Specifications for cement board placement around the opening.
Tips for preventing cracks in wall finishes.
Step-by-step instructions for removing the fireplace window.
Instructions for wiring optional lighting and fan kits.
Connecting the gas supply to the appliance.
Procedure for testing gas lines for leaks.
Identifying locations for pressure testing.
Instructions for installing fireplace liners.
List of materials needed for the Driftwood Kit.
General steps for installing the Driftwood Kit.
Instructions for installing the base platform for the kit.
Guidance on positioning logs and rocks for the Driftwood Kit.
Warning about small particles from the kit.
List of materials needed for the Murano Glass Kit.
General steps for installing the Murano Glass Kit.
Important note on compatible fireglass products.
List of materials needed for the Rocks & Shale Set.
General steps for installing the Rocks & Shale Set.
Instructions for installing the base platform for the kit.
Guidance on arranging rocks, shale, and twigs.
Step-by-step instructions for reinstalling the fireplace window.
Critical safety warning for correct window installation.
Instructions for installing the optional wall switch.
Important cautions regarding wire routing and connections.
Procedure for synchronizing the remote handset and receiver.
Warning about antenna placement to avoid short-circuits.
Verifying the fireplace functions correctly.
Adjusting the air shutter for optimal flame appearance.
Installing decorative trim and safety screen.
Instructions for mounting the remote control holder.
Guidance on optimal placement for accurate temperature sensing.
Diagram illustrating the electrical connections for the GV60 system.
Table listing compatible venting components from various manufacturers.
Components for terminating vent pipes.
Venting components for vertical installations.
Components for horizontal vent termination.
Specifications for vent pipes of specific dimensions.
Components used for sealing roof or wall penetrations.
Other components for vent system assembly.
Details on the extended warranty periods for various parts.
Information on the two-year warranty for all other parts.
Terms and conditions that apply to the warranty.
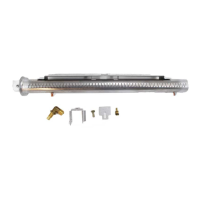
List of available replacement parts with their codes.
Fields for recording fireplace model and serial numbers.
Fields for entering customer contact details.
| Venting | Direct Vent |
|---|---|
| Efficiency | Up to 80% |
| Model | L2 SERIES |
| Category | Fireplace Accessories |
| Brand | Valor |
| Fuel Type | Natural Gas or Propane |