remove the protective covers, prize
latches 1 and remove base 2 with the
lamps attached.
To replace interior light bulb 2
(Fig. 47), first remove lens 1 by press-
ing the centre part with your fingers and
pulling it down.
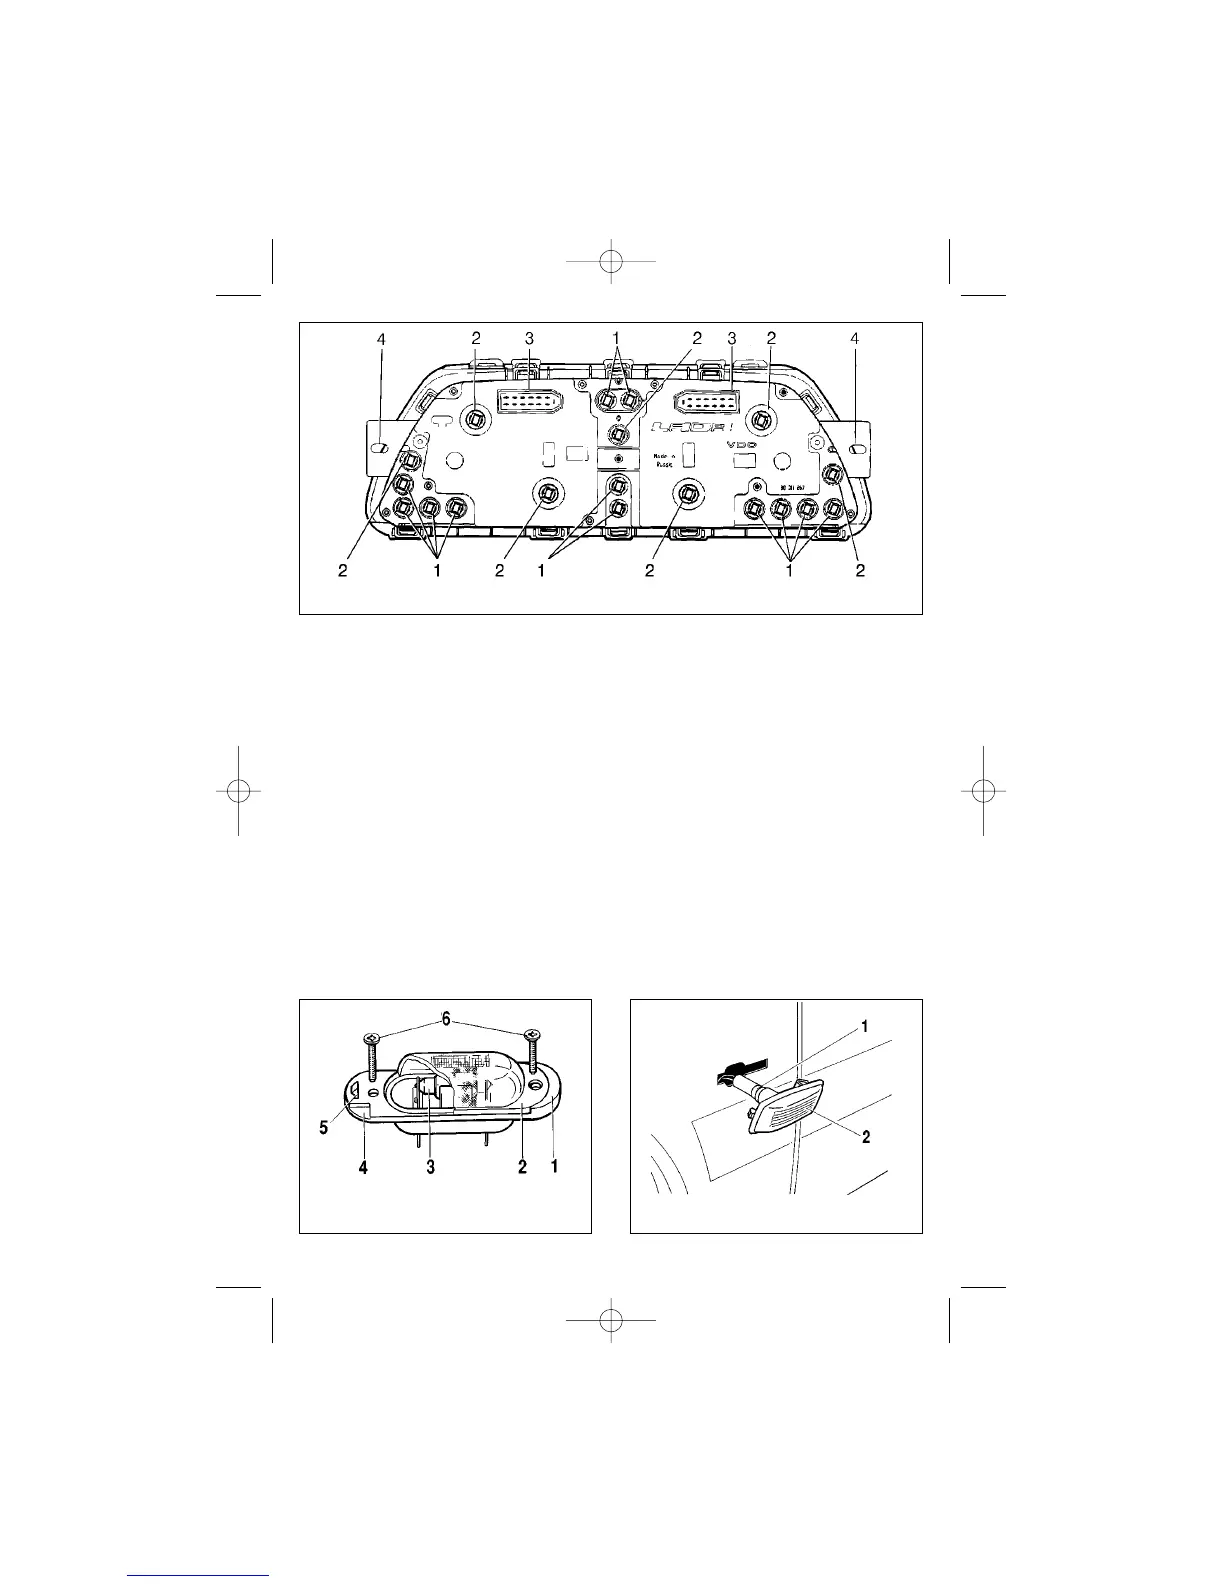
To replace tell-tale light bulb 1
(Fig. 48) or instrument cluster illumina-
tion bulb 2, carefully remove the instru-
ment cluster cover, undo screws hold-
ing the cluster by eyelets 4. Pull out the
instrument cluster and disconnect har-
ness connectors 3 as necessary. Turn
the bulb to be replaced counterclock-
wise and pull it out of the socket.
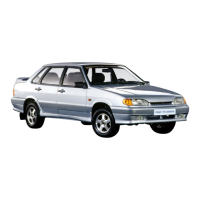
To replace number plate lamp
bulb 3 (Fig.49), first remove the lamp.
To do so, undo screws 6, insert a
screwdriver into cutout 4, press latch 5
towards the center with your finger and
carefully withdraw lens 2. Bulb 3 is held
in housing 1 by spring retainers.
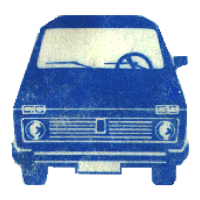
To replace a blown bulb in the
side turn-signal lamp (Fig. 50)
remove the latter from the car. The
turn-signal lamp is held in its socket by
spring retainers. Next, remove protec-
tive rubber cap 1, withdraw the
bulb/holder assembly from housing 2
and pull the bulb out.
42
Fig. 48. Instrument cluster lamps (rear view)
Fig. 49. Number plate lamp Fig. 50. Side-mounted turn-signal lamp