4
INSTALLATION
Inspection
Unpack and inspect the equipment as soon as possible. Check that all parts and accessories are
included. Determine if any damage was incurred during shipment and, if so, report to the
transportation company immediately as it is their responsibility.
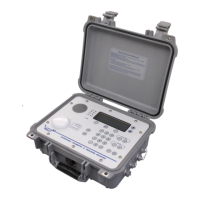
Installation
Secure the receiver in a dry place and connect the external power cable to a 12VDC power source
(if necessary). Connect the red wire on the power cable to the positive on the power supply and the
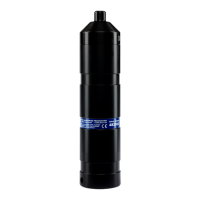
black wire to the negative. Deploy the hydrophone (see instructions included with directional
hydrophone, if used), and connect the hydrophone connector to the front panel of the receiver (DO
NOT connect a hydrophone while the receiver is powered).
OPERATION
Telemetry Transmitters Application
Set the rotary gain switch to mid position (36dB) and set the gain switch to AUTO. Select the
correct channel (frequency) for the transmitter to be received, and switch on the power. A short time
should be allowed for the Automatic Gain Control (AGC) to lock on to the transmitter amplitude.
After the AGC is locked on the transmitter amplitude, the front panel LED will flash for each
received pulse. The volume control may be adjusted to a comfortable level without affecting the
signal detection process. If the Decoder/Display unit (Option 01) has been installed in the VR60
receiver, refer to instructions on data telemetry found in the Decode Transmitters section.
Tracking and Locating Applications
Set the gain switch to manual position, and set the rotary switch to mid position (36dB). Select the
appropriate channel (frequency) for the transmitter to be received, and switch on the power. Adjust
the rotary gain switch so the signal level indicator reads approximately mid scale. Rotate the
directional hydrophone slowly past the transmitter direction and observe the increase in the signal
level shown on the signal level meter when the hydrophone is pointing towards the transmitter. The
audio signal also increases as the signal level increases. Either, or both, of these indicators may be
used for the direction to travel in when tracking a transmitter. Make sure that the gain is adjusted
appropriately for best results (see Gain Control section).