10
For the Installer
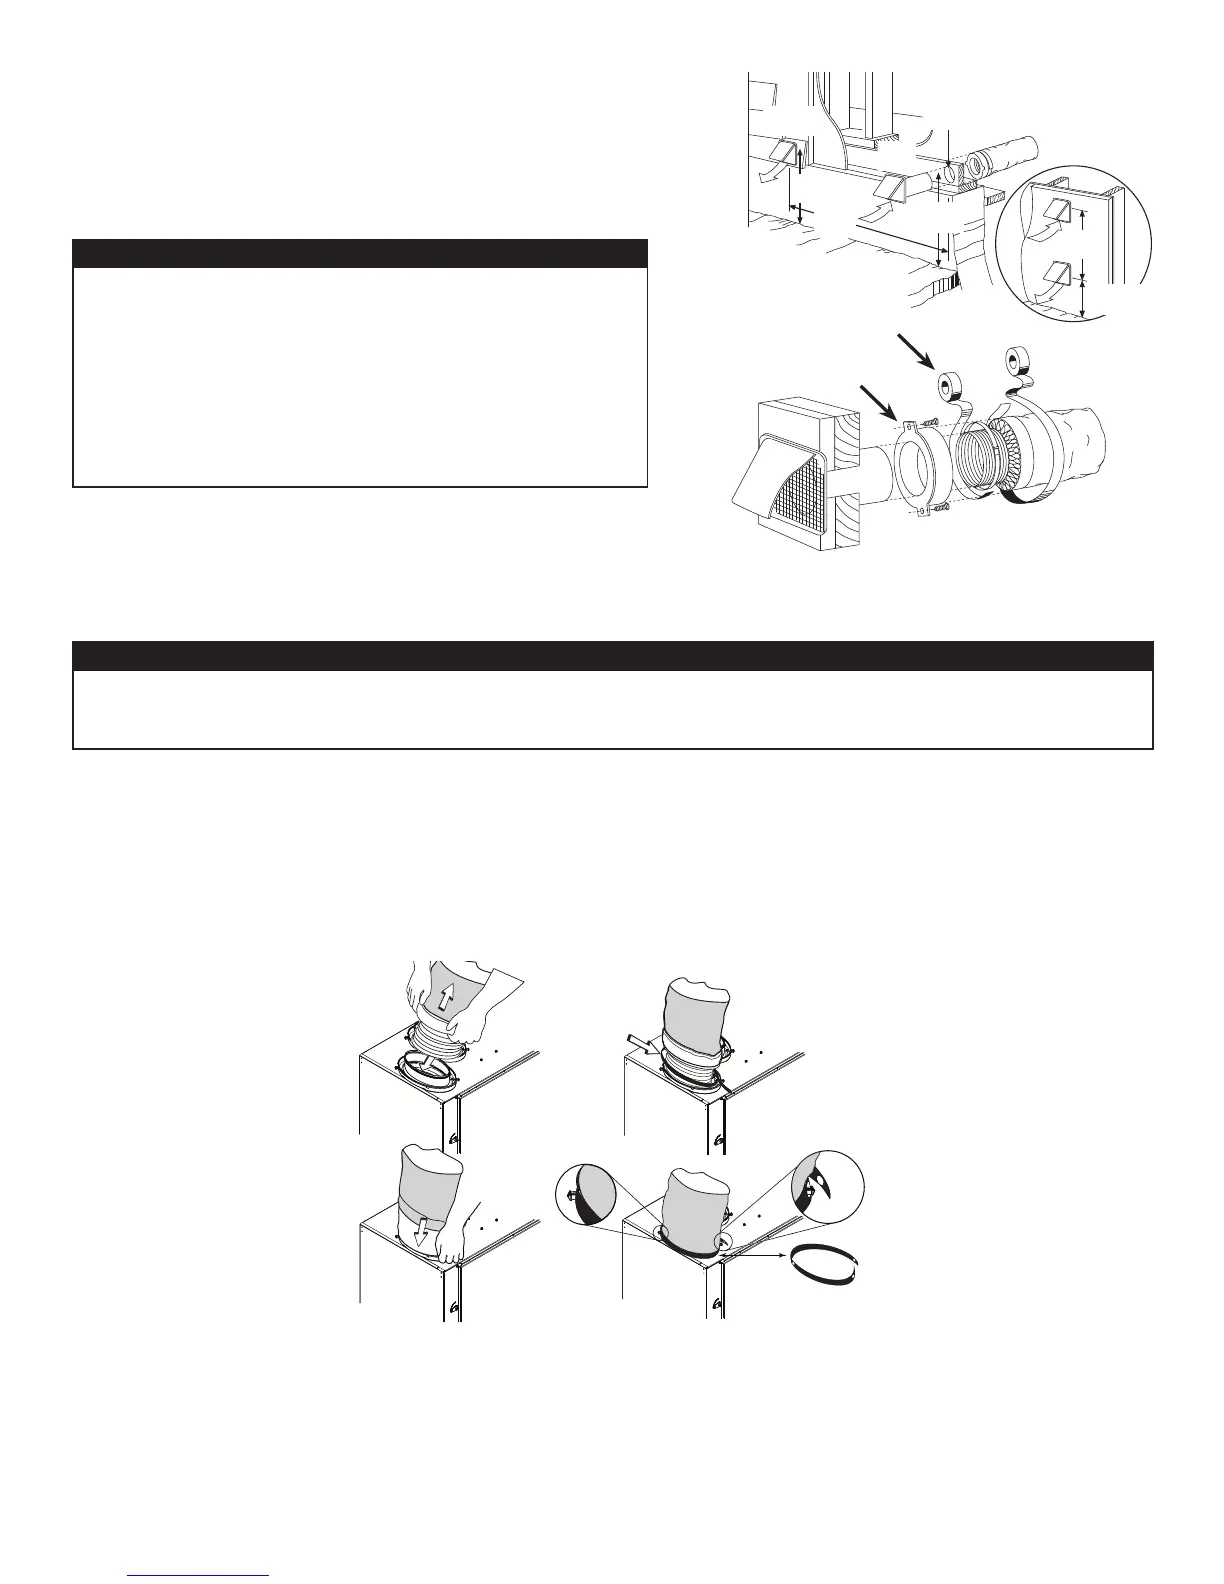
6.5 CONNECTING THE DUCTS TO THE UNIT
6.5.1 INSULATED FLEXIBLE DUCTS
1. Pull back the insulation to expose the flexible duct.
2. Attach the flexible duct to the port using tie wrap.
3. Pull the insulation over the joint and tuck in between the inner and outer rings of the double collar.
4. Pull down the vapor barrier (shaded part in illustrations below) over the outer ring to cover it completely. Fasten in place the vapor
barrier using the port strap (included in unit parts bag). To do so, insert one collar pin through the vapor barrier and first strap hole,
then insert the other collar pin through the vapor barrier and center strap hole and close the loop by inserting the first collar pin in the
last strap hole.
6.5.2 NON-INSULATED RIGID DUCTS
Use metal screws and duct tape to connect the rigid ducts to the unit ports.
6.5.3 NON-INSULATED FLEXIBLE DUCTS
Use tie wraps to connect the flexible ducts to the unit ports.
CAUTION
• If ducts have to go through an unconditioned space (e.g.: attic), always use insulated ducts.
• Make sure the vapor barrier on the insulated ducts does not tear during installation to avoid condensation
within the ducts.
6.4 INSTALLING THE EXTERIOR HOODS
Refer to illustration at right to connect the insulated duct to the hoods. An “Anti-Gust
Intake Hood” should be installed in regions where a lot of snow is expected to fall.
VD0028
EXHAUST
HOOD
INTAKE
HOOD
18”
(457 MM)
18”
(457 MM)
6” ø
(152 MM)
6’
(1.8 M)
6’
(1.8 M)
18”
(457 MM)
O
PTIONAL
DUCT
LOCATION
TAPE AND DUCT TIE
CAULKING
Make sure that both hoods are at least 18 inches above the
ground and that the intake hood is at least 6 feet (1.8m)
away from any of the following:
• Exhaust hood
• Dryer exhaust, high efficiency furnace vent, central
vacuum vent
• Gas meter exhaust, gas barbecue-grill
• Any exhaust from a combustion source
• Garbage bin and any other source of contamination
⚠WARNING
VJ0067
 Loading...