Ventis™ MX4 Product Manual
© 2014 Industrial Scientific Corporation
34
Reassembling the Aspirated Monito
.
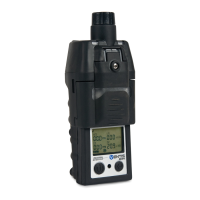
1 Re-place the monitor inside the pump module. The monitor is display side up and its logo readable.
Its lower exposed bottom portion covers the battery.
2 Tighten the four screws on the pump module bottom to secure the module to the monitor.
3 Lower and close the pump door; slide up to click in place.
4 Tighten the pump door screw to secure the door in place.
5 Dispose of any spent batteries according to company policy.
Diffusion Monitor Battery Replacement or Changeover
The diffusion monitor can be used with all three Ventis MX4 battery packs.
The Li-ion battery kit is a single part consisting of the monitor’s lower case bottom and the battery. It is
removed from and attached to the diffusion monitor as a single item.
The Extended Range Li-ion battery pack and its cover are two distinct items.
The Alkaline battery pack consists of three items: the batteries, the battery pack, and a battery pack cover
(the same cover that holds the Extended Range Li-ion battery).
NOTE: When an Extended Range Li-ion (or Alkaline) battery pack is attached to a diffusion monitor, the monitor’s lower portion becomes
deeper than its upper portion. The Conversion Kit’s suspender clip components are used to make the upper and lower portions depth-
compatible. The Conversion Kit provides a battery cover (battery not included), a suspender clip and spacer, and a screw and washer.
ATTACHING THE LI-ION BATTERY TO A DIFFUSION MONITOR.
Battery Replacement.
1 Power-off the monitor.
2 Loosen the four captive screws on the lower portion of the case bottom (or the battery cover if the
Extended Range Li-ion or Alkaline battery pack is attached).
3 Lift and remove the Li-ion kit (or Extended Range Li-ion battery Alkaline battery pack and cover); set
aside.
4 To properly attach the new Li-ion battery kit to the monitor, align its exterior charging contacts with
the monitor’s bottom.
5 Tighten the four captive screws to secure the battery pack to the monitor.
6 Dispose of any spent batteries according to company policy, or properly store any battery packs that
have a remaining life.
To changeover from an Extended Range Li-ion (or Alkaline) battery pack to a Li-ion battery continue with
the following suspender clip instruction sets.
Removal of the Suspender Clip and Spacer.
1 On the monitor’s case bottom, open the suspender clip.
2 Using a Phillips head screwdriver, remove the screw and washer that attach the suspender clip and
spacer to the monitor.
3 Set aside and store the removed items for future use with the Extended Range Li-ion (or Alkaline)
battery pack on a diffusion monitor.
Attachment of the Suspender Clip.
1 Open the suspender clip.
2 Place the washer on the screw (P/N 17139262).
3 Insert the screw with washer through the clip’s center hole and into the screw hole on the monitor.
4 Tighten the screw to secure the suspender clip to the monitor.