3. Select Configuration > Leak Settings, and record the following from the Leak Configuration
page:
DATA RECORDED INFO
Reported resistance per foot
4. To calculate the actual length of the cable: Add the physical length of the cable (the sum of all
of the lengths of installed cable) to the simulated length (the sum of all weighted lengths and
branch connectors installed), refer to the following simulated lengths when determining the
total simulated length.
• LT500-WL simulates 35 ft
• LT500-BC simulates 105 ft
• Jumper cable adds 0 (zero) ft
Calculate the actual length (physical length+simulated length) and record the result.
DATA RECORDED INFO
Calculated actual length of cable
5. Verify that the Cable Current recorded is less than 15 µA.
• If the reading is higher than 15 µA, clean the cable using isopropyl alcohol to remove any
contamination from installation.
6. Calculate the most-accurate resistance value by dividing the reported cable length by the
actual cable length and multiplying the quotient by the reported resistance.
7. On the Leak Settings page, enter the newly-calculated resistance-per-foot value and click
Submit Changes.
The reported cable length now more-closely matches the physical length of the cable and
thereby improves leak-detected reporting accuracy.
2.7 Mapping and Testing the Installation
NOTE: If the LP6000 controller is already to connected to a BMS or NMS, notify monitoring personnel
before beginning the test.
1. On the "as-installed" cable-layout diagram prepared after laying the leak-detection cable:
• Mark the cable routing, connection points, equipment used in and monitored by the
Liqui-tect system.
• Mark the locations where leak detection is critical and the locations at which the leak-
detection cable changes directions. These will be the locations measured and mapped
during testing.
2. Before beginning, set the leak alarm delay to 5 seconds as follows:
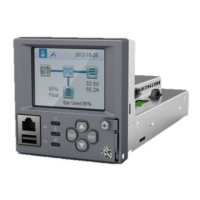
• On the web interface, click Configuration > Leak Settings.
Leak Settings on page 37 opens.
• In Leak Alarm Delay, enter 5, then click Submit Changes.
3. At each marked location on the diagram, use one of the following methods to simulate a leak,
and record the reported distance on the diagram:
Vertiv | Liqui-tect LP6000 Installer/User Guide | 16
 Loading...