2 PREPARATION
ANDINSTALLINGTHELIQUI-TECTSYSTEM
Installing the Liqui-tect system involves the following preparation before beginning:
• Choosing a readily-accessible location for the controller.
• Preparing the appropriate connections for power, leak detection, and communication.
• Consulting with your ITadministrator to determine the following network settings for the
LP6000 controller:
• IP address
• Subnet mask
• Default gateway
• Creating a leak-detection cable layout diagram that considers the equipment in the area that
may be damaged by water and the possible sources of leaks. Plan the cable layout to alert
personnel when electronic equipment is threatened by a leak. An example of a layout diagram
is included in Laying the Leak-detection Cable and Securing to the Floor on page 11.
Required Equipment and Supplies:
The following is included:
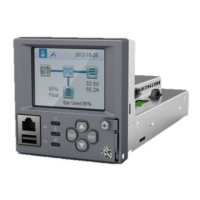
• Liqui-tect LP6000 controller
• CONNECT15 connection cable
• LT500-ET end terminator
• Screws and anchors for wall mounting
The following equipment is sold separately:
• Leak-detection cable(s) of chosen length, 15-ft, 35-ft, or 50-ft
The following tools may be field-supplied, if needed:
• Electric drill (to drive screws or drill pilot holes)
• Screw driver
• Marker/Pencil to mark screw locations
2.1 Mounting the LP6000 Controller on a Wall
1. In the location determined during preparation, mark the wall for the mounting holes using the
unit as a template.
2. If necessary, drill holes for the 4 screws that will secure the unit to the wall.
• If the wall material is not strong enough, use the supplied wall anchors.
• Clean up debris from drilling.
3. Install the 2 top screws, and hang the unit on the screws, allowing it to slip down so the screws
are in the smaller part of the pear-shaped slot.
4. Tighten the screws until snug.
5. Insert the remaining 2 screws in the bottom holes and tighten.
Vertiv | Liqui-tect LP6000 Installer/User Guide | 9
 Loading...