FIELD DESCRIPTION
Leak Trip Point
Threshold for amount of water to trigger a leak-detection alarm. Sets the sensitivity of the alarm.
A lower number equals greater sensitivity, which triggers an alarm with less water. A higher number equals less
sensitivity, requiring more water to trigger an alarm.
Default: 150 µA.
Contamination Trip Point
Threshold for amount of contamination to trigger a contamination alarm. Sets the sensitivity of the alarm.
A lower number equals greater sensitivity, which triggers an alarm with less contamination. A higher number
equals less sensitivity, requiring more contamination to trigger an alarm.
Default: 50 µA.
Leak Alarm Delay
Time delay between leak detection and alarm notification. The leak must be detected during the entire delay to trip
the alarm.
Default: 20 seconds.
Contamination Alarm Delay
Time delay between contamination detection and alarm notification. The contamination must be detected during the
entire delay to trip the alarm.
Default: 120 seconds.
Resistance Per Foot
Sets accuracy of distance-to-leak reporting. The resistance per foot (meter) determines the ability to detect cable
length and distance to leaks. Must be a 4-digit number formatted: x.xxx.
For further information on resistance and accuracy, see Calibrating Resistance to Cable Length on page 15.
Default: 4.000 ohm.
Re-Alarm Delay
Defines interval at which notification for an un-resolved alarm condition is re-sent. Zero (0) disables re-send,
sending a single notification.
Default: 0 (disabled).
Measurement Display
Selects unit of measure for system/display.
Default: feet.
Latching Alarms
Selects automatic alarm reset or manual alarm reset.
• Yes = Latching—alarm must be reset manually even if alarm condition is resolved.
• No = Non-latching—alarm resets automatically when leak or contamination is resolved.
Default: No.
Audible Alarm
Enables/Disables audible alarm notification.
Default: No = disabled.
LCD Password
4-digit, numeric password to access the Setup menu.
Default: 0000 = no password.
Table 6.4 LCD Leak Settings options
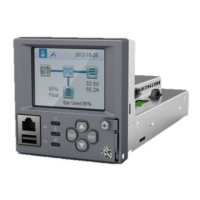
4.6.3 Configuring Virtual Zone Settings on the Touchscreen
The Virtual Zone Settings menu defines the virtual zones in your installation.
To access virtual-zone settings:
1. On the LCD display, touch Setup, enter a password if needed, and touch the enter key.
The Setup menu opens.
2. Touch Up/Down to highlight Virtual Zone, and touch Select.
The Virtual Zone Settings menu opens.
3. Touch Up/Down to highlight the setting to configure (described in the following table), and
touch Select.
The keyboard opens.
4. Use the backspace button to delete the old entry, enter the settings and touch the enter key.
• To delete a zone, delete the text from all fields.
Vertiv | Liqui-tect LP6000 Installer/User Guide | 27
 Loading...