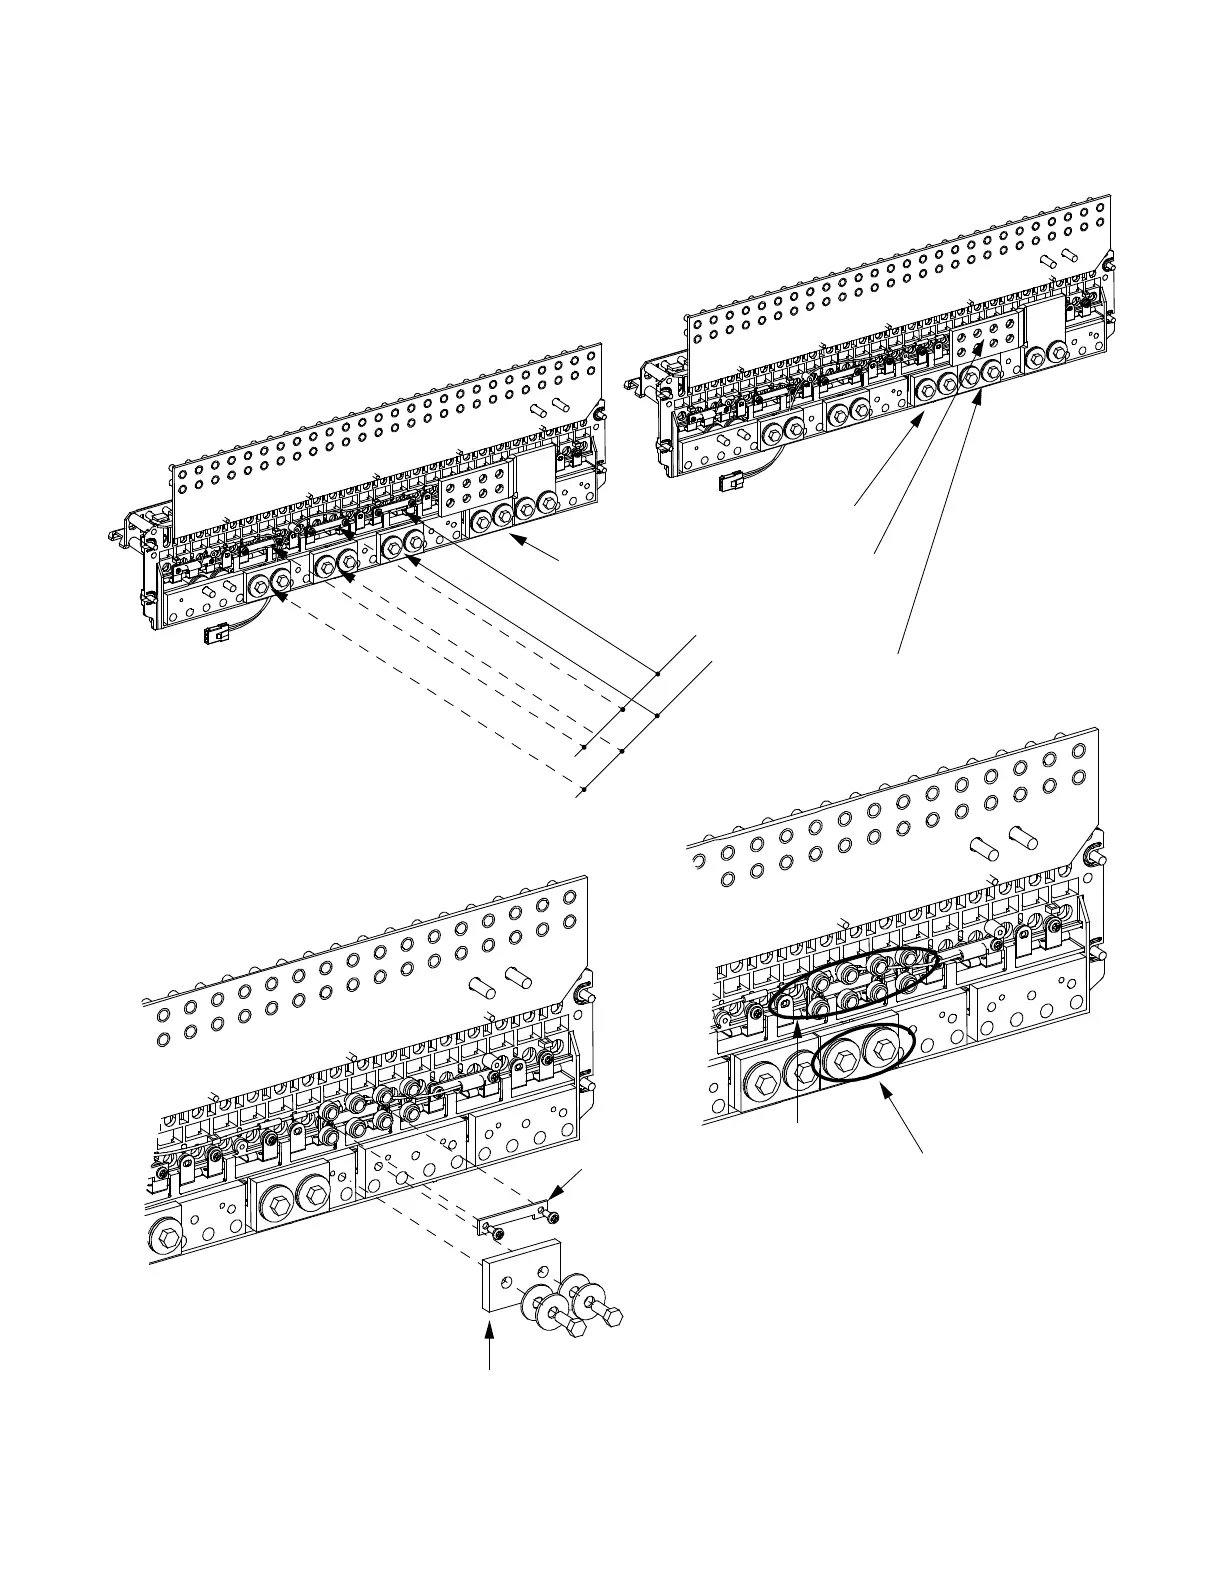
Before
After
List DF, DG, DH, DJ,
FF, FG, FH, FJ
Dual Voltage Distribution Panel
(DF Shown, Others Similar)
Move the Shorting Bus at the desired point of
of the voltage division to the new location as
shown in a previous illustration.
Move the CBA/FA alarm
strap at the desired point
of the voltage division to
the new location.
Move CBA/FA
Alarm Strap
Here
Move CBA/FA
Alarm Strap Here
6-19 x 1/2 Screw
Torque to 9.6 in-lbs.
Move Shorting
Bus Here
Move Shorting
Bus Here
Input Power
Busbar Not
Shown
Input Power
Busbar Not
Shown
Apply a thin coating of
electrical anti-oxidizing
compound to the mating
surfaces of the busbars.
1/4-20 x 5/8 Bolt
1/4” Lock Washer
1/4” Flat Washer
Torque to 75 in-lbs.
From the front, remove the
polarity labels for the positions
reassigned and turn the label
over so the other polarity shows.
See Detail A.
From the front, remove the voltage
barrier shield from the right-most
EXISTING sub-system distribution
position and place it in the right-most
NEW sub-system distribution position.
See Detail B.
Move Extra
Shorting Bus
Extra Shorting Bus

 Loading...


