Service Manual Indicator JIK-6 Page 21
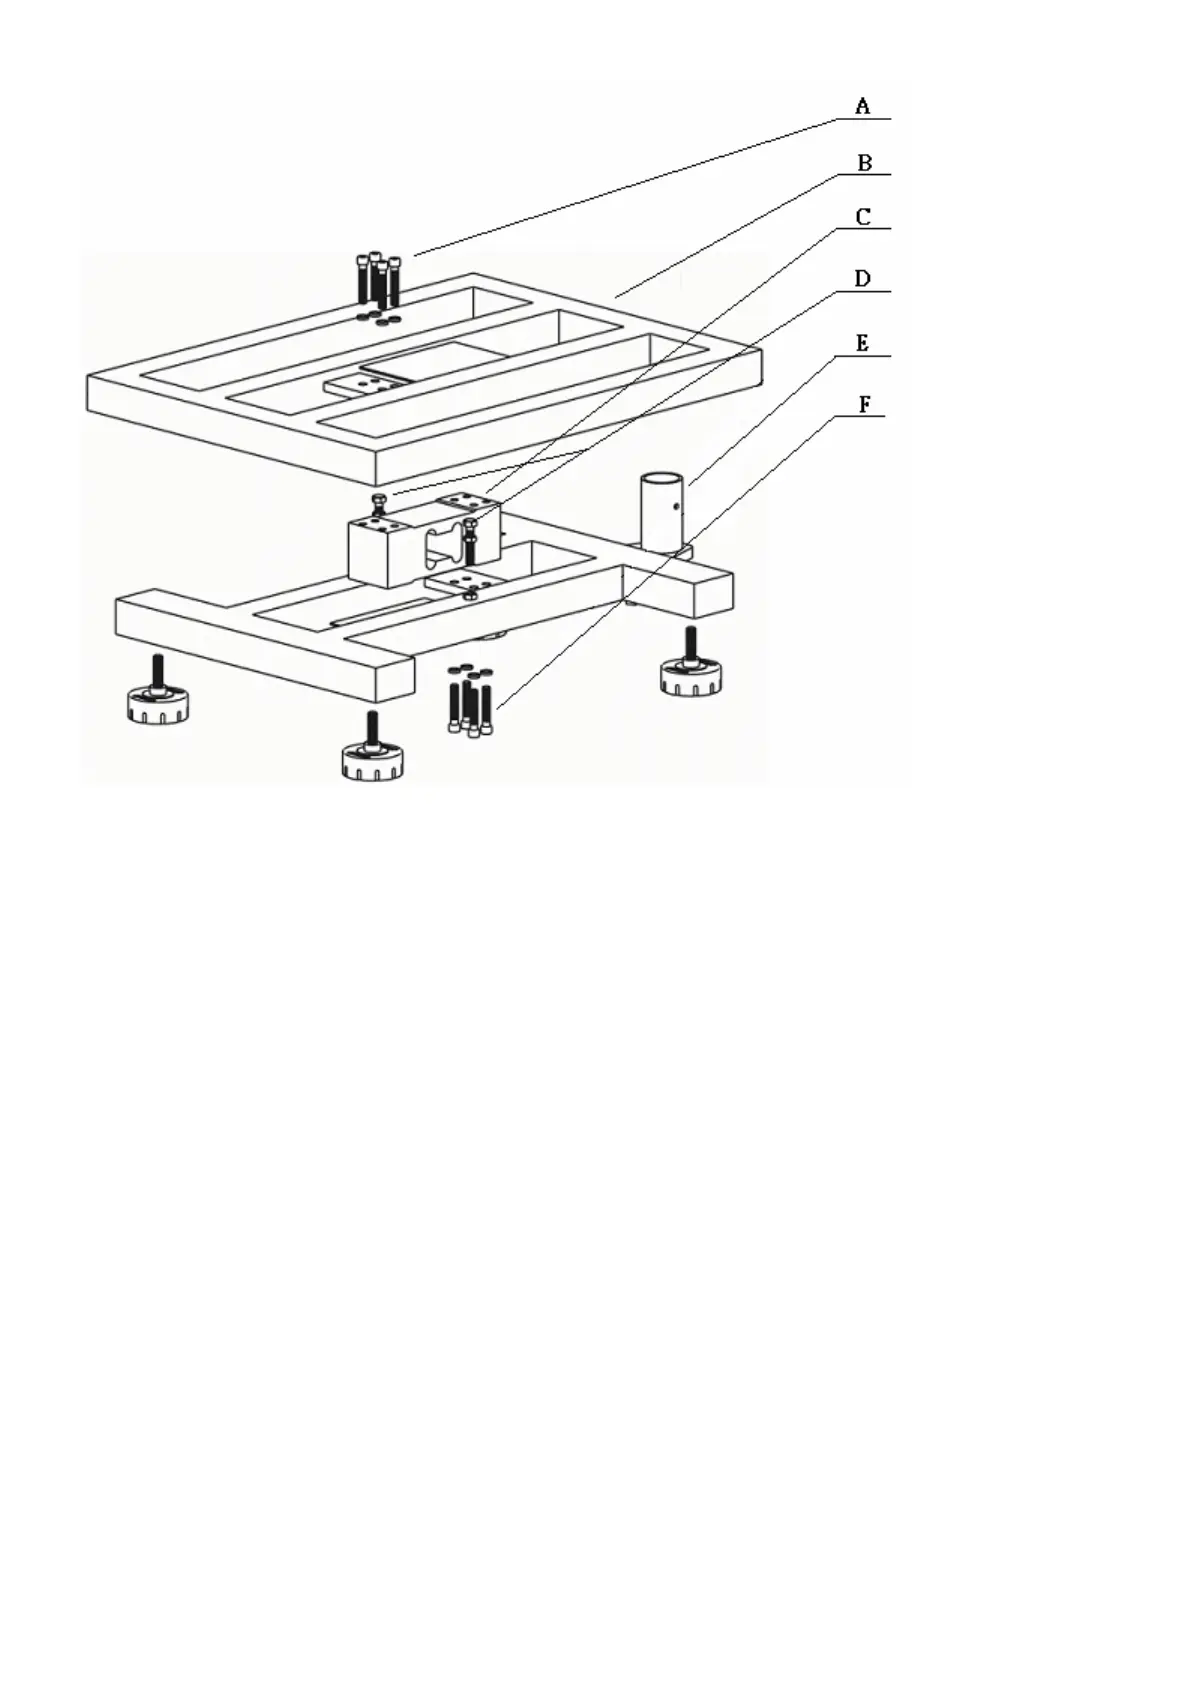
(Fig. III)
4. Please unscrew the four Allen screws (Fig. III “A”) on L/C by use of an Allen wrench, then remove the
upper bracket (Fig. III “B”).
5. Please put the whole structure upside down, and unscrew the four Allen screws (Fig. III “F”) on L/C by
use of an Allen wrench, then remove the lower bracket (Fig. III “B”).
6. After steps 4 & 5 are completed, remove L/C (Fig. III “C”), and replace it with a new L/C, then assemble
the upper and lower brackets as well as display head following steps 5-1.
7. Please perform recalibration according to “Weighing Capacity, Sensed Weight Setting and Weight
Calibration”.
8. Please make adjustment to the four corners according to “L/C-related Technology-Scale Grinding”.
9. Perform three-segment calibration once again, and the L/C replacement is completed.
 Loading...