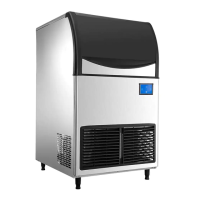
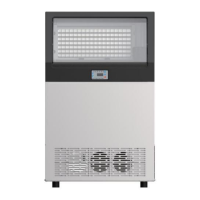
This document provides comprehensive information regarding the installation, operation, and maintenance of the LB series ice-making machines, specifically covering models LB175A, LB210A, and LB300A. The manual emphasizes safety tips and proper procedures to ensure optimal performance and longevity of the ice maker.
Function Description
The LB series ice-making machines are designed to produce ice efficiently and reliably. They incorporate several patent control systems for simple and accurate operation, adapting to various water quality conditions. Key components are sourced from internationally renowned brands, ensuring robust performance even in harsh environments. For food safety and excellent rust-proof performance, all parts that come into contact with water are made from food-grade plastic, and the shell is constructed from stainless steel.
The ice maker operates through several distinct phases:
- Ice Melting Process: Upon power-on, the display shows "C00" indicating the influent state. Once the water tank is full, the deicing indicator lights up, and a power-on delay time is displayed. The hot valve opens, followed by the press after 30 seconds. The hot valve then closes after 5 seconds, and deicing occurs for 60 seconds.
- Ice Making Process: During this phase, the ice indicator light is on, and the digital tube shows the ice-making time. If the ice skating board remains open for more than 4 minutes, the machine enters an "ice full" state. The compressor continues to operate, the heat valve closes, and the fan is controlled. The upper water valve is controlled 5 minutes before ice making starts and remains open for more than 5 minutes, with the pump opening after 90 seconds. Ice making begins when the water temperature falls below the set temperature and concludes when the ice-making time exceeds the set duration.
- Deicing Process: After ice making is complete, the machine transitions to the deicing state. The deicing indicator light is on, and the digital tube displays the deicing time. The compressor remains open, the hot valve opens, while the pump and fan close. The upper water valve is controlled. The maximum deicing time is 6 minutes. If ice is not removed within 5 minutes, the pump opens for 1 minute. If ice is still not removed, the machine returns to the ice-making state. If ice is not closed, it enters the "ice full" state. If deicing occurs for more than 6 minutes three times in a row, the deicing process stops due to timeout.
- Ice Full Detection: After ice removal, if the refrigerator is not full, the machine returns to the ice-making state to begin a new cycle. If the refrigerator is full, it enters an "ice full stop" state, indicated by the ice full indicator light. In this state, the water pump, compressor, heat valve, upper water valve, and fan are all closed. If ice is removed and the pressure mechanism closes within 180 seconds, the ice full indicator lights up. If the pressure mechanism remains closed for 180 seconds, the machine powers up for a new cycle. If ice is not taken away, the machine remains in an "ice full" state.
Usage Features
The ice maker features a user-friendly touch screen interface for various operations:
- Turn On/Off: Connect water supply and drainage, plug in the power, and press the power switch. The touch screen will light up. To shut down, press the mode button during ice making to enter standby (screen shows "OFF"), then press the power switch and unplug.
- Ice Thickness Regulation: In the ice-making state, users can adjust ice thickness by increasing or decreasing the ice-making time in 1-minute increments using the designated buttons. The adjustment is complete when the number stops flashing.
- Mandatory Deicing: A dedicated button allows users to force deicing during ice-making conditions.
- Manual Cleaning: In standby mode, pressing the cleaning button initiates a manual cleaning cycle. The cleaning icon flickers, the inlet valve opens, and a timer starts on the screen. After approximately 15 minutes, cleaning stops, followed by 30 seconds of drainage.
- Booking of Ice: In standby mode, users can set a delayed start time for ice making. Each press of the booking button increases or decreases the time by 10 minutes. Once set, the screen displays a countdown, and ice making begins when the timer reaches 00:00.
- Setup Function: This advanced function, accessible by long-pressing a specific button in standby mode, allows for parameter adjustments. It is recommended that this function be operated under the guidance of professionals to avoid unintended settings.
Maintenance Features
Regular cleaning and maintenance are crucial for the ice maker's efficiency and longevity.
- Routine Cleaning:
- Environmental Cleaning: Keep the surrounding environment clean to ensure efficient equipment operation.
- Shell Cleaning: Clean the machine's shell with a sponge dipped in neutral cleaning liquid, then dry with a soft cloth. Stainless steel cleaners can be used if necessary.
- Air Filter Cleaning: The air filter prevents dirt and dust from clogging the condenser. A blocked filter can reduce performance. It is recommended to clean air filters once or twice a month.
- Shell Dismantling: To clean, remove the top cover plate by unscrewing the screw at the back, gently lifting, and pulling back. The back plate can also be removed by unscrewing the upper two screws and gently lifting it, being careful with the drain pipe.
- Evaporator Cleaning: Scrub the evaporator surface with a brush or sponge dipped in scale remover or vinegar. Use a nylon brush for plastic parts around the evaporator and soft materials for the sink.
- Flume Cleaning: Unplug the machine, remove two screws from the pump box, loosen three screws on the inner wall of the ice storage barrel, and remove the clamps. Unplug the upper water pipe, pump, and float plug-in for cleaning.
- Condenser Cleaning: Disconnect power before cleaning. The condenser edges can be sharp, so handle with care. Remove the left and right ventilation windows using cross screws. Use a nylon brush to remove dust from the filter and brush condenser fins along the upper and lower directions. It is recommended to clean the condenser every six months. After cleaning, reinstall the top cover plate and back plate correctly.
- Cleaning and Disinfection Process:
- Open the front panel and check if the evaporator is making ice. If so, execute the forced deicing program to stop ice making.
- Remove all ice from the refrigerator using an ice shovel.
- Press the cleaning button to start the cleaning phase. The inlet valve opens, and a timer starts.
- Add two packs of cleaning agent (KAY DELIMER, 56.7g/pack) or mixed detergent to the ice maker sink. The water in the evaporator will circulate for about 15 minutes, then stop and drain.
- After drainage, the machine enters an automatic rinsing phase, cleaning for 3 minutes, draining for 30 seconds, and repeating 5 cycles. The entire cleaning process takes about 37 minutes, after which the screen displays "OFF" and the machine enters standby.
- Unplug the power.
- Remove the flow pipe, water retaining plate, water pump, float ball, and ice shovel (refer to parts removal/installation process).
- Soak the removed parts in a cleaning solution (8 liters of warm water at 45-50°C mixed with 4 packets of KAY DELIMER) for at least 5 minutes, or 10 minutes for heavy scale.
- While parts are soaking, wipe surfaces in contact with water and ice (evaporator ice grid, ice baffle, ice storage bucket) with a nylon brush or soft cloth dipped in cleaning liquid. Rinse with clean water 5 times. Scrub the ice shield and wash the refrigerator.
- Disinfection Process:
- Mix 8 liters of warm water (45-50°C) with 2 packets of disinfectant (KAY5, 28.4/package) to create a disinfectant solution.
- Soak the cleaned parts in the mixed disinfectant.
- While soaking, spray the disinfectant evenly and completely on all ice-contacting surfaces.
- After 20 minutes, remove the soaked parts and rinse with water. Reinstall the parts.
- Plug in the power, press the standby button, then the cleaning button to enter the cleaning stage. Add the equipped disinfectant to the ice maker sink as the evaporator begins to flow water, and spray the outer surface with disinfectant.
- The water circulates for about 15 minutes, then cleaning stops, and drainage begins.
- After drainage, the machine enters an automatic rinsing phase, cleaning for 3 minutes, then rinsing with purified water 3 times. The entire process takes about 37 minutes. The screen displays "OFF" when complete.
- Unplug the machine. Note: Discard the first batch of ice made after cleaning and disinfection; do not eat it.
- Removal/Installation of Parts: When removing pipes, detach "pull out" clamps and upper pipes. Spin out plastic covers and remove plastic mandrels. When assembling pipes, ensure the pipe hole and mandrel hole directions are opposite. To disassemble the baffle, grasp its middle and use a flat screwdriver to force it from one side until it detaches from the pinhole.
- Out of Use/Winterization: If the ice maker will be out of service for an extended period or exposed to temperatures below 0°C, special protection measures are required. Disconnect power and water supply, empty the sink, remove the water inlet hose, and ensure no water residue remains in the inlet, drain, and distribution pipes. Leaving water in the machine below 0°C can cause serious damage not covered by warranty.
- Troubleshooting: Before requesting repair, check the water supply (faucets open, inlet valve not blocked, pressure 1-5 bar), power supply (voltage within ±10% of rated, switch connected, fuse intact, plug fixed), ambient and water temperatures (10-38°C ambient, 5-32°C water), and whether the ice bin is full. Record the machine number and contact the service provider or toll-free number for assistance.