General remote terminal check
1. Check if the connector with the wire loop is present.
2. Check if the connector has been inserted all the way in.
3. Check that the wire loop is making electrical contact.
4. Be aware that if an external device is connected to the remote terminal, the wire loop has been removed and one or two
wires will be connected between the remote connector and the external device.
9.2.5. The charger is disabled
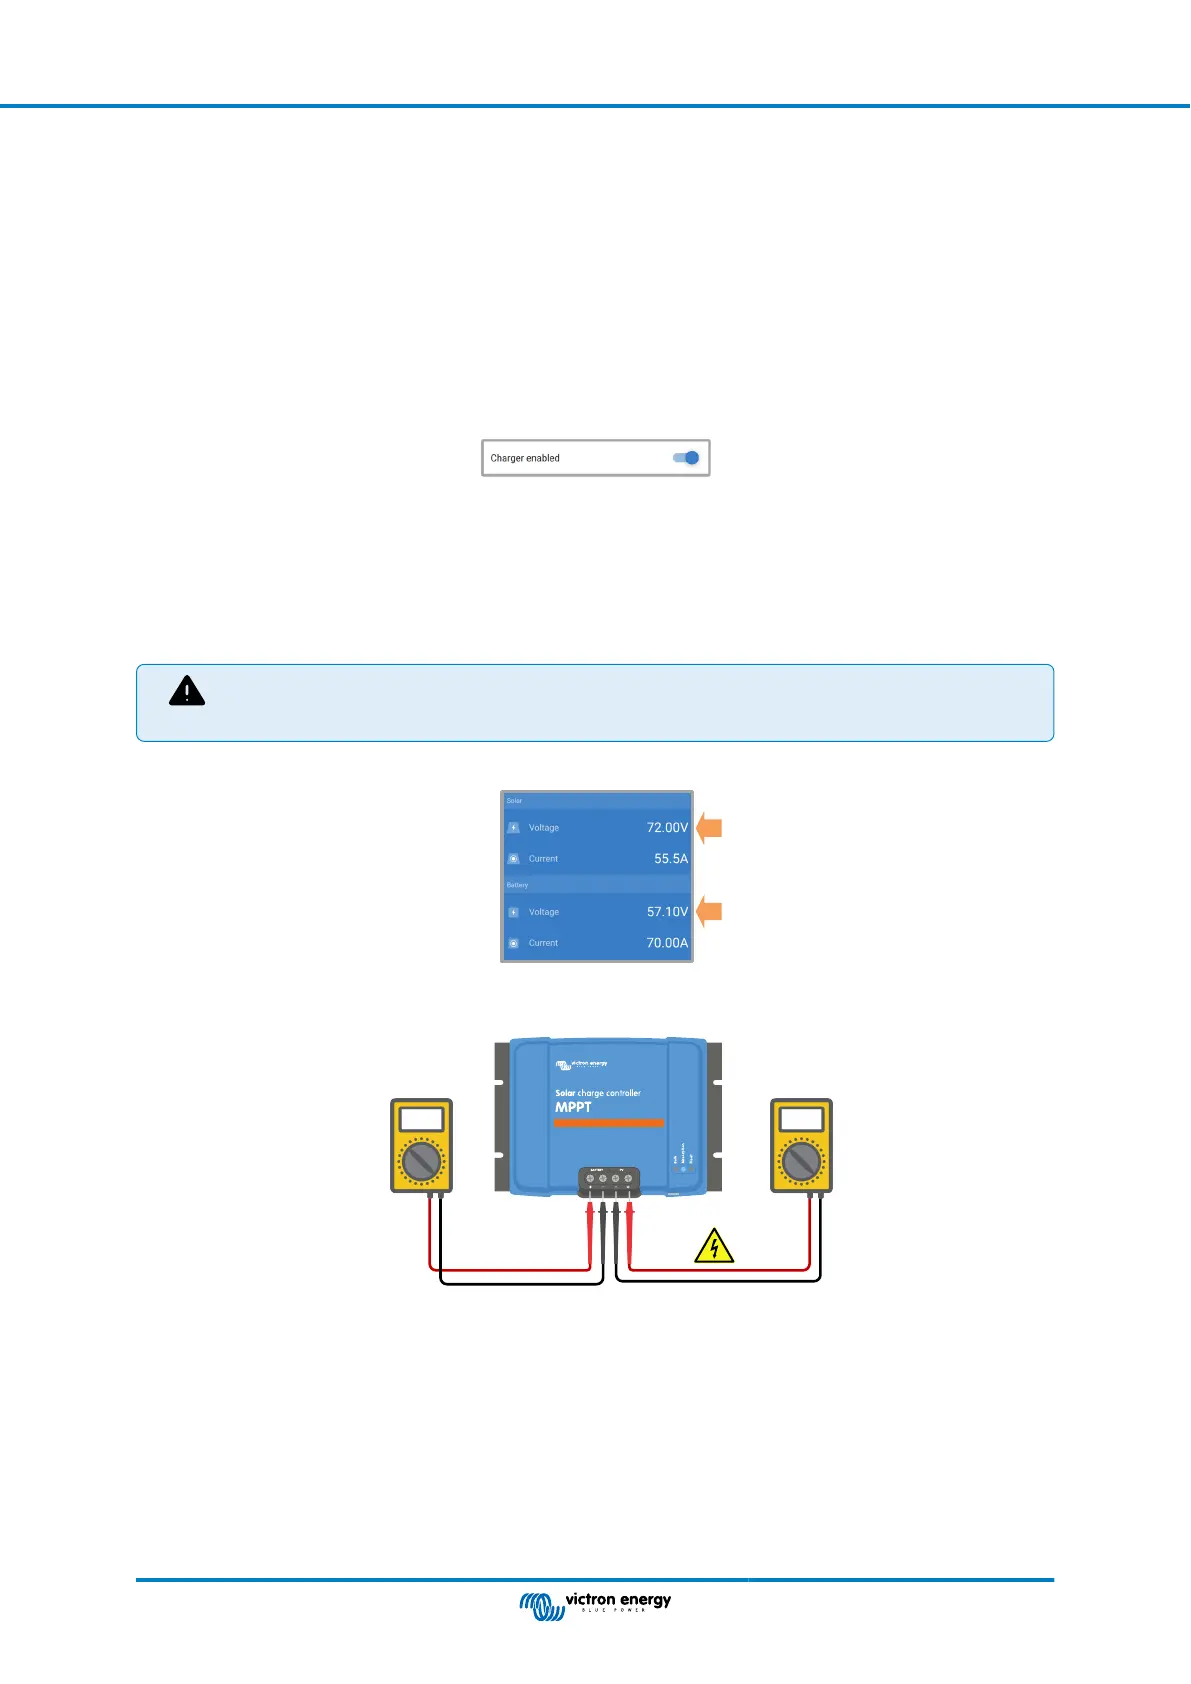
Check the VictronConnect app to make sure the charger has been enabled.
VictronConnect charger enable/disable setting
9.2.6. PV voltage too low
The solar charger will commence charging when the PV voltage is 5V higher than the battery voltage. Once charging has
commenced, the PV voltage must remain 1V higher than the battery voltage for charging to continue.
Check the PV and battery voltage
WARNING: Depending on the solar charge controller model, the PV voltage can be up to 450Vdc. Voltages
above 50V are generally considered to be dangerous. Check your local electrical safety regulations as to the
exact regulations. Dangerous voltages can only be handled by a qualified technician.
1. Use the VictronConnect app, a solar charger display or a GX device to check the battery voltage and PV voltage.
2. In case the above step is not possible, measure the battery and PV voltages at the solar charger terminals using a multi
meter instead.
VV
3. Compare both voltages, the PV voltage needs to be 5V higher than the battery voltage for charging to commence.
4.
Causes of zero or low PV voltage:
Not enough solar irradiance into the solar panels:
• Night.
• Cloud cover or bad weather.
• Shading – see this shading blog story for more information.
MPPT solar charger manual
Page 48 Troubleshooting and Support
 Loading...