25H/SP/DDA/2W (1 way “2 wire” DDA audio intercom kit)
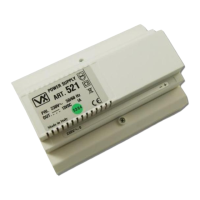
FUSE
N
L
Mains
1 PHASE SUPPLY
(220 - 240Vac, 50/60Hz)
SWITCHED FUSE SPUR
Fig.4A
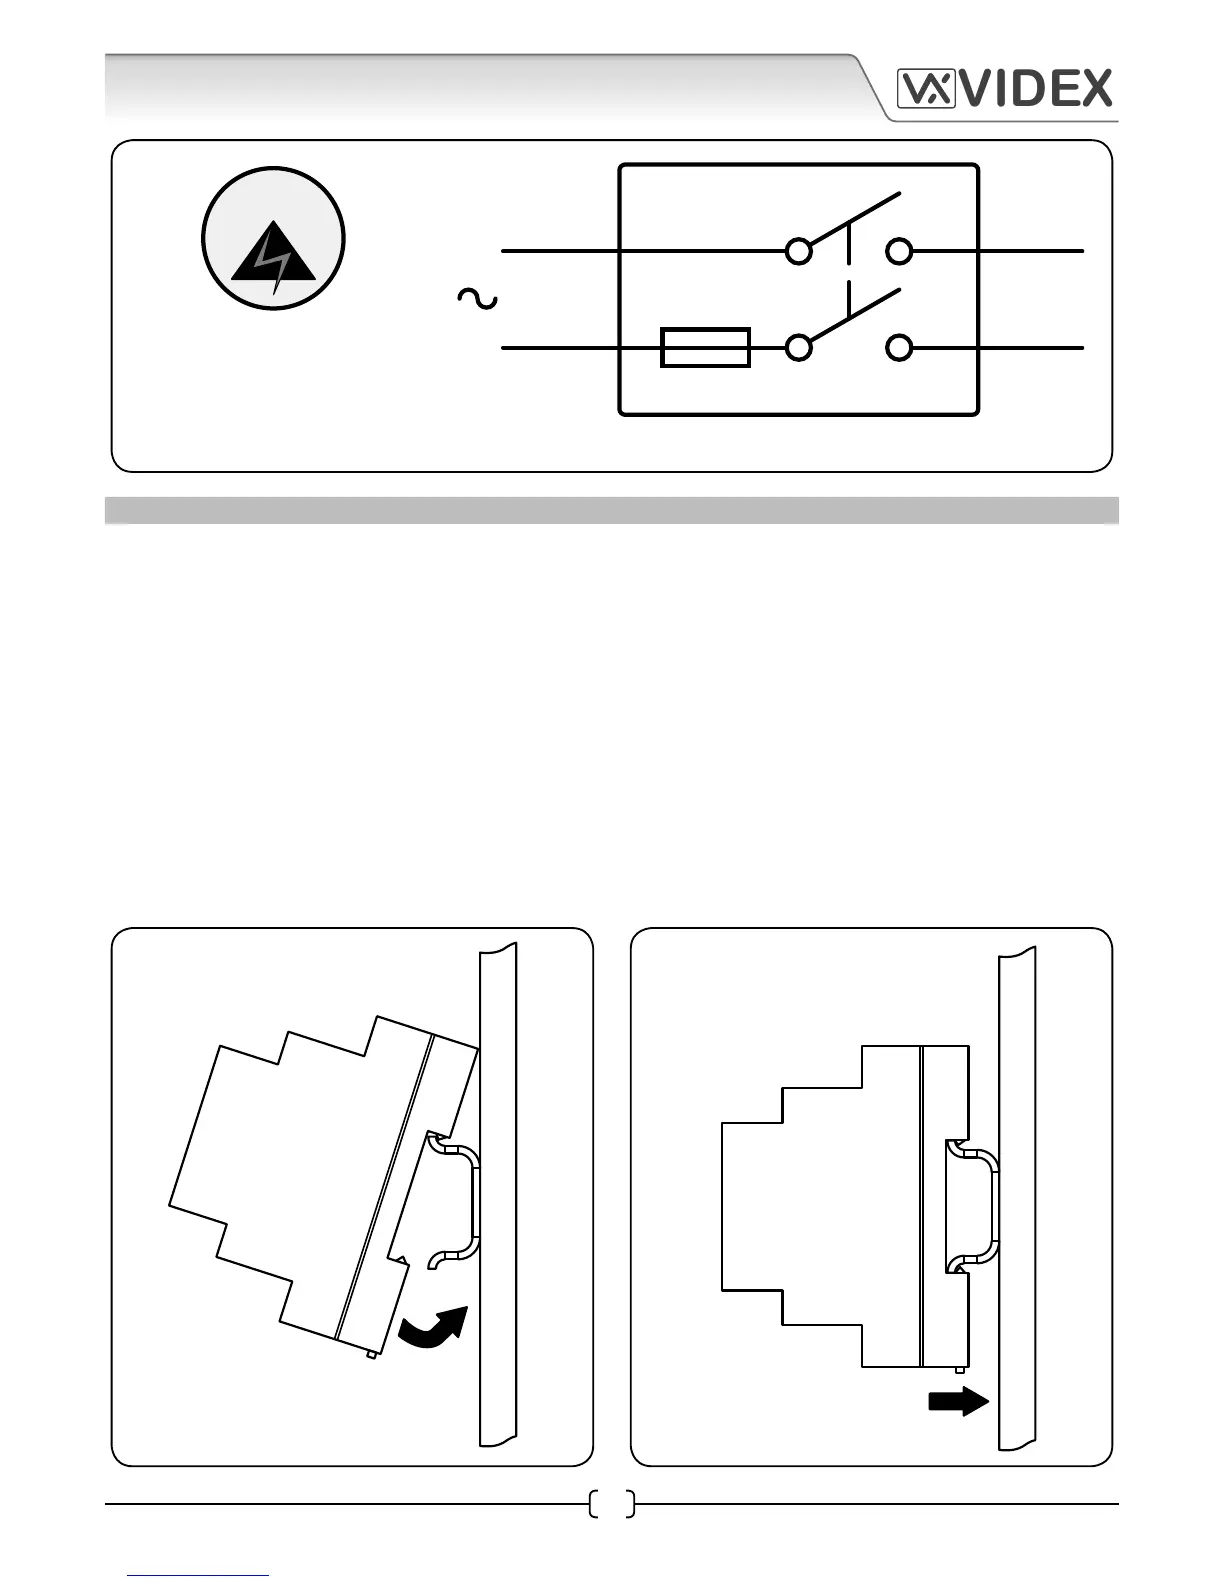
Follow the steps below when tting the Art.521 power supply:
• First remove the terminal side covers by unscrewing the retaining screws.
• Fix the power supply to a DIN rail (following to Fig.4B, Fig.4C and Fig.4D) or directly to the wall using two
rawl plugs and two expansion type screws (refer to Fig.4E).
• Switch OFF the mains using the circuit breaker mentioned previously on page 29 and then make the
connections as shown on the installation diagrams.
• Check the connections and secure the wires into the terminals ensuring that the low voltage (signal)
cables are routed separately from the high voltage (mains) cables.
• Replace the terminal covers and x them back into place using the relevant screws.
• When all connections are made restore the mains supply.
Fig.4B Fig.4C
POWER SUPPLY INSTALLATION
 Loading...


