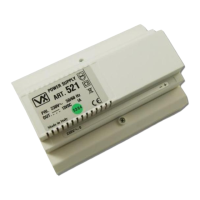
25H/SP/DDA/2W (1 way “2 wire” DDA audio intercom kit)
PANEL CARE AND MAINTENANCE
The VR intercom door panel is manufactured from brushed 12 Gauge 304 grade stainless steel. It is important
that the fascia is cleaned on regular occasions to prevent dirt build up and tarnishing of the metal. A general
household metal polish can be used but care should be taken to follow the grain of the metal when polishing
and always only polish in one direction with a soft cloth to avoid light scratching of the fascia. Also try to
avoid any polish build up around the call button which may prevent the button from operating correctly.
Table C below identies the best methods for cleaning and maintaining the intercom door panel.
Table C
To Clean Method
Finger Prints Detergent and warm water or a household polish.
Routine Cleaning Soap, detergent or dilute (1%) ammonia solution in warm water.
Staining and
discolouration
Mild non-scratching creams and polishes. Take care to avoid build up of creams in
the buttons which could cause sticking.
Cleaners that CANNOT be used
• Chloride containing cleaners.
• Hydrochloric acid based cleaners.
• Sidol stainless steel cleaner (can aect engraving).
• Hydrochloride bleaches.
• Silver cleaners.
POWERING UP THE ART.UIM-138 DISPLAY MODULE
After all the connections have been made to the
Art.UIM-138 display module power up the system.
When the display initializes it will show the part
number of the unit on the top line of the display and
the rmware version of the unit on the second line of
the display, as shown in Fig.10.
VIDEX UIM-138
R:1.0 (138N:1.3)
After a short period the display will show the default
message ‘PRESS BUTTON TO CALL’ , as shown in Fig.11
and will be ready to connect to a PC or laptop for
programming (refer to pages 15 - 25 for software
installation and setup).
PRESS BUTTON
TO CALL
Fig.10
Fig.11

 Loading...