SECTION TSM 344 ISSUE E PAGE 9 OF 24
■ Close all suction and discharge valves.
■ Disconnect the power source to the motor.
■ Flush and drain the pump.
■ Remove the piping (optional for repair kit).
■ The canister area will not fully drain and will
contain some process fluid.
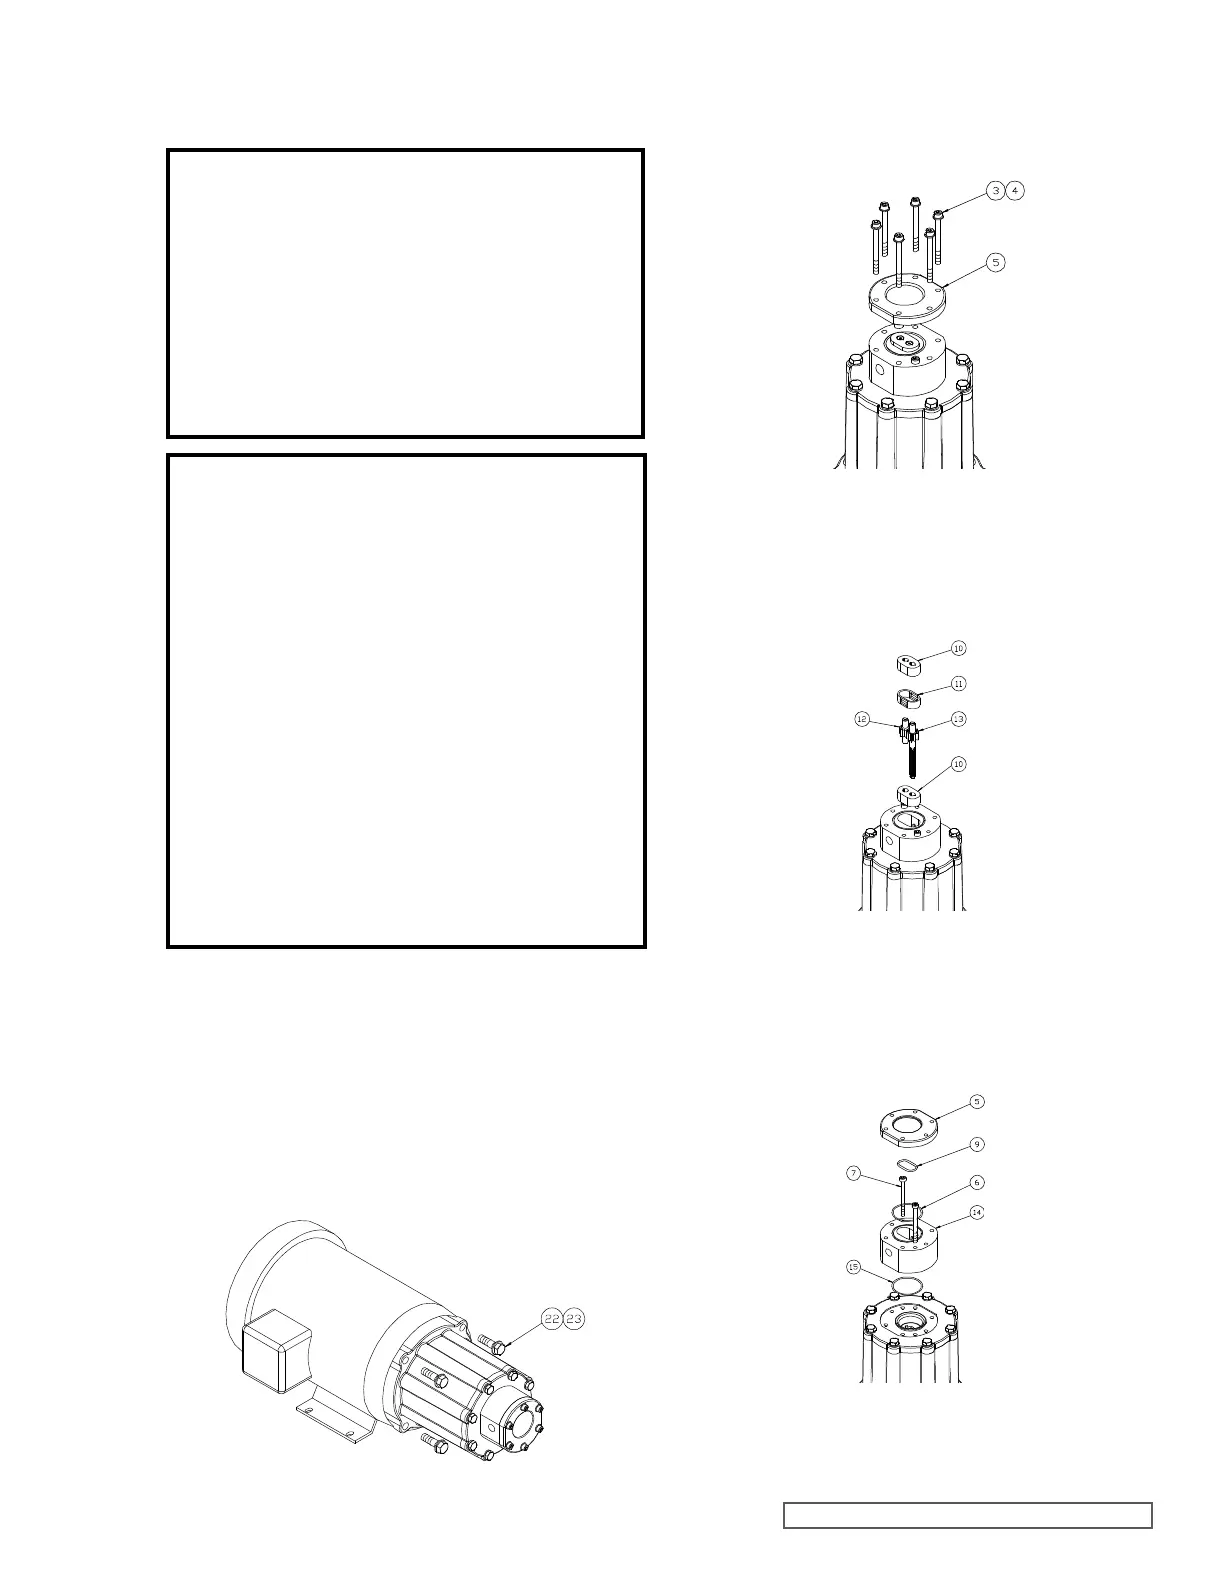
Remove the four motor bolts and washers (items 22, 23)
and slide the entire pump straight off the motor.
Place the pump assembly (motor spool down) on the
work surface.
Remove the six bolts and flat washers (items 3, 4) and
remove the front cover (item 5) as shown.
Remove the bearings (item 10), gear/shaft assemblies
(items 12, 13) and housing liner (item 11) as shown.
These parts, along with the three O-Rings make up a
standard CMD Series repair kit. Check the parts for
wear and replace with a repair kit as required.
Remove the two remaining bolts (item 7) to detach the
center housing (item 14).
Remove all O-Rings from the center housing and front
cover. There are two in the center housing (items 6 and
15) and one in the front cover (item 9) as shown.
Remove the eight mounting bolts and washers (items
16, 17) holding the adapter plate (item 18) to the motor
spool (item 20) and detach the adapter plate.