INSTRUCTION FOR USE ENGLISH
22
Remove the tie rod (G), disengage the fasteners (M) and remove the retaining strip (K), then replace the rear
blade (D). Assemble the blade in the reverse order of disassembly.
Unscrew the knobs (I) and remove the retaining strip (L), then replace the front blade (C). Assemble the blade
in the reverse order of disassembly. After the blade replacement (or turning over), adjust the height as shown in
the previous step.
4. Connect the vacuum hose (A, Figure 18) to the squeegee.
5. Install the squeegee (B) and screw down the knobs (C).
6. If necessary, adjust the squeegee balance adjusting knob (35 Figure2).
TANK AND DEBRIS COLLECTION BOX CLEANING, AND COVER GASKET CHECK
1. Drive the machine on a level floor.
2. Ensure that the machine is off and the key witch (53, Figure 3) has
been removed.
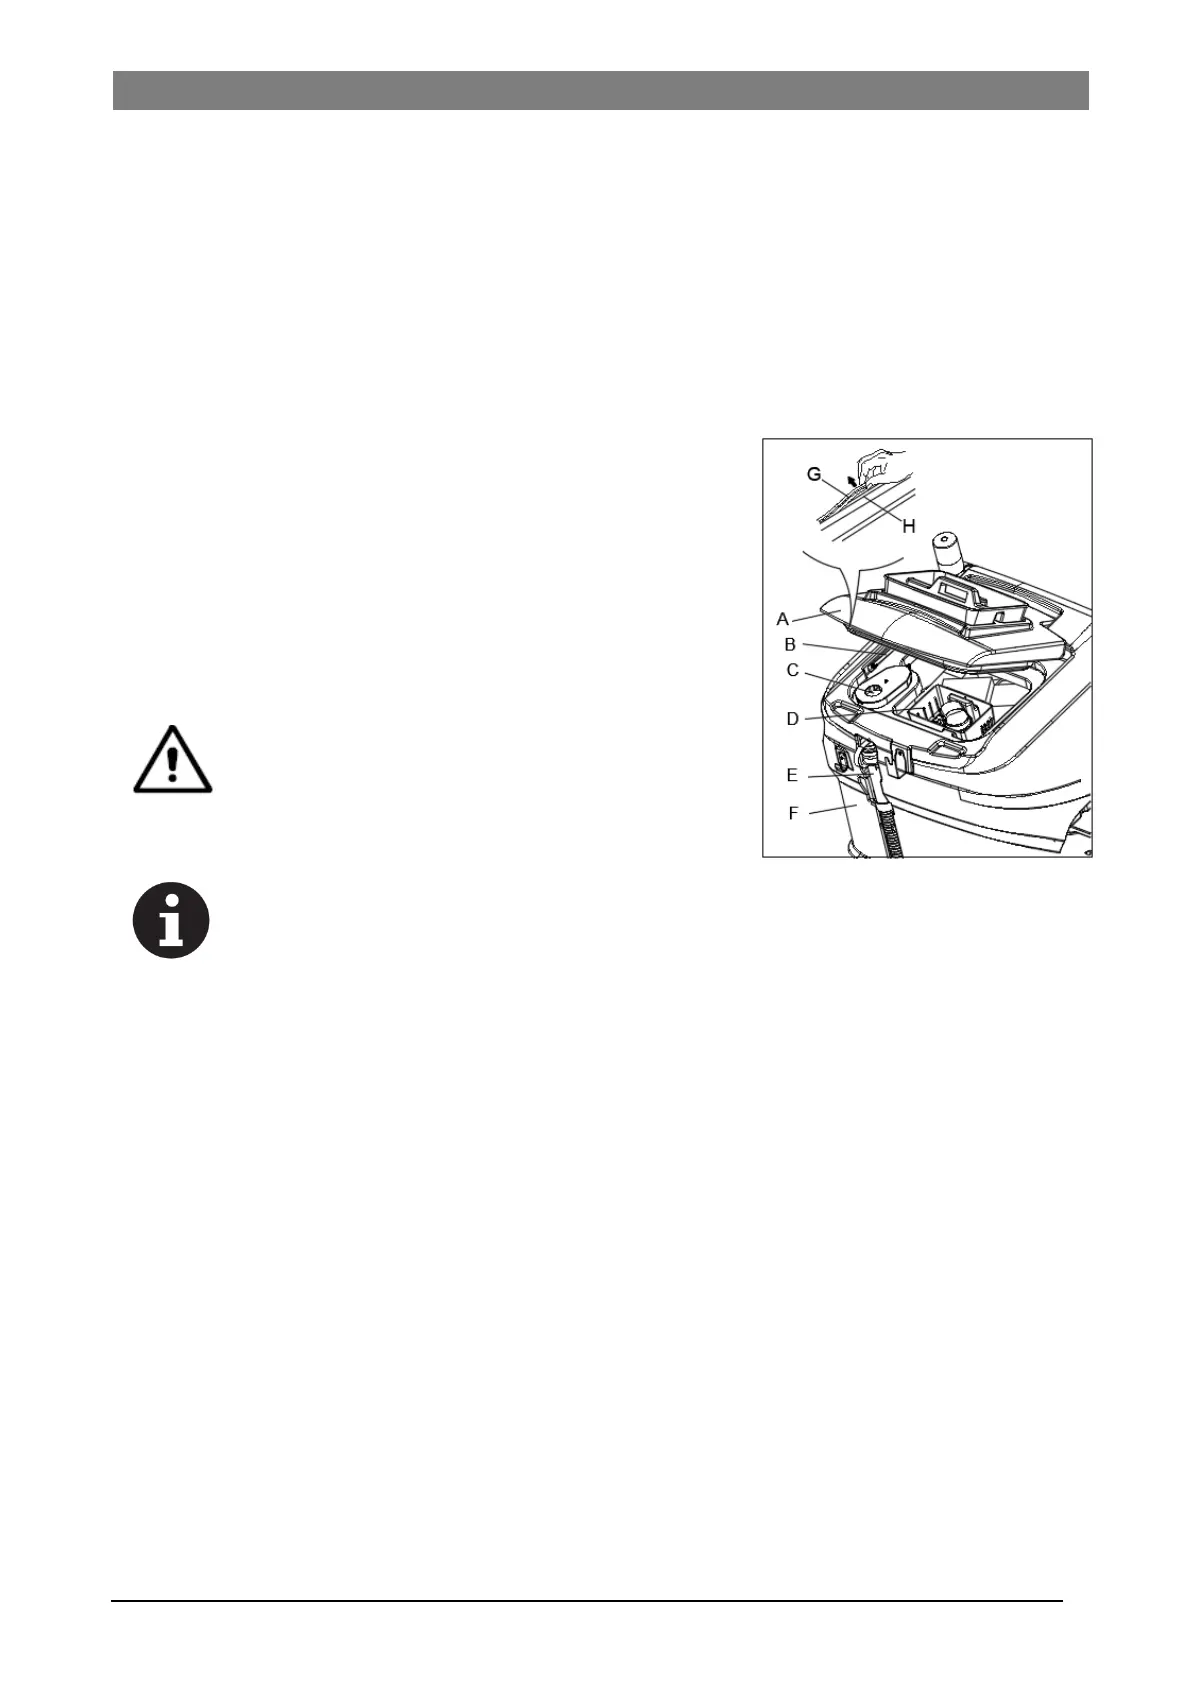
3. Open the recovery tank lid (A, Figure 19) and make sure the support
(B) is working.
4. Clean the recovery tank lid (A), recovery tank (F), the vacuum filter
(C) and the debris collection box (D). Empty the recovery tank with
the drain hose (E).
5. Inspect the integrity of the tank gasket strip.
NOTE
Tank gasket strip (G) is critical to produce the suction inside the tank when the vacuum
motor is working. The tank must be sealed so it can effectively move the water from the
ground to the recovery tank.
6. Check whether the contact surface of gasket strip (G) is good condition and sealing is sufficient. If necessary,
take the gasket strip of the tank out of the groove (H) and replace it. Assemble the new gasket strip as shown in
(Figure 19), the joint should be back in the middle area.
7. Close the recovery tank lid (A).
ACCESSORIES/OPTIONS
In addition to the standard components, the machine can be equipped with the following accessories/options,
according to the machine specific use:
For further information concerning the above-mentioned optional accessories, contact an authorized Retailer.
ACCESSORIES/OPTIONS
See “Parts List” section
1. Brush of different materials
2. Mop clamp
3. Utility caddy
4. Overhead guard
5. Dual vacuum system
CAUTION!
Insure the lid support is latched properly. Take
care that the tank lid is not open too far and you
do not bump into the support, while working in-
side. The tank lid can close suddenly.
Figure 19
 Loading...