Example Jobs 139
© 2015 Vision Engraving Systems
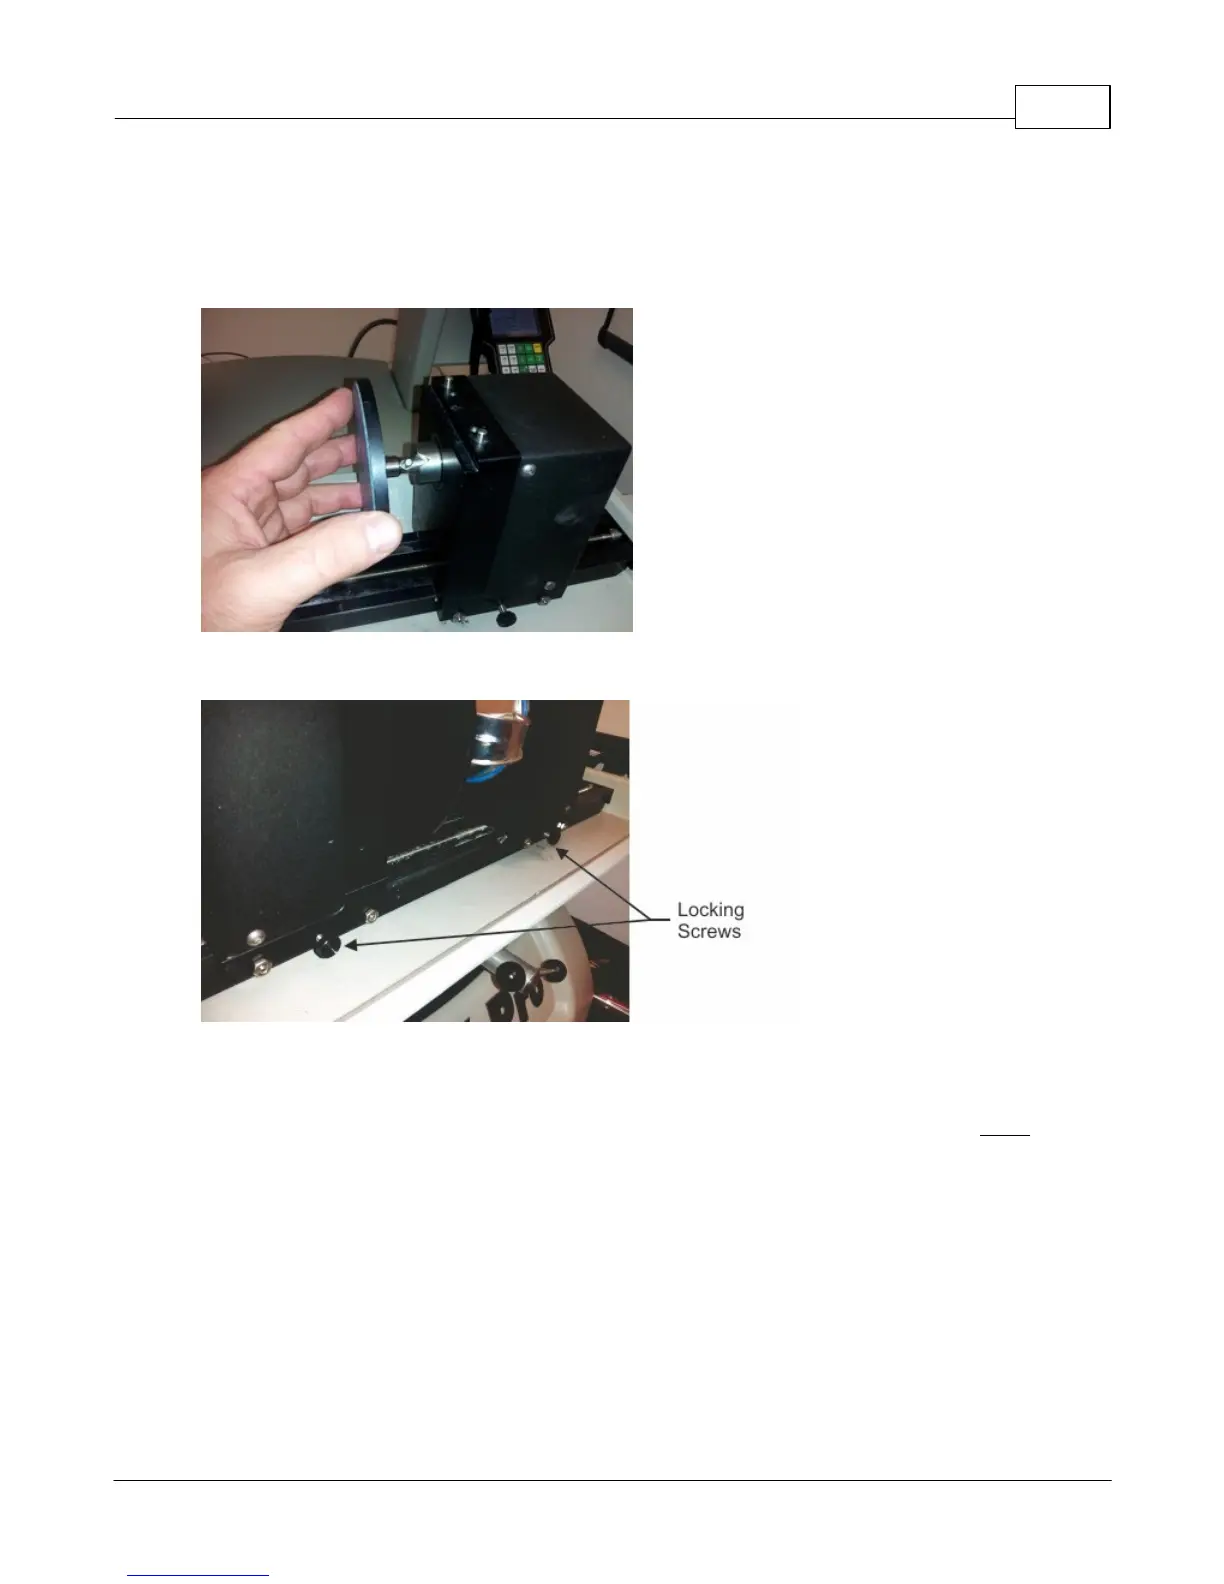
Install the appropriate cones or holding chucks for the item being engraved. The drive side of the rotary
axis is on the left. This is the side where the cones or chucks are installed. A flat fixture is commonly
used for the base of flat items and is installed on the free floating (right) side of the rotary fixture. Note
that the cross pin slides into the V grooves as shown.
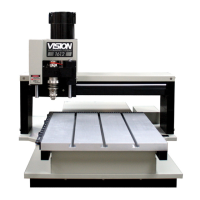
Make sure the locking screws are loose.
Place the item between the flat and the cone on the rotary vise and either use the wheel on the right side
of the vise to tighten the vise, or if the vise is far apart, press the Shift key on the Pendant and use the X
Move keys to move the vise together, or apart, using the vise motor. Hold the item in-line with the cone
and held flat against the right side of the rotary, then close the vise. Once the item is held lightly between
the cone and the flat fixture, rotate the item by hand to see it is centered on the flat fixture side (the cone
side will inherently be centered). NOTE: Do not attempt to secure the item in the vise using the X Move
keys. The vise motor does not provide sufficient torque to hold large items in place securely and it may
put too much pressure on delicate items. Always secure the item in the vise using the adjusting wheel. If
the item is not centered, manually open the vise slightly by rotating the wheel on the right side of the
machine, center the item, then close the vise using the wheel. Items should be firmly secured by turning
the wheel by hand, or they may slip during engraving.