Example Jobs 87
© 2015 Vision Engraving Systems
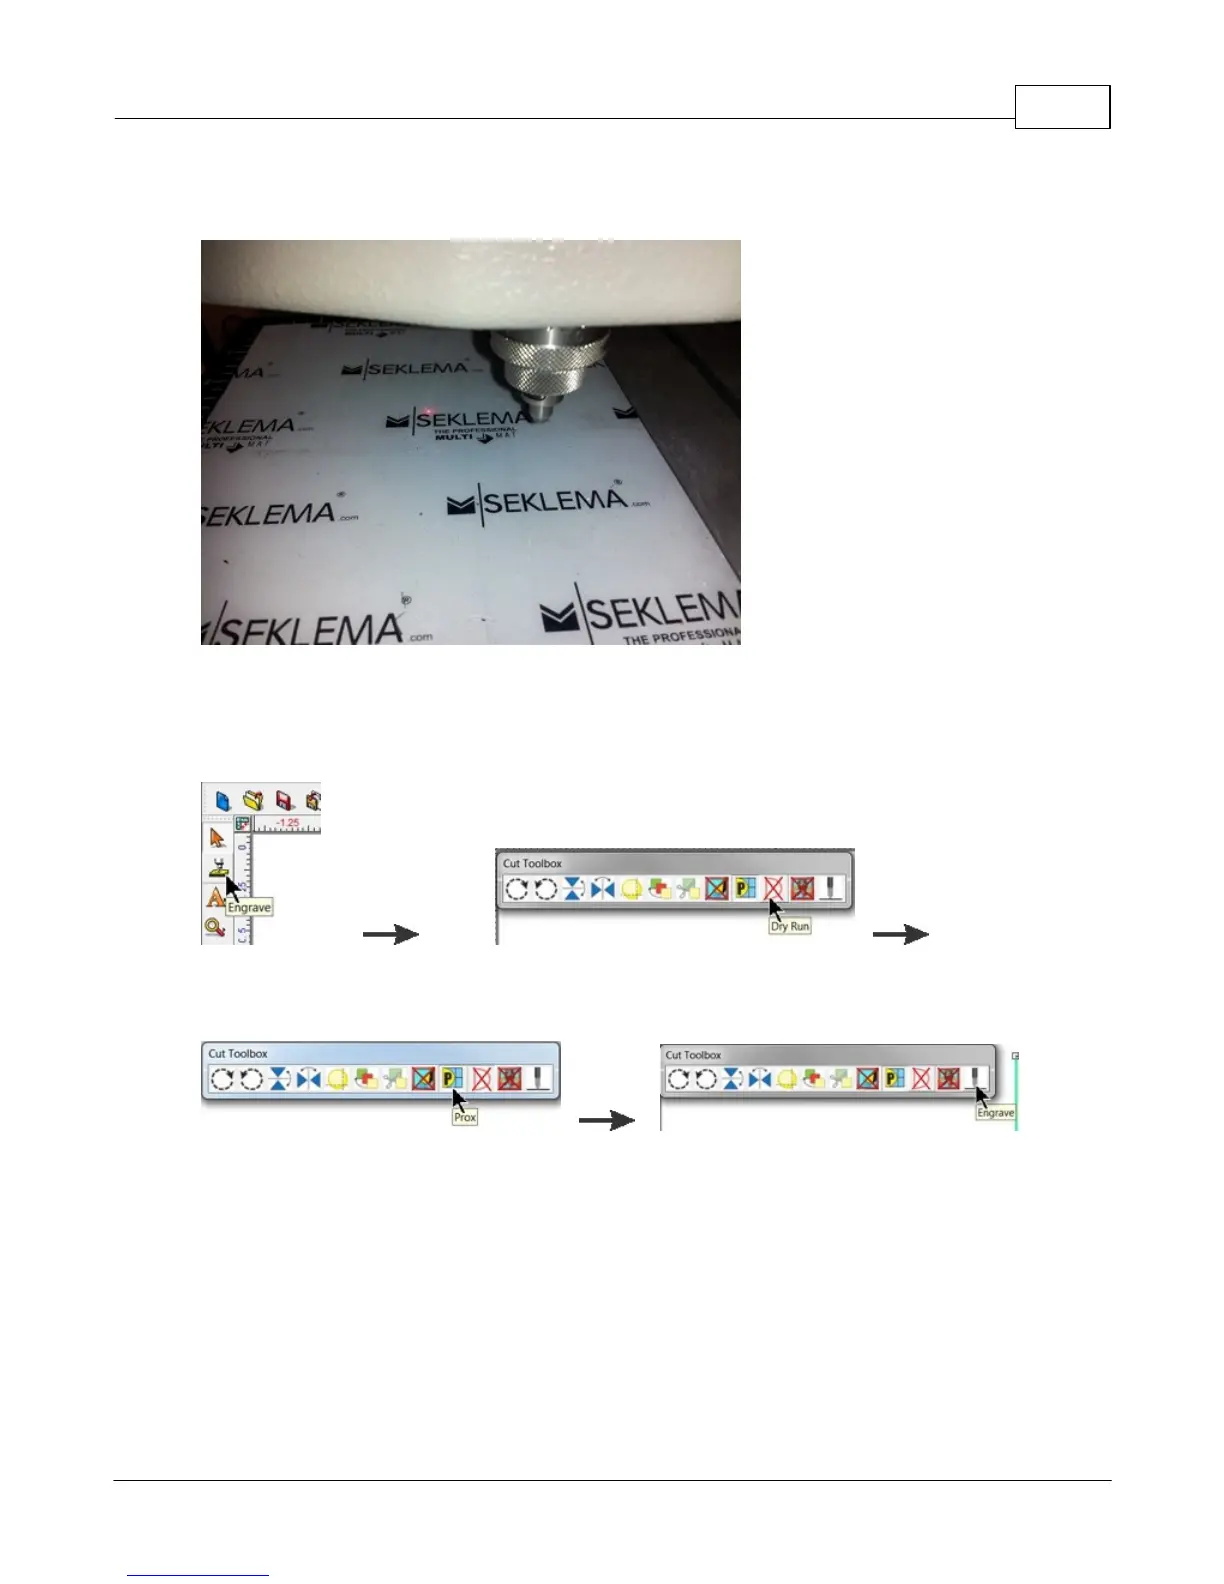
Red Laser Pointer
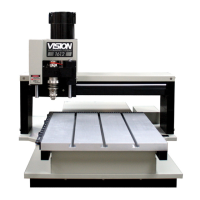
If the file and material appear to be positioned properly and you are ready to engrave, select the
Engrave icon from the left toolbar, turn off the Dry Run option and check to make sure the Proximity
Sensor (see the Prox icon below) is enabled, then select the Engrave icon on the Cut Toolbox to send
the file to the engraver.
Engrave icon (from toolbar) Dry Run Off
Prox icon (shown as enabled) Engrave icon
Make sure the material is positioned properly and secured on the engraving table, then press the Start
Button on the Pendant to begin engraving.