9
HARDWARE SETUP
HARDWARE SETUP
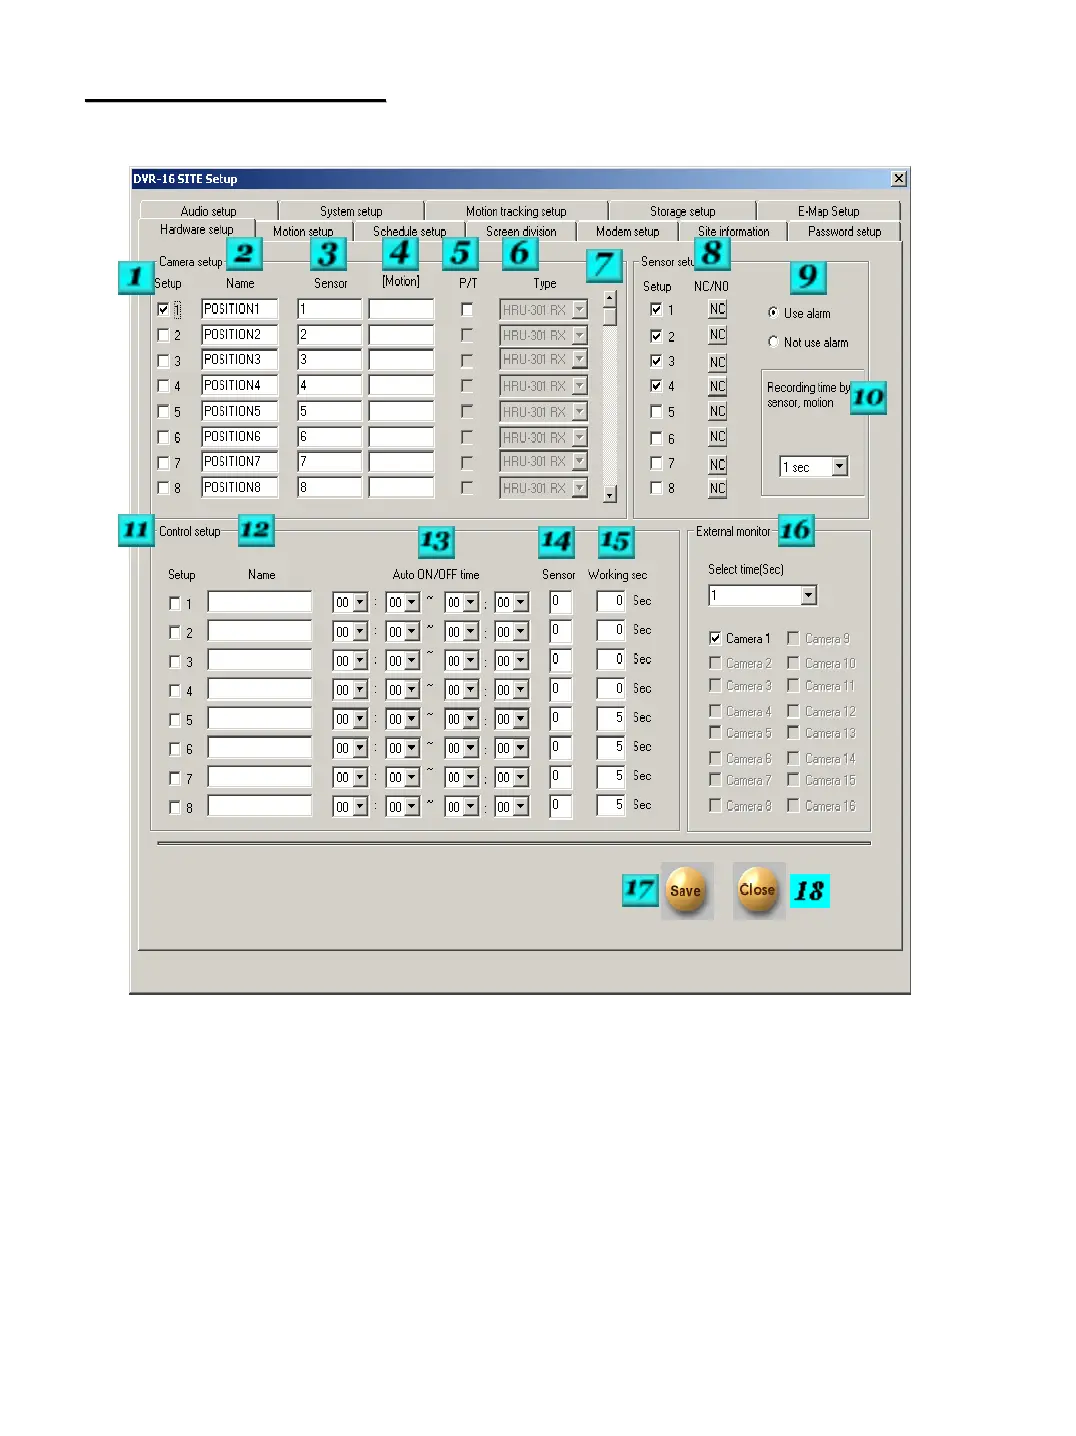
# 1 – Camera Setup – Place a check in the box for each camera that you would like to be turned on. Any
Camera channels that are not being used should be turned off.
# 2 – Camera Name – Each camera can be given a unique name. Up to 14 characters can be entered.
# 3 – Sensor – Enter the sensor numbers that should begin the selected camera recording. If you would like
more than one sensor to activate recording separate the sensor numbers by a comma ex: 1,4.
# 4 – Camera Link – Enter a camera number that needs to begin recording when the sensor is activated that
is tied to the selected camera.
# 5 – Pan Tilt – Place a check in the box if the camera is capable of Pan/Tilt control, and you wish to be able
to have the DVR control its features through the RS-422 output.