or NOT READY)
(See figure 4.10)
(See fig. 4.1b & 4.1c)
(See par. 4.12)
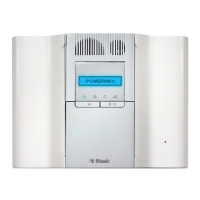
(Control Panel
serial number
display)
<OK> TO EXIT
OK
NEXT
(See section 4.14)
OK
OK
OK
OK
OK
OK
OK
OK
OK
OK
OK
OK
(See figure 4.6)
NEXT
6. DEFINE GSM
OK
(See figure 4.7)
NEXT
7. DEFINE PWRLNK
OK
(*)
Figure 4.1a - Installer’s Menu
* Applicable if USER PERMIT function is enabled (see
par. 4.4.35).
4.1.4 Setting a New Installer Code
To set an installer code, perform the actions that are
presented in figure 4.1b. When you are instructed to enter
code, enter a 4-digit code.
OK
OK
OK
(See fig. 4.1a)
1. NEW INSTL CODE
NEW INST. CODE
INST. CODE xxxx
[code]
Figure 4.1b - Setting a New Installer Code (see note)
4.1.5 Setting a New Installer Code in
PowerMax+ that has 2 Installer
Codes
For PowerMax+ with 2 installer codes, INSTALLER code
(default 8888) and MASTER INSTALLER code (default
9999), set new codes as shown in figure 4.1c.
For details regarding the different authorization levels
when logging in with installer code and master installer
code, refer to the note inside figure 4.5 (DEFINE COMM).
By using the master installer code, the menu enables
changing both master installer code and installer code.
By using the installer code, the menu enables changing
the installer code only.
By using
INSTALLER CODE
OK
OK
OK
INST. CODE xxxx
NEW INST. CODE
[code]
1. NEW INSTL CODE
(see fig. 4.1a)
(see fig. 4.1a)
OK
OK
OK
NEXT
[code]
OK
OK
1. NEW INSTL CODE
NEW MASTER CODE
MASTER CODE xxxx
[code]
NEXT
INST. CODE xxxx
NEW INST. CODE
By using
MASTER INSTALLER CODE
Figure 4.1c - Setting a New Installer Code
in System with Inst. & Master Inst. Codes (see note)
Note: Installer Code should never be programmed as
“0000”. Doing so will lock the user out of the installer
menu!
4.2 ENROLLING WIRELESS DEVICES AND KEYFOB TRANSMITTERS
4.2.1 General Guidance
The ENROLLING mode has 5 sub-modes:
• ENROLLING TYPE (wireless devices)
• ENROLL WL (wireless devices) DEVICE
• ENROLL
KEYFOB (multi-button CodeSecure
transmitters)
• ENROLL WL 1WAY KP (wireless commander MCM-140+)
• ENROLL WL 2WAY KP (wireless 2-way keypad MKP-150)
• ENROLL WL SIREN (wireless siren)
Before beginning, gather all the devices that you intend to
enroll and make sure they all have batteries installed.
Your control panel must recognize the unique identification
code (ID) of each such device in order to supervise them,
receive their signals and respond accordingly.
Attention! CodeSecure transmitters are mainly used for
arming/disarming and can not be enrolled to zones. For
enrolling to zones, use only non-CodeSecure
wireless devices.

 Loading...


