Do you have a question about the Vivitar DVR5K and is the answer not in the manual?
Controls power on/off and night vision illumination.
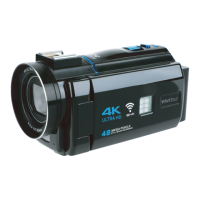
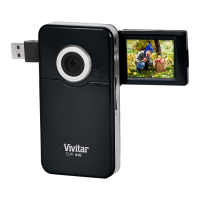
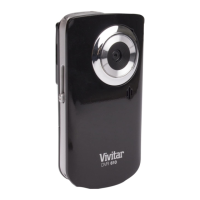
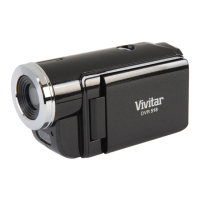
The Vivitar DVR5K is a 4K digital camcorder designed for capturing high-quality videos and photos. It features a 3-inch, 270-degree rotatable touch screen display, allowing for flexible viewing and control during recording and playback. The camcorder supports real 4K Ultra HD video recording and can capture photos with a maximum resolution of 48 megapixels.
One of its key features is built-in Wi-Fi connectivity, which, when paired with the free "ELooK Pro" app (available on Google Play for Android and the Apple App Store for iOS), allows users to download photos and videos directly to their smartphone. The app can be accessed by scanning a QR code provided in the manual or by searching for it in the respective app stores. To connect, users press and hold the DISP/WIFI button on the camcorder, then connect their phone to the "Ultra-HD-4K" Wi-Fi network using the provided password. While 4K videos can be large and may not always download smoothly over Wi-Fi, the functionality offers convenience for sharing content.
The DVR5K boasts a 16X Super Digital Zoom, enabling users to get closer to their subjects. It also includes a Night Vision feature, which can be activated by pressing the Power/Light button once powered on, illuminating subjects with three red LED lights. Pressing the button again switches to three white LED lights for standard illumination, and a third press exits the light mode. For output, the camcorder includes an HDMI port, allowing for direct playback of recorded content on a television using the included HDMI cable.
Powering the camcorder is a rechargeable lithium battery. The device can be powered on by pressing the Power/Light button and powered off by pressing and holding the same button. The camcorder also automatically powers on or off when the screen is opened or closed, and it will power off after an extended period of inactivity to conserve battery life. The battery charges via a USB-C cable, and a green charging indicator light turns off when charging is complete. The camcorder can be used while plugged in for extended recording sessions.
The camcorder offers various modes for both video and photo capture. Video modes include Normal Record, Slowly Record (for slower speeds), Loop Record (for timed segments), and Time Lapse Record (for low frame rate recording). Photo modes include Normal Picture, Auto Picture (after a set time), Continue Picture (burst mode), and Time Picture (after a countdown). These modes are accessed via the MODE button, with selections made using the Zoom controls and confirmed with the PHOTO button.
For navigation and settings, the camcorder features several physical buttons:
The camcorder also comes with a remote control that mirrors many of these functions, including photo capture, video recording, night vision/LED light control, Wi-Fi activation, zoom, menu navigation, and mode selection.
Playback of recorded content is accessed via the playback mode icon on the display screen. In playback mode, users can toggle through videos and photos using the Zoom controls, play/pause videos with the PHOTO button, and exit with the MODE button.
Connecting to a computer is done via the included USB-C cable. The camcorder offers three options when connected: charging mode, large-capacity storage mode (for file transfer), and camcorder mode (not available for this model). When in large-capacity storage mode, the camcorder acts as a mass storage device, allowing users to access files on Windows or Mac computers.
For enhanced audio, the camcorder supports an external microphone, which connects via a 3.5mm plug into the External Microphone Jack. If it's a cold shoe microphone, it can be securely slid into the camcorder's cold shoe mount.
Maintenance and care for the DVR5K are straightforward. Users should avoid exposing the camcorder to water, excessive heat, flames, or strong magnetic fields. It should not be dropped, punctured, or subjected to excessive trauma. The camcorder is not intended for commercial use. When charging, it's important to ensure charging cables are well-ventilated and not in contact with flammable materials. The device should be stored in a cool, dry environment when not in use. Before use, the battery should be fully charged, and a suitable memory card (Class 10 or above, 16-128GB) should be inserted. If a "Card is Full" error occurs, files can be deleted, or a new card can be used. Memory cards may need to be formatted by the camcorder, so backing up files before formatting is crucial. Any repairs should be handled by a qualified service center.
| Image Sensor | CMOS |
|---|---|
| Sensor Resolution | 5 MP |
| Digital Zoom | 4x |
| Optical Sensor Size | 1/3.2 inch |
| Storage | SD card |
| Connectivity | USB 2.0 |