16
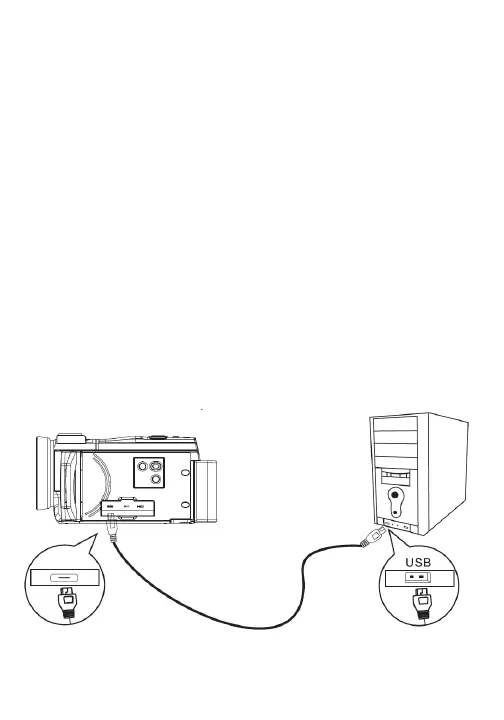
1. Connect one end of the included USB-C cable into the USB
port on your camcorder.
2. Connect the other end to an available USB port on your
computer. Once connected your camcorder’s battery can be
FKDUJHGRU\RXFDQWUDQVIHU´OHVIURP\RXUFDPFRUGHUVPHPRU\
card to your computer.
3. Your camcorder’s display screen will show 3 options: charging
mode, large-capacity storage mode or camcorder mode.
4. Select charging mode if you wish just to charge your
FDPFRUGHU7RWUDQVIHU´OHVVHOHFWODUJHFDSDFLW\VWRUDJHPRGH
Note that camcorder mode is not available for this model.
5. Your camcorder will now act similarly to a thumb drive or
other mass storage device. In Windows computers, a removable
disk drive will mount in your My Computer or My PC window.
You can click on this drive to access your photos. On computers
running Mac OS an extra drive will mount on your desktop.
Connecting to a Computer