22
SDR-3 Installation
1. Turn OFF the JAMCUBE.
2. Unscrew the two retaining screws that hold the slot cover in place.
3. Remove plate and store it in a safe place.
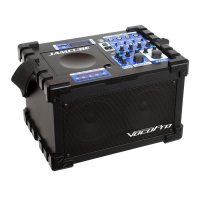
4. Attach the cable to the back of the SDR-3.
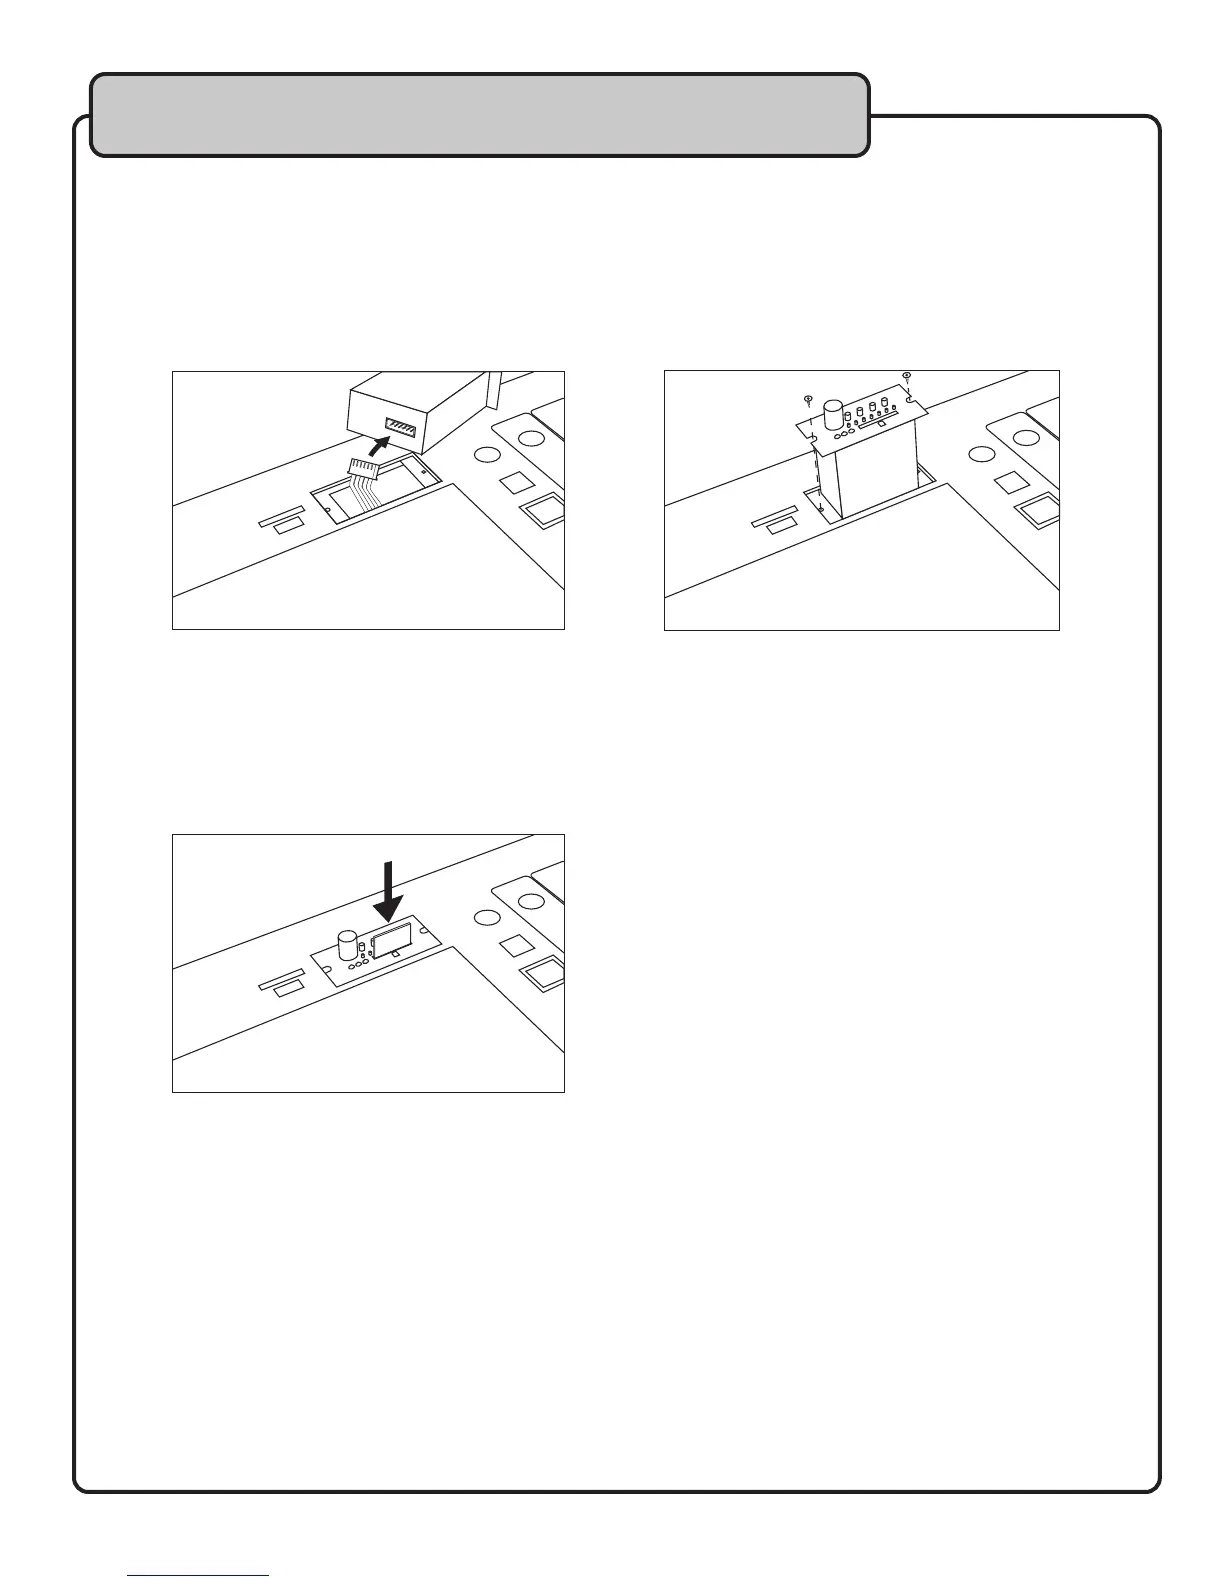
5. Carefully slide the SDR-3 into place.
6. Replace and tighten screws.
Inserting/Removing an SD card
1. Insert SD card with the same alignment as indicated by the SD card icon.
2. Push the SD card unit it clicks into place.
3. To remove the SD card, gently push in until it pops out slightly; it is then safe to remove.
NOTE: The maximum size SD card that can be used by the SDR-3 is 1GB. The SDR-3 does
not support SDHC cards.
Recording to the SDR-3
Prior to recording to the SDR-3, you want to ensure that the signal being recorded is properly mixed.
Once you are happy with your overall mix, follow the steps below to record.
1. Press the REC button once to place the SDR-3 in record pause mode. This is the time to
check the recording level and adjust if necessary.
2. Press the REC button a second time to begin recording.
3. Press PLAY/STOP to stop a recording. Or press REC to pause the recording without creating
a new track.
Descriptions and Functions