14
Descriptions and Functions
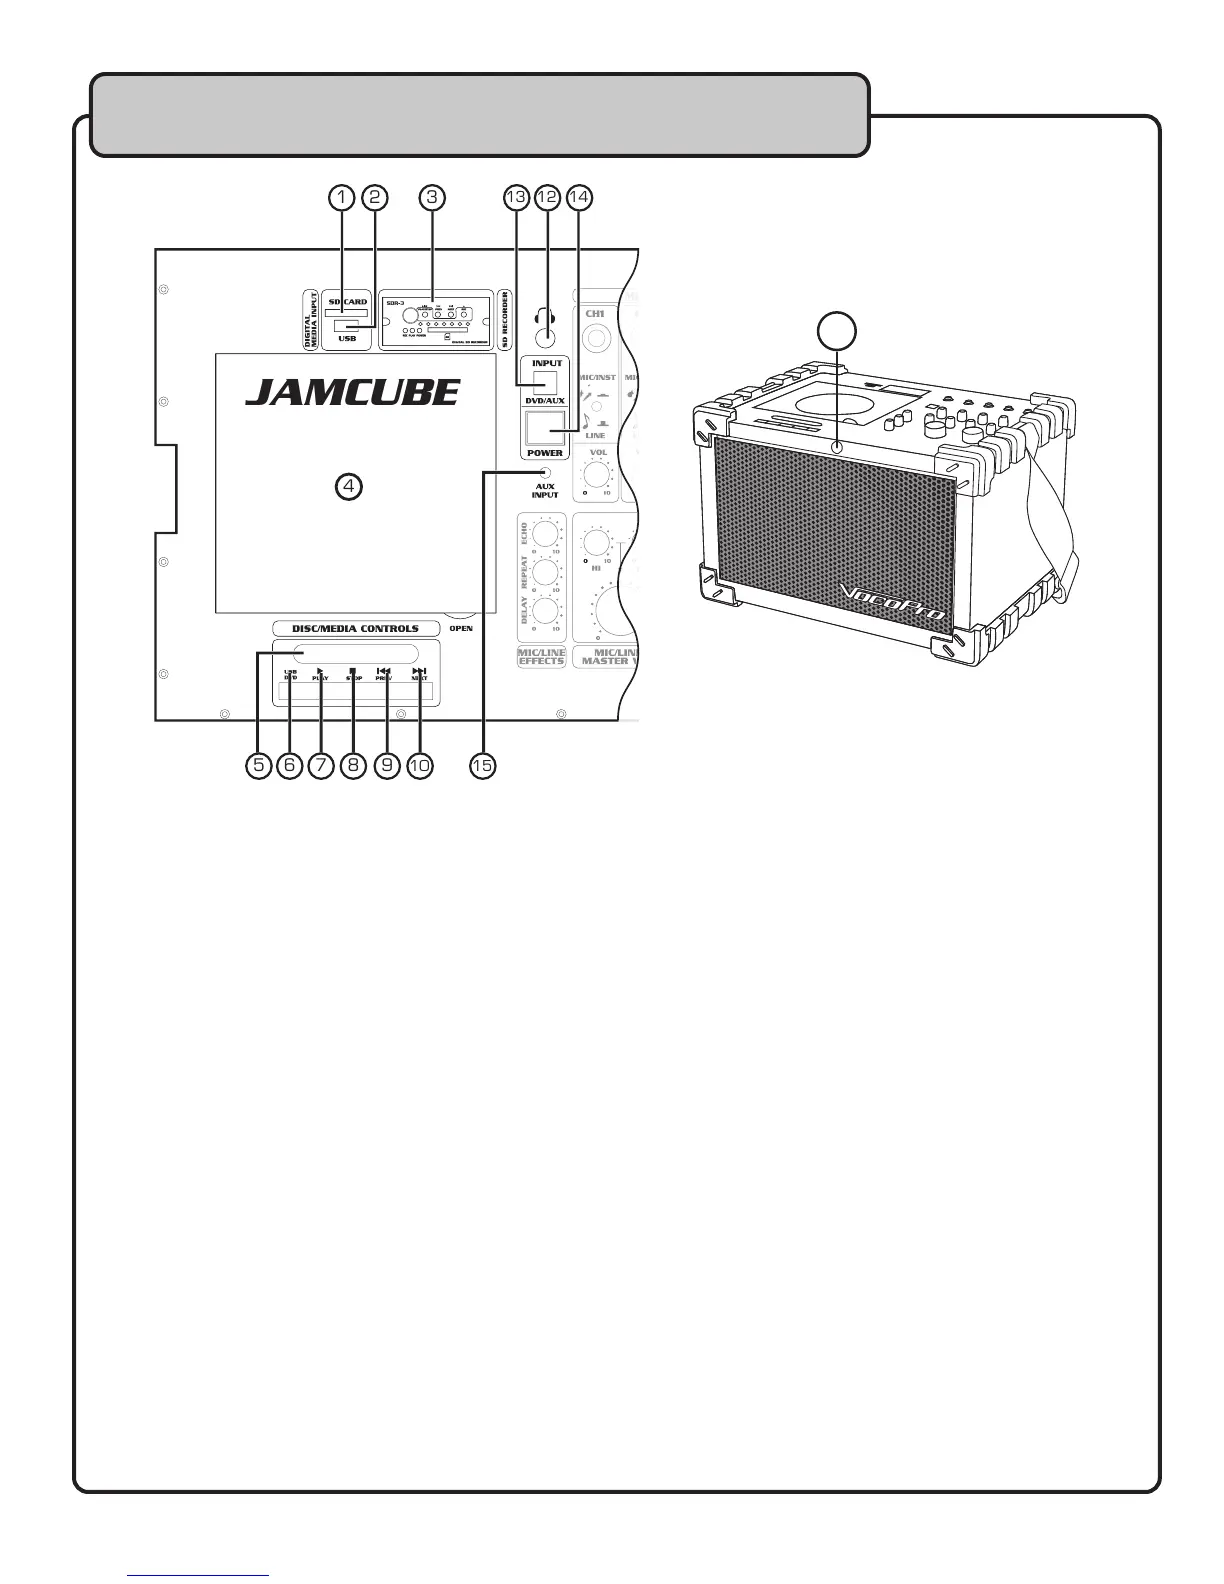
Front/Top Panel
1. SD CARD SLOT – Insert an SD card into this slot for playback of media files.
2. USB PORT – Insert a USB flash drive for playback of media files.
3. SDR-3 EXPANSION PORT – If you have an SDR-3 installed, or need to install the SDR-3, refer to
pages 21-22 for details.
4. DISC TRAY – Insert your discs for playback. Open the disc tray lid by lifting the tab on the right
side of tray lid. Carefully set your disc onto the tray and close.
5. VFD DISPLAY - Displays track, playback and setting information.
6. USB/DVD BUTTON – When an SD or USB device is connected, use this button to toggle
between DVD, USB, and SD playback.
NOTE: The INPUT (DVD/AUX) BUTTON must be set to DVD.
A video connection is required to see the options when using this button.
This button is only functional when an SD or USB device is connected.
7. PLAY/PAUSE BUTTON - Plays a disc that is stopped or paused and pauses a disc that is playing.
8. STOP BUTTON – Stops a disc that is playing.
9. PREV BUTTON – Press this button to jump to the previous track or chapter.
10. NEXT BUTTON – Press this button to jump to the next track or chapter.
11. REMOTE CONTROL SENSOR - Receives signals from the remote control. For best results, aim
the remote control directly at this sensor.
12. HEADPHONE JACK – Connect headphones with a 1⁄4” plug to this output for private listening.
NOTE: The JAMCUBE’s main speaker output is disabled when headphones are connected.
13. INPUT (DVD/AUX) BUTTON - Use this button to select which audio source you want to use:
DVD: DISC/SD/USB
AUX: 1/8” AUX/REAR RCA INPUT
14. POWER SWITCH - Use this switch to power the JAMCUBE ON or OFF.
15. AUX INPUT (1/8”) – Connect audio from an audio source (PC/MP3 player, etc) with an 1/8”
audio cable.
NOTE: The INPUT (DVD/AUX) BUTTON must be set to AUX for playback.
JAMCUBE
1 3 2
4
5 7 6 8 9 10 15
12 13
14
11