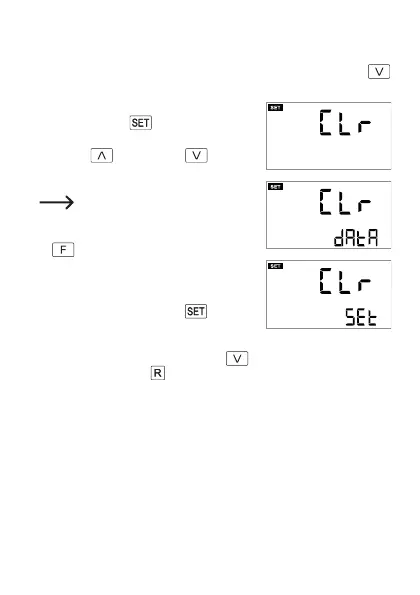
• If you have set the overload alarm (see Chapter 8. h) before setting delete
mode, you can proceed directly to the next step.
Otherwise, setup mode must be started, see Chapter 8. c. Press the
button(7)vetimestoopendeletemode,seethenextstep.
• “CLr” appears on the display.
Brieypress the
button (3), “CLr dAtA”
appears at the bottom of the display.
• Use the
button (6) and button (7)
to select one of the two delete functions “CLr
dAtA” and “CLr SEt”.
The data that is deleted is outlined at the
start of Chapter 8 i).
• To delete the selected data, press and hold the
button (4) for 3 seconds until a beep is
heard. The selected data is deleted. “CLr” ap-
pears on the display again.
If you want to interrupt delete mode without
deletingdata,brieypressthe
button (3).
“CLr” appears on the display.
• Ifnoindicatorisashing,youcangotothestartofsetupmode(timesetting,
seeChapter8.d)bybrieypressingthe
(7) button or exit the setup menu
bybrieypressingthe button (2).
58