Adjusting the valves
Note! The clearance must never be checked when
the engine is running.
Valve clearance (cold engine):
I
nlet and outlet for all engines: 0.20 mm (.0078 in).
1.
Dismantle the valve cover.
2.
Turn the engine in its normal direction of rotation
until both valves for cylinder No. 1 are closed (com-
pression position). Continue turning the engine
round until the marking of flywheel shows 0
0
.
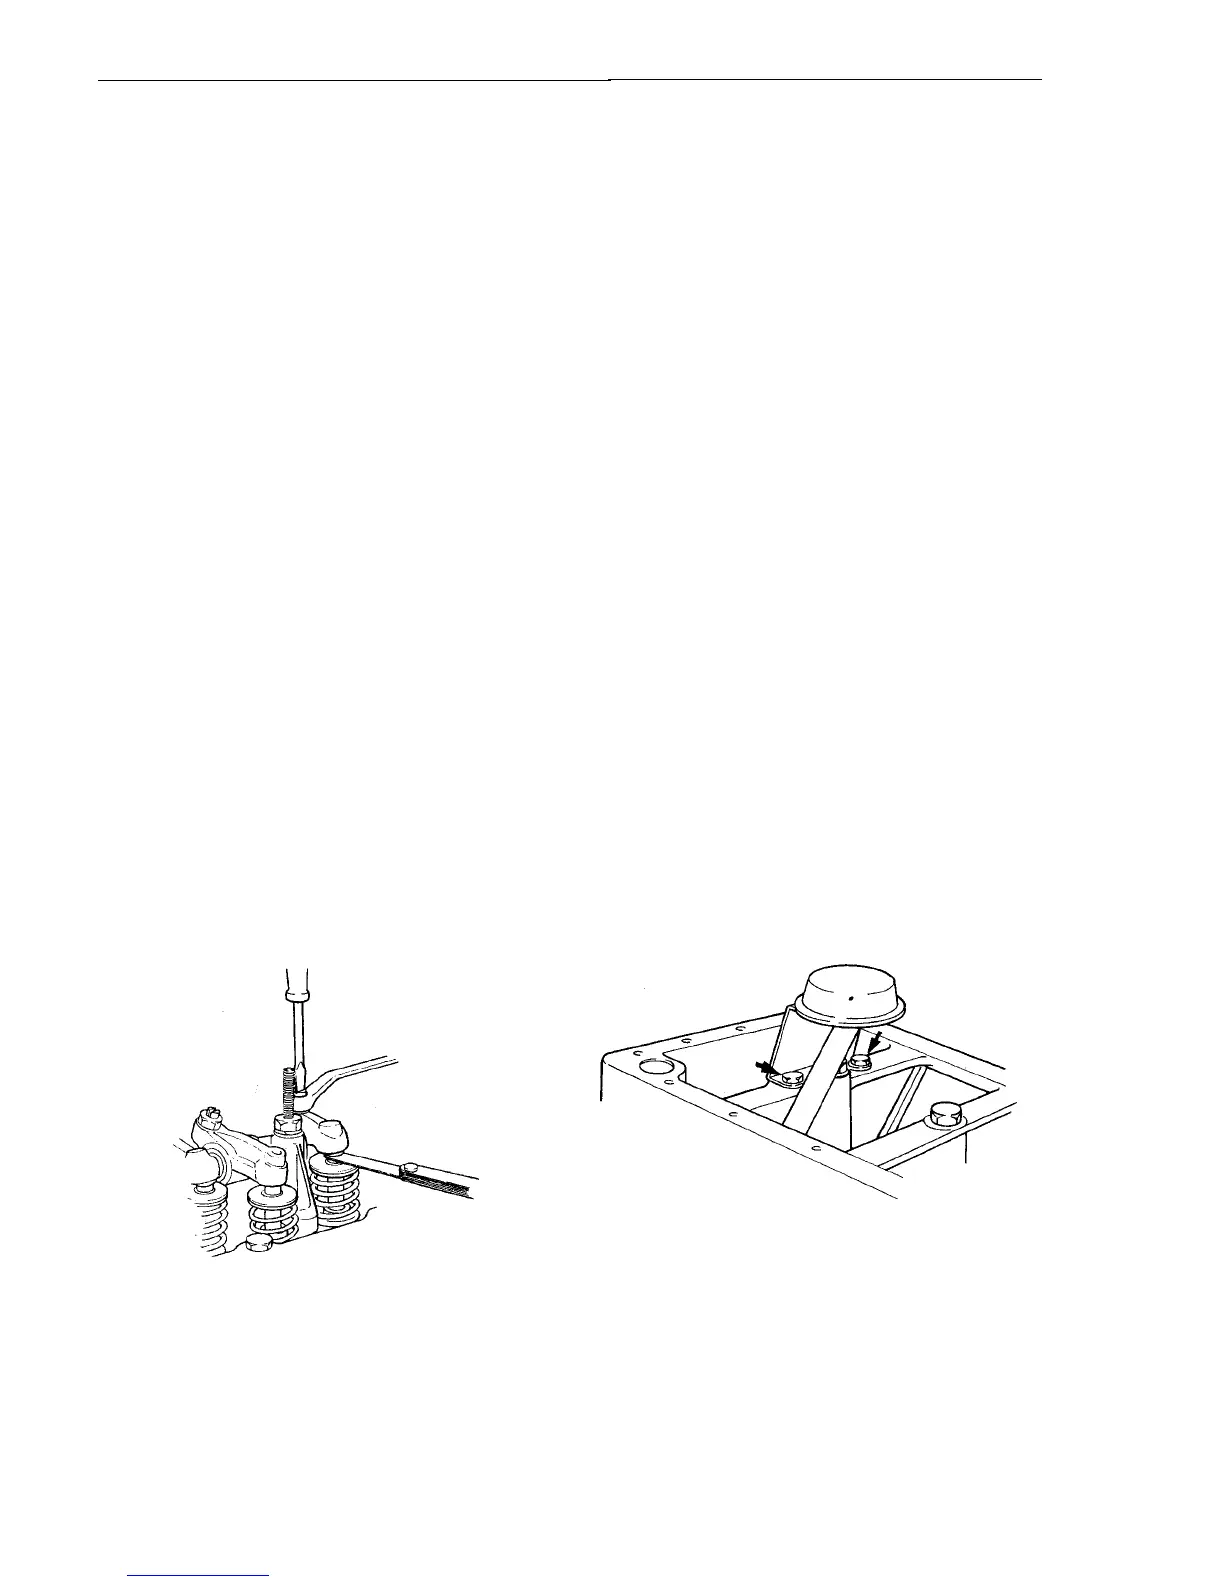
Fig. 37. Adjusting the valves
3.
MD2O10:
Check and adjust if necessary the valve
clearance for cylinder No. 1.
Pull round the crankshaft 180° (1/2 turn) clockwise
(see from front) and adjust the clearance for cylin-
der No. 2.
3 4
MD2020. MD2030. MD2040:
Check and adjust if
necessary the valve clearance for cylinder No. 1,
and the clearance for the outlet valve on cylinder
No. 2.
Pull round the crankshaft 240° (2/3 turn) anti-clock-
wise
(seen from front) and adjust the clearance for
cylinder No. 3 and the clearance for the inlet valve
on cylinder No. 2.
Clean the valve cover and fit it. Replace the seal if
damaged. Test run the engine and check that no
l
eakage occurs.
Dismantling of piston, piston rings and
connecting rod
1.
Empty the cooling system and drain or syphon out
the engine oil.
2.
Dismantle the cylinder head. See "Dismantling of
cylinder head" on page 25 and 26.
Fig. 38. Dismantling of oil strainer with induction
manifold
3.
Remove the sump and plate` over the sump.
Remove the oil pump's induction manifold.
There is no plate on the MD2O10-40C.
Engine body
19. Fit the relay box.
4.
20.
MD2O10, MD2020: Fit the alternator and clamp. Fit
the drive belt.
I
Note:
I
t should be possible to press in the belt ap-
prox. 10 mm (.40 in) between the pulleys.
21.
Connect the hose to the sea water pump and tigh-
ten'the clip. Connect the exhaust pipe.
22. Fill with refrigerant. See "Replenishment of refrige-
ra t on page 64.
23.
Connect the battery cables. Open the fuel cocks
and bottom valve. Start the engine and check that
5.
no leakage occurs.