8
9
Getting Started
Getting Started
Installation
Installation
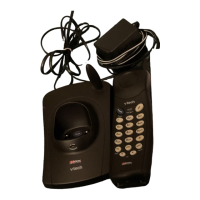
4. Charge the Handset Battery
Place the handset in the base. Charge the battery for at least 15 hours the
first time.
NOTE: If the phone will not be used for a long period of time, remove the battery
to prevent possible leakage.
5. Check for Dial Tone
After the batteries are charged, pick up the handset and press PHONE; you
should hear a dial tone.
6. Set the Dial Mode
If you have touch tone service, the phone is ready to use as soon as the
battery is charged. If you have pulse (rotary) service, you’ll need to change the
dial mode.
• Press PROG.
• Press or until the screen displays DIAL MODE: and the
currently selected mode.
• Press SELECT. The current setting blinks.
• Press to select TONE or PULSE.
• Press SELECT to save.
7. Set Time and Date
If you subscribe to CID service, the date and time will be set automatically with
the first incoming call. If you do not have CID service, you can set the date and
time manually:
• Press PROG/CHAN, then press or until DATE/TIME is displayed.
Press SELECT.
• The month is flashing. Press or until the screen displays the correct
month. Press SELECT.
• The day is flashing. Press or until the screen displays the correct
day. Press SELECT.
• The hour is flashing. Press or until the screen displays the correct
hour. Press SELECT.
• The minute is flashing. Press or until the screen displays the correct
minute. Press SELECT.
• AM or PM is flashing. Press or to choose between AM or
PM.Press SELECT.
8. Set Language Mode
• Press PROG/CHAN, then press or until LANGUAGE is displayed.
Press SELECT.
• The current setting blinks.Press or until the screen displays the
correct language (English, Espanol or French).
• Press SELECT to save your selection.
Your t 2453 base unit is designed to mount on a standard telephone wall plate.
Wall mounting is optional.
1. Open the hinged wall mount bracket on the underside of the base, then
swivel it down and lock it into place as shown in the diagram above.
2. Run the power and telephone cords through the slot, then connect them to
the jacks located on the underside of the base.
3. Plug the AC adapter into an electrical outlet. If the battery has not been
previously charged, place the handset in the base, and allow it to charge for
15 hours (or overnight). Connect the telephone line cord to the wall jack.
4. Mount the base on the wall. Position the base unit so the mounting studs will
fit into the holes on the wall mount bracket. Slide the base unit down on the
mounting studs until it locks into place.
3
2
1