EasyManua.ls Logo

Wali M001LP - User Manual

Wali M001LP
2 pages
Print Icon
To Next Page IconTo Next Page
Loading...
M001LP
WARNING
USE OF TIPOVER RESTRAINTS MAY ONLY REDUCE, BUT NOT ELIMINATE RISK OF TIP OVER.
SMALL PARTS- NOT FOR CHILDREN UNDER 3 YEARS. ADULT SUPERVISION IS REQUIRED.
If you do not understand these directions, or if you have any doubts about the safety of the installation, please call a
qualified technician. Check carefully to make sure there are no missing or defective parts. Improper installation may
cause damage or serious injury. Do not use this product for any purpose that is not explicitly specified in this manual.
Do not exceed weight capacity. We cannot be liable for damage or injury caused by improper mounting, incorrect
assembly or inappropriate use.
SERIOUS OR FATAL CRUSHING INJURIES CAN OCCUR FROM TIPOVER. TO HELP PREVENT TIPOVER:
Single Mount With Laptop Tray
75x75\100x100
INSTALLATION MANUAL
1-844-SATTLER (18447288537)
support@walielectric.com
www.walielectric.com
(10kg/22lbs)x2
RATED
TIPOVER WARNING
● NEVER ALLOW CHILDREN TO CLIMB, STAND, HANG, OR PLAY ON ANY PART OF MONITOR OR STAND.
● USE TIPOVER RESTRAINT OR ANCHOR STAND TO WALL.
Supplied Parts List
Pole
a (x1)
C-Clamp Brace
c (x1)
C-Clamp
b (x1)
VESA Plate
e (x2)
M8x12 Bolt
g (x2)
Nut
h (x2)
M5x14 Bolt
f (x3)
Support Plate
j (x1)
Spring Washer
l (x1)
M10 Washer
k (x1)
M10 Bolt
i (x1)
Grommet Base Plate
m (x1)
Wire Clip
n1 (x2)
Allen Key
o (x1)
Wire Clip
n2 (x3)
M4 Spacer
s (x8)
M4x30 Bolt
r (x8)
Wrench
p (x1)
M4x12 Bolt
q (x8)
Swivel Arms
d (x1)
Laptop Tray
t (x1)
M4 Nut
v (x4)
M4x10 Bolt
u (x4)
Option A : Clamp Installation
1. Connect Pole a and C-Clamp Brace c from the bottom using M5x14 Bolt f and
tighten with Allen Key 3mm o .
1
2. Select the preferred height according to your desk thickness. Connect C-Clamp b to C-Clamp
Brace c using M8x12 Bolt g and tighten with Allen Key 5mm o . Rotate the hand knob
clockwise to fasten for stability.
Hand Knob
a
c
c
c
f
o
o
o
g
g
b
b
a c
f
o
Option B : Grommet Base Installation
1. Place Pole a onto Grommet Base Plate m . Connect them from the bottom using
M5x14 Bolt and tighten with Allen Key 3mm .
o
o
a
a
m
m
f
f
Laptop : 17” Max
Monitor: 27” Max
Washer
w (x4)
Anti-skid Pad
x (x4)
Question and Answer IconNeed help?

Do you have a question about the Wali M001LP and is the answer not in the manual?

Summary

Supplied Parts List

Installation Options

Option A: Clamp Installation

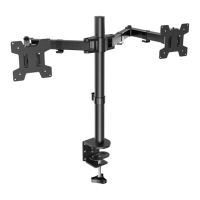
Instructions for installing the mount using a clamp mechanism to the desk.

Option B: Grommet Base Installation

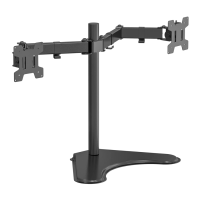
Instructions for installing the mount using a grommet base on the desk.

Grommet Hole Installation

2 a. Existing Grommet Hole Installation

Securing the pole to the mounting surface using existing grommet holes.

2 b. Self-drilled Grommet Hole Installation

Drilling a new hole for grommet installation and securing the pole.

Tray and Monitor Mounting

Option A: Laptop Tray Installation

Attaching the VESA plate to the laptop tray and adding anti-skid pads.

Option B: Monitor Mount Installation

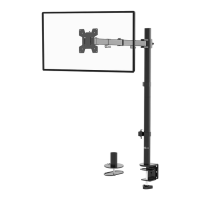
Selecting and attaching VESA plate to the monitor, considering screen type.

Overview

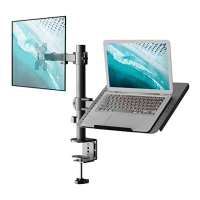
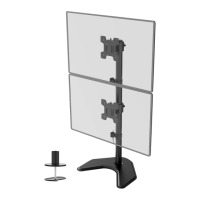
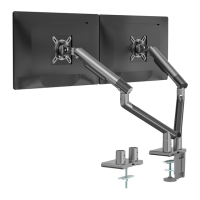
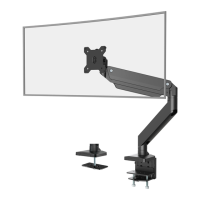
This document describes the installation and features of the WALI Single Mount with Laptop Tray (M001LP), a desk-mounted solution designed to support both a laptop and a monitor.

Function Description:

The WALI M001LP is a versatile desk mount system that allows users to elevate a laptop and a monitor, freeing up desk space and promoting ergonomic viewing angles. It features a single pole design with two swivel arms, one for a laptop tray and the other for a monitor. The mount offers flexible adjustment capabilities including height, tilt, swivel, and rotation, enabling users to customize their setup for optimal comfort and productivity. The system supports two primary installation methods: clamp installation for desks with an edge, and grommet base installation for desks with an existing hole or where a new hole can be drilled. Cable management clips are integrated to keep cables organized and out of sight.

Important Technical Specifications:

  • Model: M001LP
  • Weight Capacity: Rated for 10kg (22lbs) per arm (total 20kg/44lbs for two arms).
  • VESA Compatibility: 75x75mm and 100x100mm.
  • Laptop Compatibility: Supports laptops up to 17 inches.
  • Monitor Compatibility: Supports monitors up to 27 inches.
  • Installation Options:
    • Clamp Installation: Suitable for desks with an edge, adjustable for various desk thicknesses.
    • Grommet Base Installation:
      • Existing Grommet Hole: Utilizes an existing hole in the desk.
      • Self-drilled Grommet Hole: Requires drilling a 3/8" (10mm) diameter hole.
  • Adjustments:
    • Height Adjustment: Adjustable along the central pole.
    • Tilt: +/- 15 degrees for monitor and laptop tray.
    • Swivel: 190 degrees at the arm joints.
    • Rotation: 360 degrees for the monitor and laptop tray.
  • Materials: Includes various bolts (M5x14, M8x12, M10, M4x12, M4x30, M4x10), nuts (M4, M10), washers (M10, spring, anti-skid pad), spacers (M4), and tools (Allen keys, wrench).
  • Cable Management: Integrated wire clips (n1, n2) to route and organize cables along the arms and pole.

Usage Features:

  • Ergonomic Design: Elevates laptop and monitor to eye level, reducing strain on the neck and eyes.
  • Space Saving: Frees up valuable desk space by lifting devices off the surface.
  • Dual Device Support: Accommodates both a laptop and a monitor on a single mount.
  • Flexible Positioning: Swivel arms allow for easy repositioning of devices, enabling sharing screens or adjusting for different tasks.
  • Tilt Functionality: The laptop tray and monitor mount can be tilted +/- 15 degrees to reduce glare and optimize viewing angles.
  • Rotation: The monitor and laptop tray can be rotated 360 degrees, allowing for portrait or landscape orientation.
  • Easy Installation: Provides clear, step-by-step instructions for both clamp and grommet base installations, with all necessary hardware and tools included (except a screwdriver for VESA plate attachment and a drill for self-drilled grommet hole).
  • Cable Management: Built-in wire clips help maintain a tidy workspace by routing power and data cables along the mount structure.
  • Laptop Tray Features: Includes anti-skid pads to secure the laptop and prevent it from sliding.

Maintenance Features:

  • Adjustments: Allen keys are provided for tightening various bolts and adjusting tilt angles, ensuring the mount remains stable and secure over time.
  • Security Nut: A security nut is highlighted as important for stability when rotating the monitor, indicating a point for periodic check and tightening.
  • Safety Warning: Emphasizes the importance of not exceeding weight capacity and warns against children climbing or hanging on the stand, which is a critical aspect of long-term safe use and "maintenance" of safety.
  • Pre-adjustment Removal: Advises removing the laptop when making adjustments to the laptop tray, suggesting a best practice for safety and ease of adjustment.
  • Regular Checks: While not explicitly stated as "maintenance," the instructions imply that users should periodically check the tightness of bolts, especially after initial installation and after making significant adjustments, to ensure continued stability and safety.

Wali M001LP Specifications

General IconGeneral
BrandWali
ModelM001LP
CategoryRacks & Stands
LanguageEnglish

Related product manuals