EasyManua.ls Logo

Wali GSM001XL - User Manual

Wali GSM001XL
12 pages
Print Icon
To Next Page IconTo Next Page
Loading...
INSTALLATION MANUAL
support@walielectric.com
75x75/100x100
35"
MAX
(1~15kg)
(2.2~33lbs)
RATED
GSM001XL
Single Monitor Desk Mount
Question and Answer IconNeed help?

Do you have a question about the Wali GSM001XL and is the answer not in the manual?

Summary

Product Overview and Safety

Product Identification and Specifications

Details the product model, VESA compatibility, and weight capacity for the single monitor desk mount.

General Safety Warnings

Crucial safety precautions, including tipover prevention and proper usage guidelines for the monitor stand.

Supplied Parts List

Comprehensive inventory of all included parts and hardware necessary for assembling the desk mount.

Installation Steps

Step 1: Measure Mounting Surface

Guide to measuring desk thickness for correct clamp or grommet installation.

Step 2: Clamp Installation

Steps for assembling the desk mount using the clamp installation method.

Step 2: Clamp Installation Continued

Continuation of clamp installation steps, including height adjustment and final positioning.

Step 2: Grommet Base Installation

Steps for assembling the desk mount using the grommet base installation method.

Step 3: Connect Lower Arm

Attaching the first arm segment to the base unit of the monitor mount.

Step 4: Connect Upper Arm

Connecting the second arm segment to the first arm segment.

Step 5: VESA Plate Attachment

Selecting and attaching the correct bolts and washers to the VESA plate for monitor mounting.

Step 6: Mount Monitor to Arm

Securing the assembled monitor onto the desk mount arm and ensuring stability.

Step 7: Adjust Gas Spring Tension

Tuning the arm's gas spring tension for optimal monitor support and movement.

Step 8: Adjust Tilt Tension

Adjusting the monitor's tilt angle resistance for desired viewing positions.

Step 9: Cable Management - Removal

Procedure for removing cable covers to prepare for cable routing.

Step 10: Cable Management - Routing

Guiding cables through the monitor arm and reattaching the cable covers.

Step 11: Safety - Monitor Positioning

Important safety note on monitor placement to prevent instability and tipping.

Step 12: Final Adjustments and Storage

Fine-tuning monitor position and storing Allen keys in the decor cover holder.

Overview

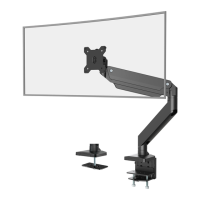
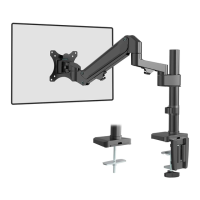
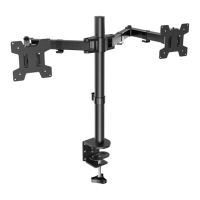
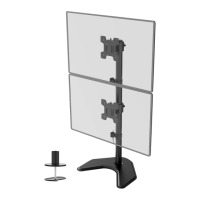
This document is an installation manual for the WALI Single Monitor Desk Mount, model GSM001XL.

Function Description:

The WALI Single Monitor Desk Mount is designed to securely hold a single computer monitor on a desk, providing adjustable positioning for optimal viewing. It offers two primary installation methods: C-Clamp and Grommet Base, catering to different desk types and user preferences. The mount features a gas spring mechanism for easy and smooth adjustment of monitor height, tilt, swivel, and rotation, enhancing ergonomic comfort and workspace efficiency.

Important Technical Specifications:

  • Model: GSM001XL
  • VESA Mounting Compatibility: 75x75mm and 100x100mm
  • Maximum Monitor Size: 35 inches
  • Weight Capacity: 1-15 kg (2.2-33 lbs)
  • Desk Thickness Compatibility (C-Clamp): 0.4"-3.3"
  • Desk Thickness Compatibility (Grommet): 0.4"-1.9"
  • Swivel Range: Up to +/-180° (with optional restriction to +/-90°)
  • Tilt Range: Adjustable
  • Rotation: 360° (implied by the ability to rotate for best viewing angle)
  • Materials: Includes metal components for the base, arms, and VESA plate, along with plastic covers and anti-skid pads.

Usage Features:

  • Installation Flexibility:
    • C-Clamp Installation (Option A): Attaches to the edge of a desk. The C-Clamp Brace (I) connects to the Base (A) using bolts (K) and an Allen Key (M). An Anti-Skid Pad (G) is applied to the base for stability. The clamp bolts are loosened to adjust to desk thickness, then tightened with an Allen Key (N) after positioning the base on the desktop. A Decor Cover (H) is attached to the back of the C-Clamp Brace for a clean look.
    • Grommet Base Installation (Option B): Utilizes an existing desk hole. The Bottom Grommet Plate (F) connects to the Base (A) with bolts (K) and an Allen Key (M). An Anti-Skid Pad (G) is applied. The clamp bolt is removed from the C-Clamp (J), and the Base (A) is placed over the desk hole. The Support Plate (E) is guided through the bolt, and the bolt is tightened to the base with an Allen Key (N) for stability.
  • Monitor Attachment: The VESA Plate (D) is attached to the back of the TV/Monitor using either M4x12 bolts (M-A) or M5x12 bolts (M-B) and D5 Washers (M-C), depending on the monitor's threading. Users are instructed to hand-thread screws first to determine the correct size.
  • Arm Assembly:
    • Arm (B) connects to the Base (A), and its lower screw is tightened with Allen Key 3mm (L). Optionally, the upper screw can be tightened to restrict swivel movement to +/-90° instead of +/-180°.
    • Arm (C) connects to Arm (B) and is tightened with Allen Key 3mm (L).
  • Monitor Mounting: After assembling the VESA plate to the monitor, the assembled TV/Monitor is placed onto the Arm (C) by pulling a buckle, ensuring stability.
  • Adjustability:
    • Gas Spring Tension Adjustment (Step 7): The gas spring tension can be adjusted using Allen Key 6mm (N) to suit the monitor's weight. Turning clockwise (-) reduces tension for lighter screens, while turning counter-clockwise (+) increases tension for heavier screens. This adjustment is performed with the arm held at a horizontal level.
    • Tilt Adjustment (Step 8): The tilt tension can be adjusted using Allen Key 6mm (N).
    • Swivel, Tilt, and Rotation (Step 12): The monitor can be manually swiveled (up to +/-180°), tilted (+/-45°), and rotated (360° implied by the diagram) for the best viewing angle.
  • Cable Management (Steps 9 & 10): The mount includes cable cases on the arms. Users can screw out bolts to remove the cable cases, guide cables through, and then replace the cases and bolts for a tidy setup.
  • Safety Warning (Step 11): Users are advised not to extend the monitor behind the desk, as this can cause instability and tip the desk over.

Maintenance Features:

  • Allen Key Storage: The Allen Keys (L, M, N) can be stored in the holder of the Decor Cover (H) for future convenience, ensuring they are readily available for adjustments.
  • Regular Checks: While not explicitly stated as "maintenance," the need for Allen Keys for adjustments implies that users might periodically need to re-tighten or adjust the mount as needed, especially after changing monitors or desired positions.

Safety Information:

The manual includes a "WARNING!" section emphasizing the importance of understanding directions, checking for missing/defective parts, and not exceeding weight capacity. It also features a "TIPOVER WARNING" highlighting the risk of serious crushing injuries if children climb, stand, hang, or play on the monitor or stand. It strongly recommends using tipover restraints or anchoring the stand to the wall. Small parts are noted as a choking hazard for children under 3 years, requiring adult supervision.

Wali GSM001XL Specifications

General IconGeneral
BrandWali
ModelGSM001XL
CategoryRacks & Stands
LanguageEnglish

Related product manuals