Do you have a question about the Wali M00LP and is the answer not in the manual?
Connect the pole to the C-Clamp Brace using M5x14 Bolt and tighten.
Connect M10 Hand Knob to C-clamp Brace with screw and washer, then rotate for stability.
Place the pole onto the Grommet Base Plate and secure from the bottom.
Install the pole through an existing grommet hole using the hand knob for stability.
Drill a 3/8" hole and install the pole through it using the hand knob for stability.
Attach Swivel Arm to the Pole, adjust height, and secure with Allen Key.
Connect VESA Plate to Laptop Tray using M4x12 Bolts and D4 Nuts.
Secure the assembled tray onto the Swivel Arm using the M6 Nut.
Guide cables through clips and store Allen Keys in the Wire Clip.
Manually swivel, tilt, and rotate for the best viewing angle.
Remove your laptop/monitor when making adjustments for safety.
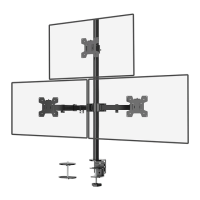
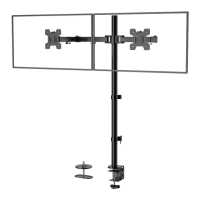
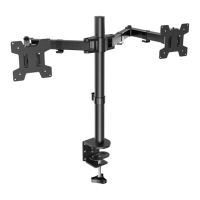
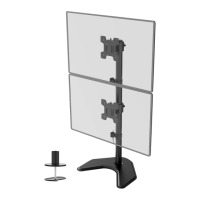
The device is a desk mount designed to hold a laptop tray or a monitor, providing an ergonomic solution for workspaces. Its primary function is to elevate and position a laptop or monitor, freeing up desk space and allowing for adjustable viewing angles to enhance user comfort and productivity. The mount supports two main installation methods: clamp installation for desks with an edge, and grommet base installation for desks with existing grommet holes or where a new hole can be drilled.
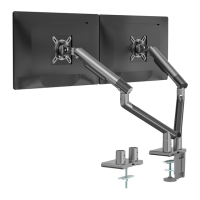
For clamp installation, the device securely attaches to the edge of a desk. This method involves connecting the main pole to a C-Clamp Brace using bolts and an Allen key, ensuring a stable base. The C-Clamp is then secured to the desk by tightening an M10 Hand Knob, which allows for adjustment based on desk thickness. An EVA pad is included to protect the desk surface and provide a non-slip grip. This setup is ideal for users who prefer not to drill into their desks or have a suitable desk edge for clamping.
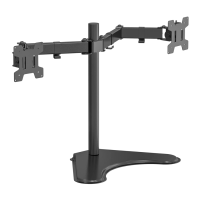
The grommet base installation offers an alternative for desks with pre-existing holes or for users who prefer a more permanent and flush mounting solution. This method involves placing the main pole onto a Grommet Base Plate and securing it from the bottom with bolts and an Allen key. Similar to the clamp method, an EVA pad is used to protect the desk and ensure stability. For desks without an existing grommet hole, the manual provides instructions for self-drilling a 3/8-inch (10mm) diameter hole, allowing for flexible placement on the desk surface. The hand knob is then used to fasten the pole through the support plate and the grommet hole, ensuring a secure attachment.
Once the base is installed, the swivel arm is attached to the pole. This arm is a crucial component, allowing for height adjustment and articulation of the mounted device. Wire clips are provided to manage cables, keeping the workspace tidy and preventing clutter. These clips guide cables along the pole and swivel arm, contributing to a clean and organized setup. Allen keys, which are essential tools for assembly and adjustment, can also be stored in the wire clip for convenience.
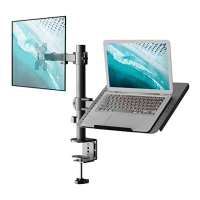
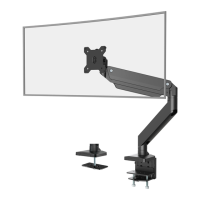
The device supports two primary mounting options: a laptop tray installation and a monitor mount installation. For laptop tray installation, a VESA plate is attached to the laptop tray using bolts and nuts, then secured with a screwdriver. Anti-skid pads are placed on the tray to prevent the laptop from sliding. The assembled laptop tray is then mounted onto the swivel arm and secured with an M6 nut, which is tightened with a wrench for stability. This setup allows the laptop to be elevated and positioned at an ergonomic height and angle.
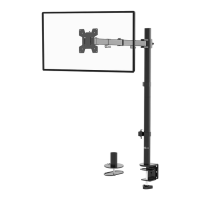
For monitor mount installation, the device utilizes the VESA plate directly, which is a standard interface for mounting monitors. While the specific steps for attaching a monitor are not detailed in the provided excerpt, the presence of a VESA plate indicates compatibility with a wide range of monitors. Both mounting options benefit from the swivel arm's adjustability, allowing for manual swivel, tilt, and rotation of the tray or monitor. The tilt range is specified as +15° to -15°, and rotation up to 90°, providing extensive flexibility for optimal viewing angles.
Maintenance features primarily involve ensuring the security of the setup. Users are advised to make sure the security nut is installed before rotating the monitor or laptop. When making adjustments, especially to the tilt or rotation, it is recommended to remove the laptop from the tray for safety. This prevents accidental drops or damage during adjustments. The overall design emphasizes ease of assembly and adjustment, with clear instructions for each step and the provision of all necessary tools like Allen keys and a wrench.
The device is designed with safety in mind, including a "TIPOVER WARNING" that highlights the risk of serious or fatal crushing injuries from tipover. To mitigate this risk, users are cautioned against allowing children to climb, stand, hang, or play on any part of the monitor or stand. It is also recommended to use a tipover restraint or anchor the stand to the wall, although these restraints only reduce, not eliminate, the risk. The product contains small parts, making adult supervision necessary for children under 3 years old. The weight capacity is rated at 10kg (22lbs), and users are warned not to exceed this limit to prevent damage or injury. The mount is compatible with laptops up to 17 inches and monitors up to 27 inches, with VESA patterns of 75x75mm and 100x100mm.
| Material | Steel |
|---|---|
| Adjustable Height | Yes |
| Color | Black |
| VESA Compatibility | 75x75mm, 100x100mm |
| Screen Size | Up to 27 inches |