59
Maintenance Instructions CHECKING/SERVICING
WARNING
DO NOT try to straighten a blade that is
bent. NEVER weld a broken or cracked
blade. ALWAYS replace with a new blade
to assure safety.
4. If the blade cutting edge is dull or nicked, it
should be sharpened. Remove blades for
sharpening by grasping the end of the blade us-
ing a rag or a thick, padded glove, while loosen-
ing and removing the nut, lock washer, and at
washer that mounts the blade.
5. Grind cutting edge at the same bevel as the
original. Sharpen only the top of the cutting
edge to maintain sharpness.
NOTE: Blades can be sharpened with an elec-
tric blade sharpener, conventional electric grind-
er, or a hand le.
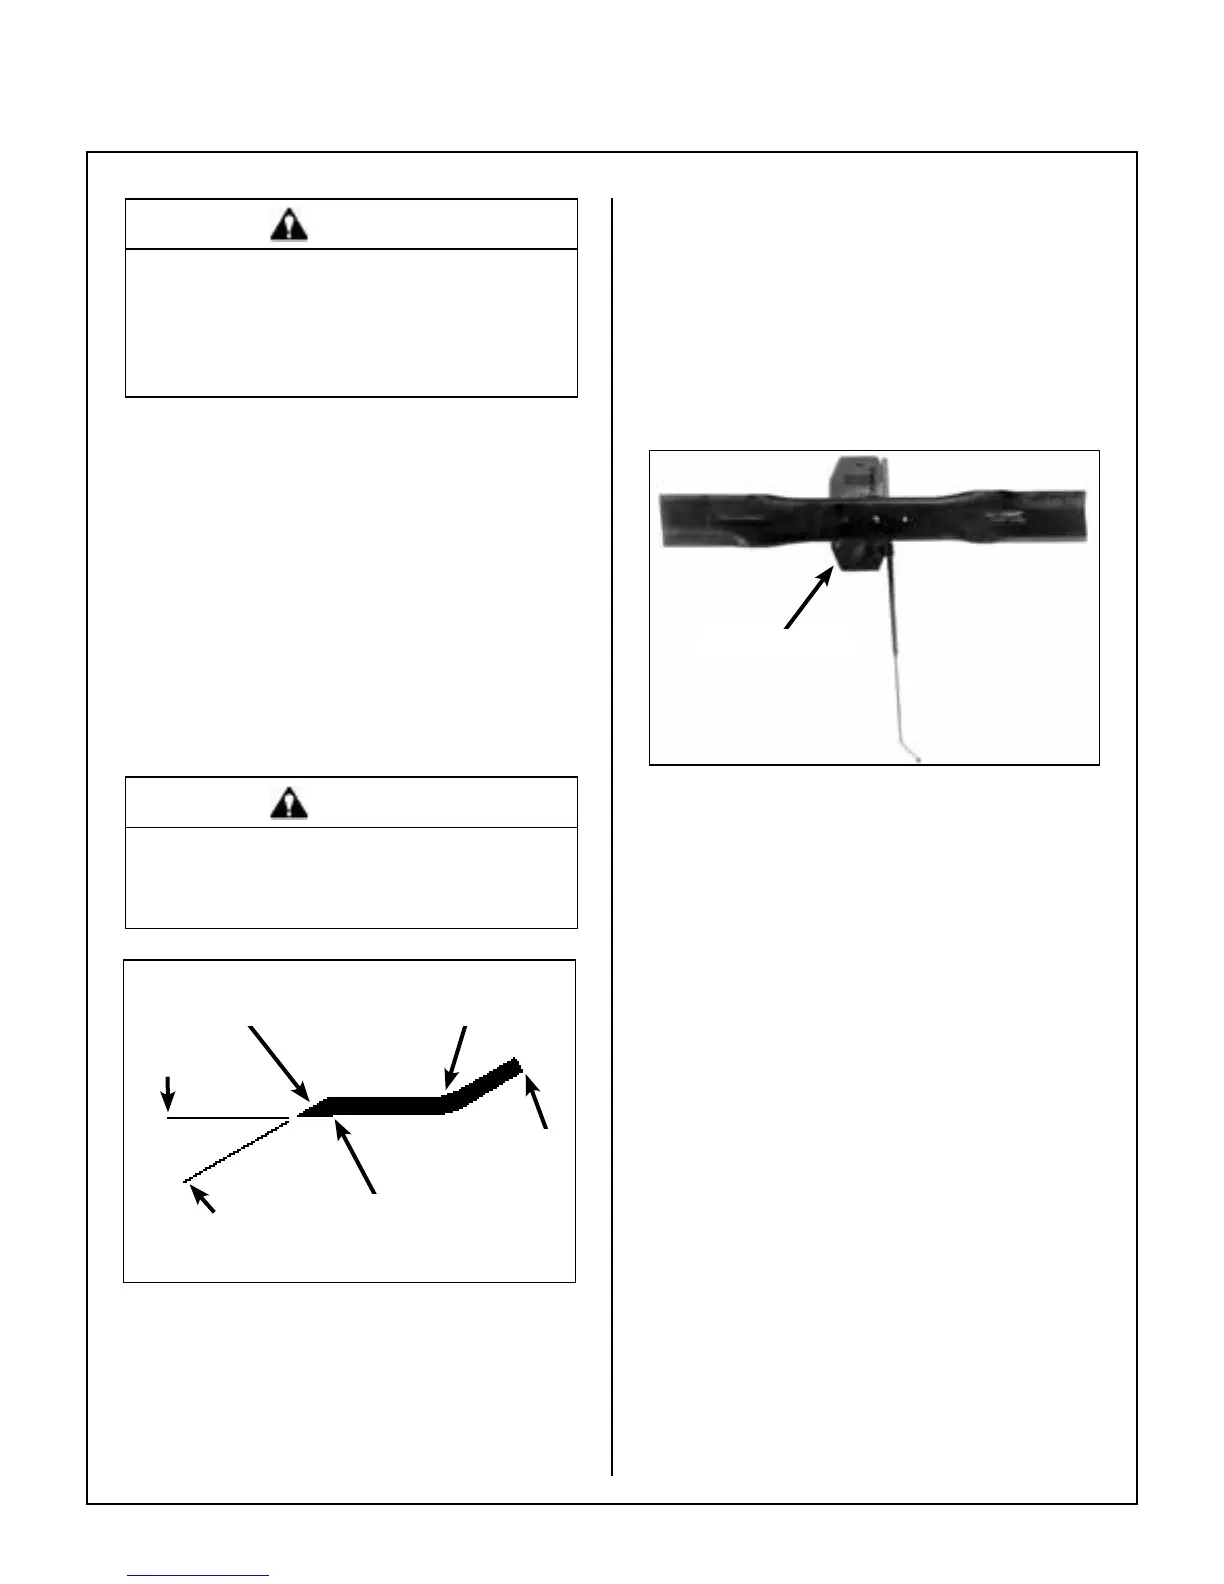
CAUTION
ALWAYS wear eye protection and gloves
when sharpening a blade.
Wing
Tip
Do Not Grind or
Sharpen on Underside
Intersection
Wear Area
Sharpen at
Original 30° Angle
30°
Mower Blade Prole for Sharpening
6. Check blade balance by positioning the blade
horizontally on a blade balancer or use a nail
or shaft through the center hole. If either end of
the blade rotates downward, grind (remove)
metal on that end until the blade will balance.
The blade is properly balanced when neither
end drops. Balance of a blade is generally
maintained by removing an equal amount of
material from each end of the blade when
sharpening.
Blade Balancer
Blade Balanced on Magnetic
Wall-Mounted Balancer
7. Mount the blade with wing tips pointing up into
the housing. For gear driven decks reinstall
the blade, washer, lock washer, and nut. Tight-
en the nut to 60 lb·ft (81 N·m). For belt driven
decks reinstall the spacer (if applicable), blade,
washer, and bolt. Tighten the bolt to 70 lb·ft
(90 N·m).
NOTE: When reinstalling blades on GHS models,
remember, the blades counter-rotate and the LH
and RH blades must not be switched. Check for
proper blade rotation before installing blades on the
deck. Refer to Blade Rotation illustrations shown
in Clogging Checklist in Operating Instructions for
correct blade rotation.