16 | P a g e
Wallgate Thrii®
PRODUCT MANUAL Issue 5_3
ORIGINAL INSTRUCTIONS
© 2013 Wallgate Ltd.
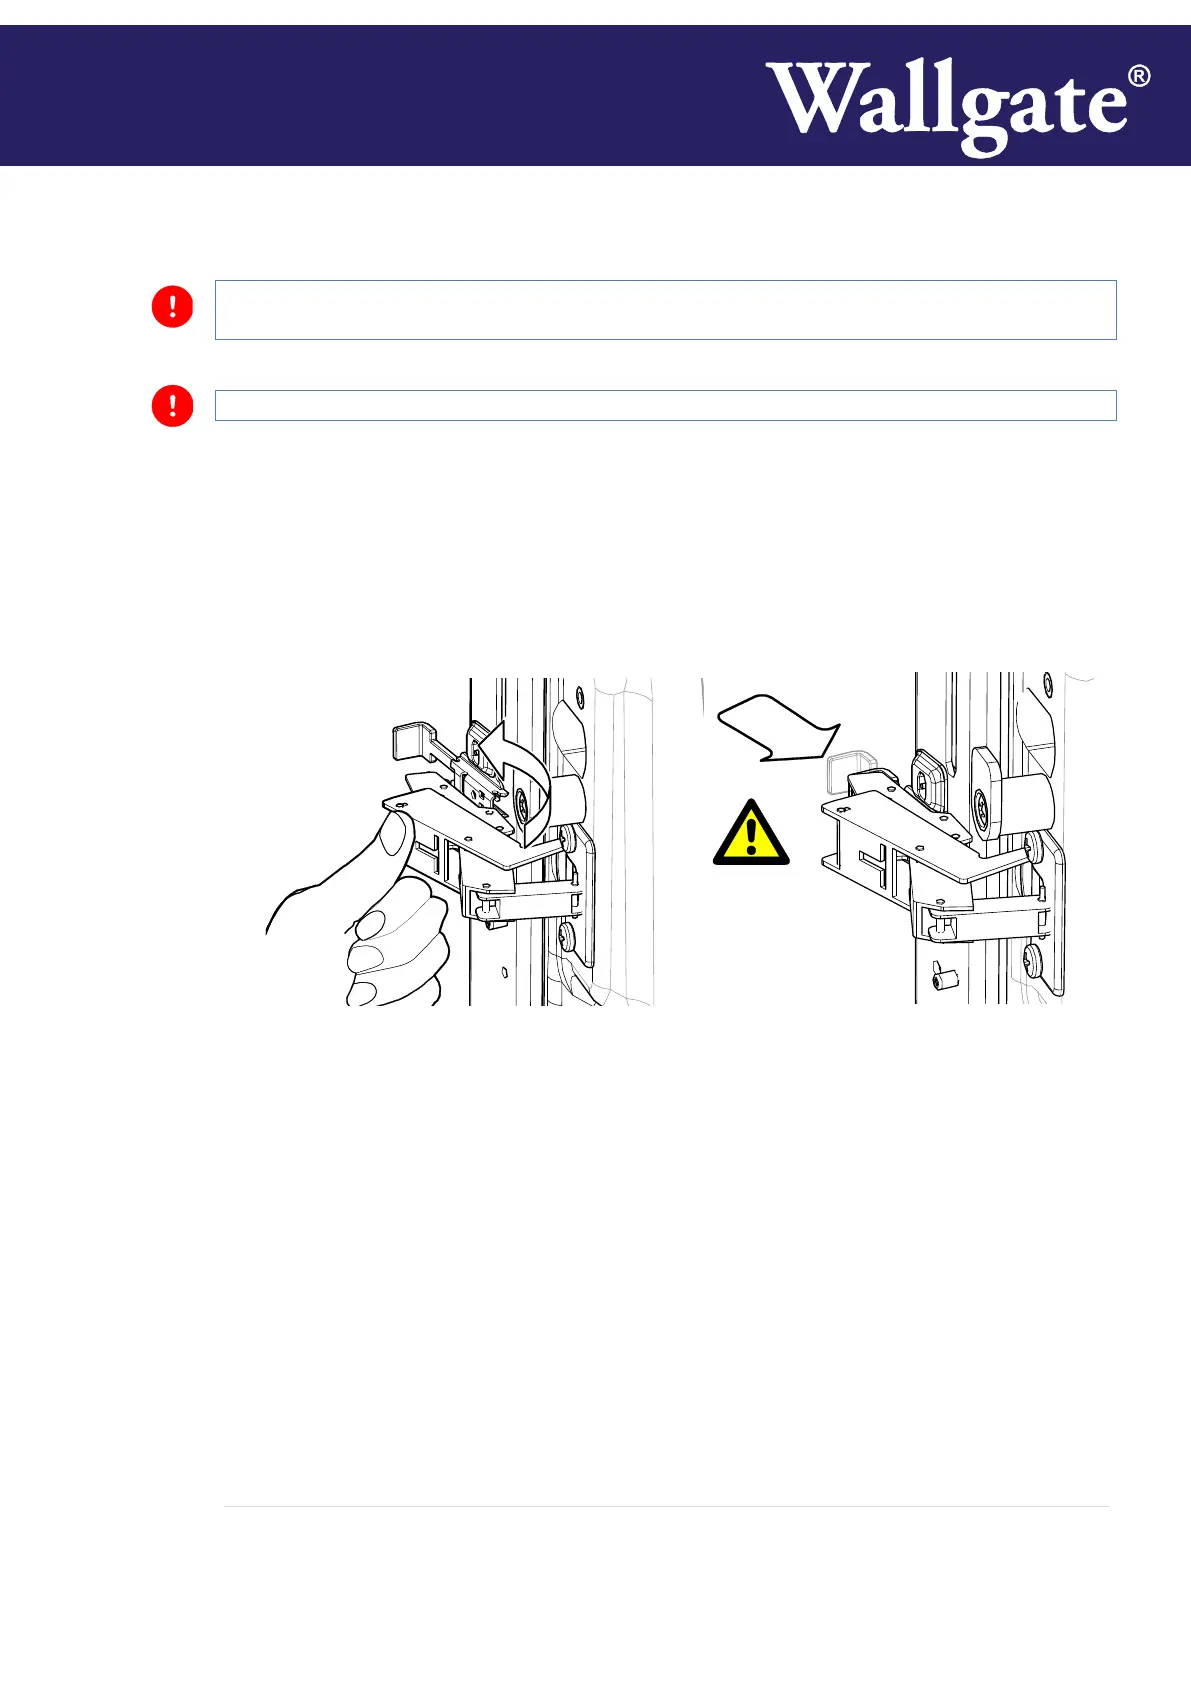
6.4 Mounting the fascia
Ensure that the fascia is fully supported until both hinges are fully engaged. Failure to do so may
damage the hinges
For ease of installation it is recommended to have at least two people carry out this operation
1. Remove the fascia from the packing box.
2. With the right-hand side of the fascia vertically aligned with the support frame and offered up in
the ‘open’ position (approximately 120°), extend the fascia hinges to the open position, align
andlocate hinge ends into the hinge side lock plates on the support frame and engage the two
parts to secure the two halves together. See Fig. 8
Fig.8 Hinge assembly Fig. 9 Hinge release spigot detail
3. Engage the ‘Hinge release lock’ spigot, fitted to each hinge to prevent accidental hinge latch
release see Fig.9
4. It is necessary to check the fascia alignment with the frame before proceeding further, as the
hinges may need adjustment. Carefully close the fasciaensuring the door opens and closes freely.
In the closed position, visually check the gap between the fascia and the wall along the hinged
edge, and adjust the hinges as appropriate to ensure an even fit using the adjustment screw on
the hinges see Fig. 10a. Do not over-tighten as this may result in the fascia damaging the wall
finish. Horizontal adjustment of the fascia door can be configured, (see Fig. 10b) however note
this is factory set.