SHUT DOWN - EVERY NIGHT
• Turn Cycle Selector to 0 and turn off the power from the wall.
•
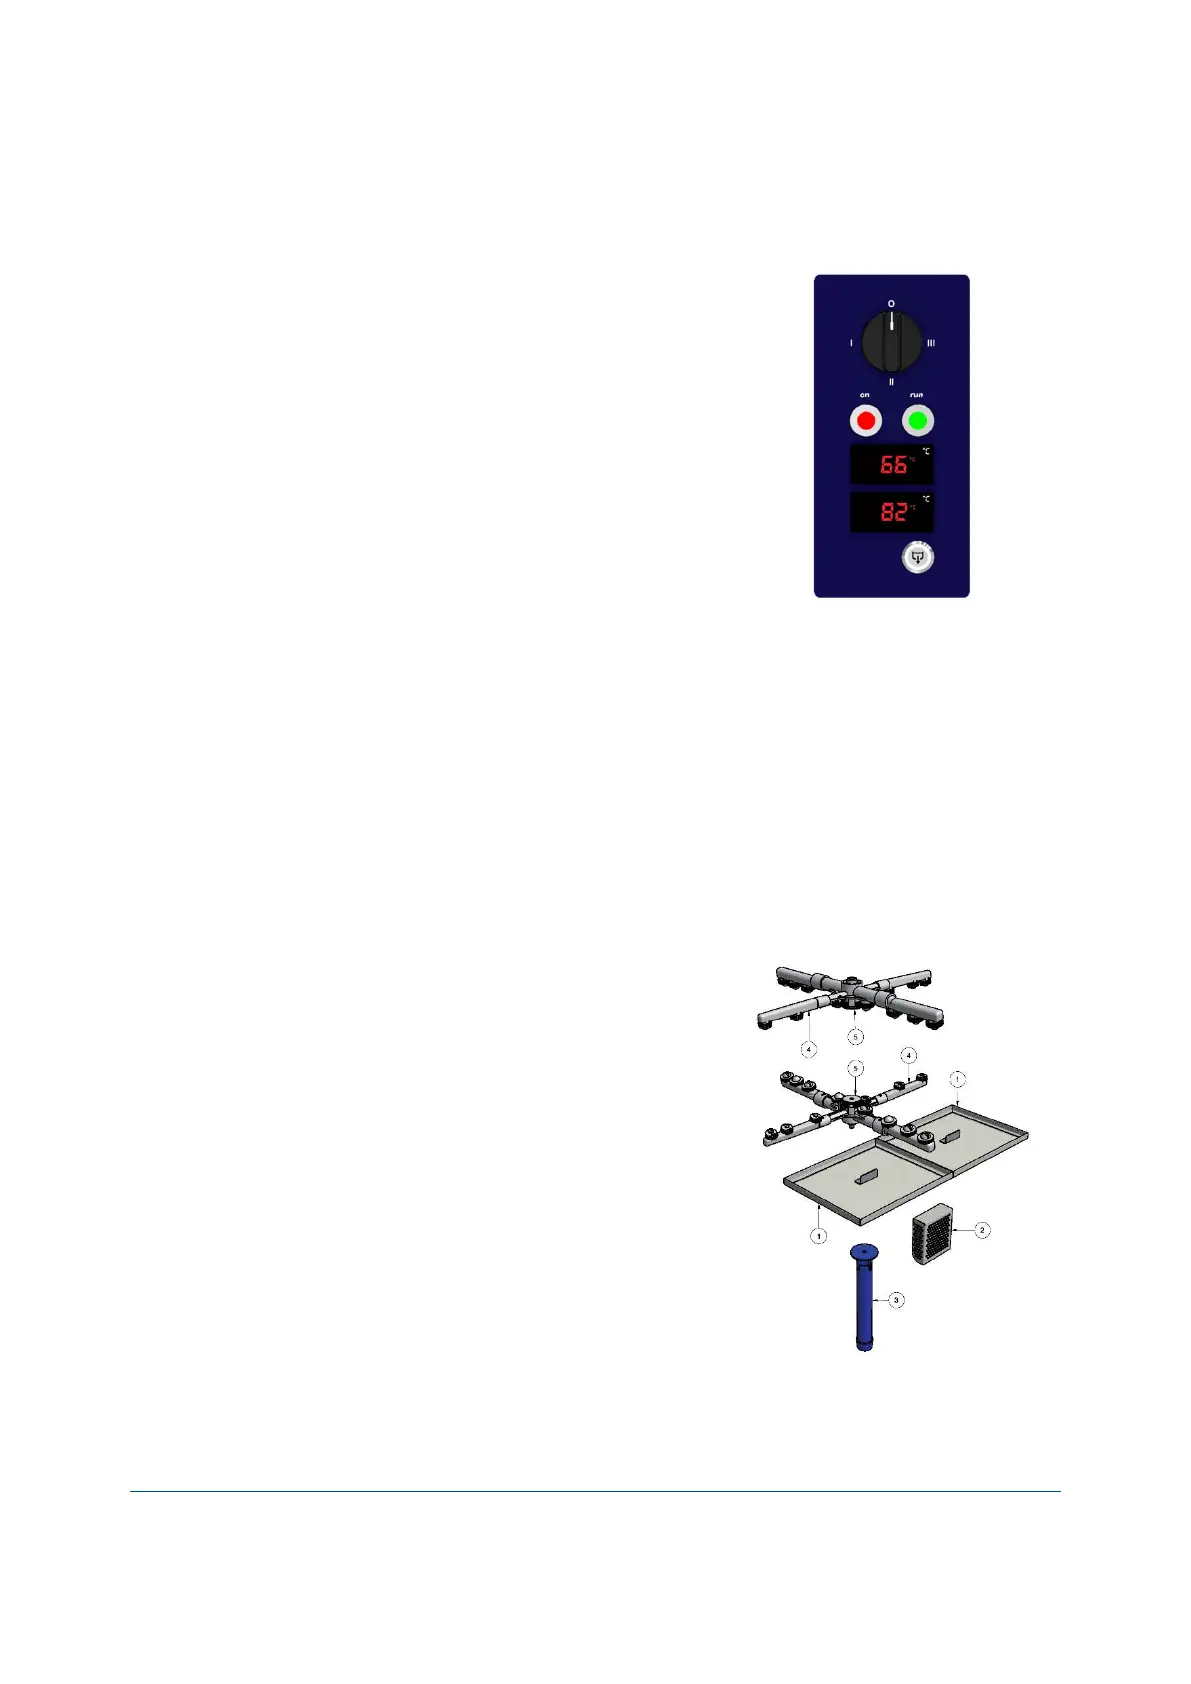
Remove Scrap Trays (1) and Upstand (3) to drain the Wash Tank.
• Once the Wash Tank is fully drained remove and rinse Wash Pump Filter (2) before
replacing back into the machine along with the Upstand (3) and Scrap Trays (1).
CLEANING – AT LEAST ONCE A WEEK
Remove, rinse and replace when machine has cooled down:
Scrap Trays 1
Wash Pump Filters 2
Drain Upstand 3
Wash & Rinse Arms 4
Thumb Screws 5
Inspect and clear all jets in the upper and lower
Wash/Rinse Arms using a small object such as a
toothpick where necessary to remove any
blockages prior to rinsing.
SUGGESTED BEST PRACTICE
Pre-rinse Scrape and/or rinse trays, plates & glasses in cool water.
Chemical Use a good quality non foaming commercial detergent and drying agent – do
not use domestic detergents which will cause the wash tank to foam.
7
Operator Use Guide
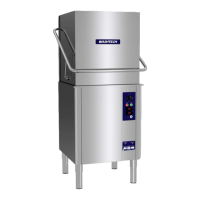
START
• Turn on at wall.
•
Ensure the Upstand (3) and Wash Pump Filter (2) are
firmly in place.
• Check the Scrap Trays (1) are in place and shut door.
• Turn the Selector Switch to any Cycle (I, II or III).
•
Power light glows red and machine fills automatically.
•
Once full, rinse heating starts.
OPERATION
•
Select required Cycle of I (1 minutes) , II (2 minutes) or
III (3 minutes).
• Load items into the machine and shut door.
•
Press Start Button to start machine.
• Start Button glows green while machine operates.
•
When Start Button goes out, the cycle is complete.
NOTE: The machine may be started while the rinse water
is being heated – the machine will continue to run the
wash cycle until the rinse water is up to temperature.
Wash Temp Gauge
Cycle Light
Selector Switch
Rinse Temp Gauge
Power On Light
Drain Switch