Required tools and materials
• Chemical-resistant, powder-free gloves
• Protective eyewear
• 1/4-inch open-end wrench
• Needle-nose pliers
• Flat-blade screwdriver
• T20 TORX driver
To prepare the CH-A for installation with the MS-bracket kit:
1. Stop any running mobile phase.
2. Power-off the sample manager.
3. If a column and APH or column stabilizer assembly are installed within the column
compartment, complete steps 4 through 9 to remove them from the compartment.
4. Detach the column's eCord fob from the receptacle on the right-hand side of the column
heater.
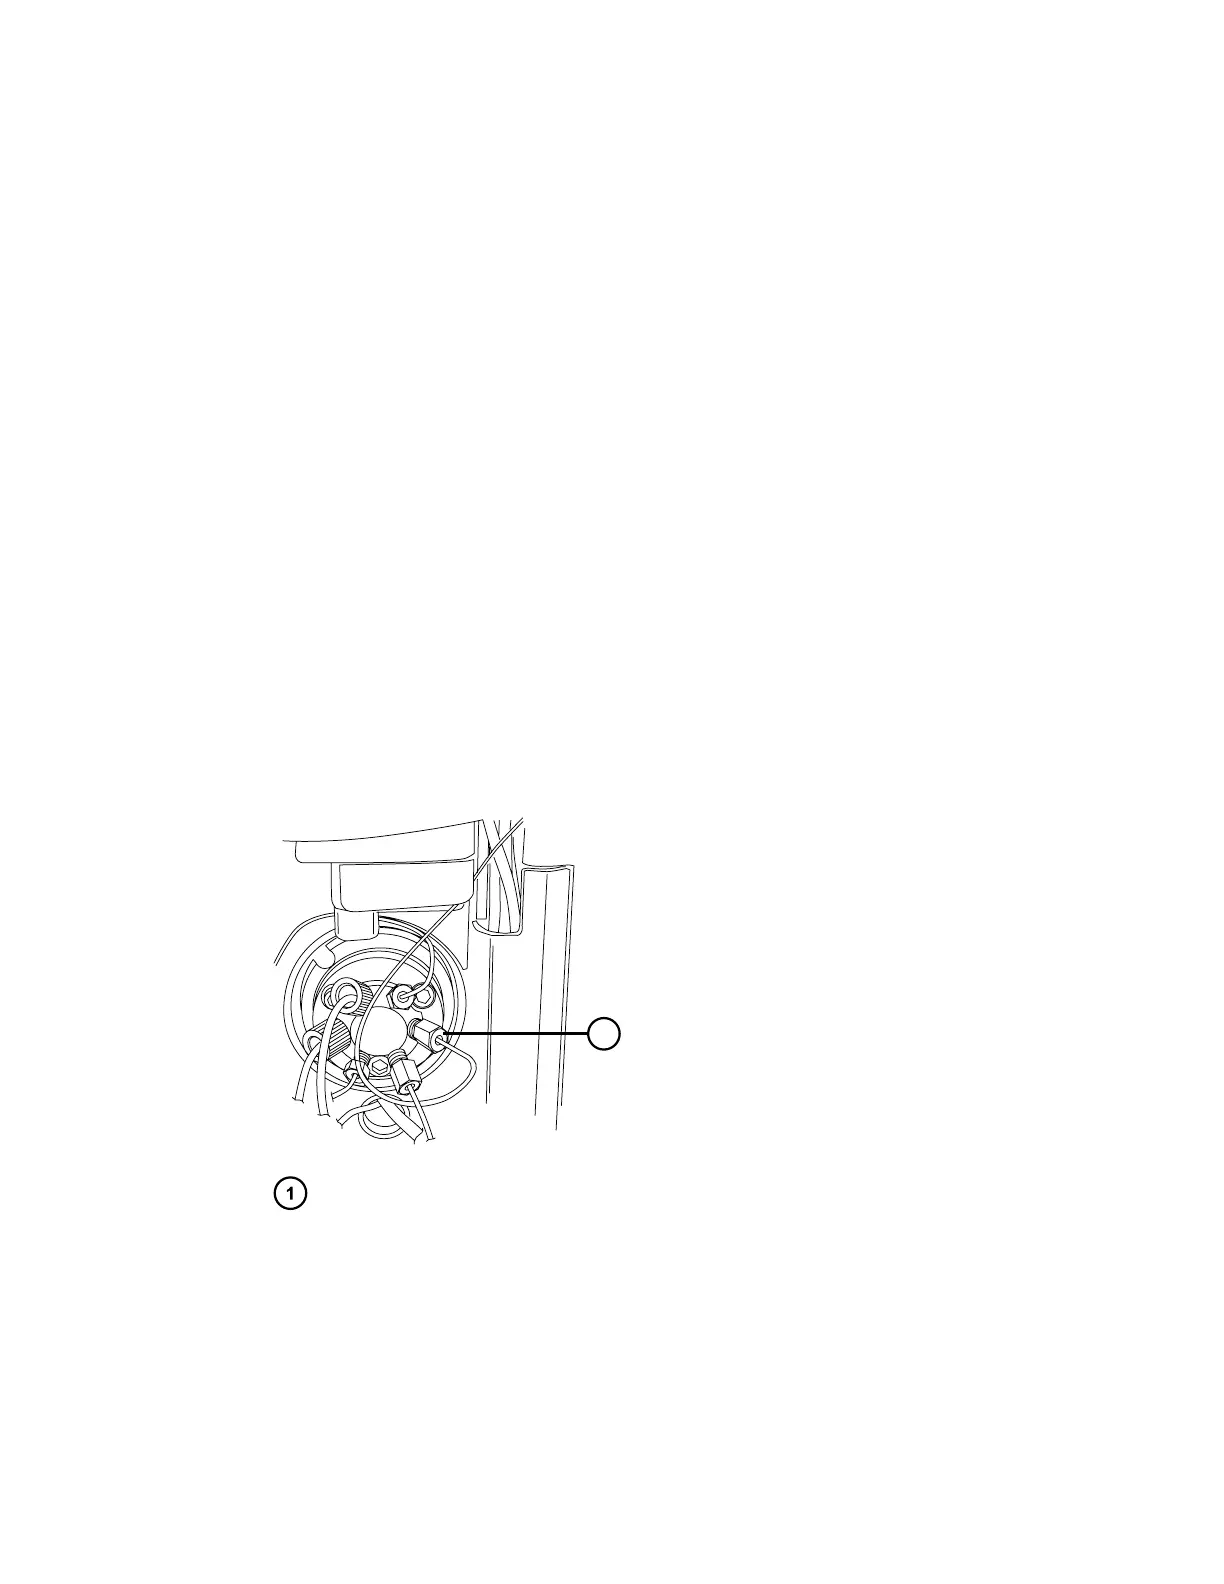
5. Using the 1/4-inch open-end wrench, disconnect the long, flat compression-screw end of
the APH assembly from port 6 of the sample manager's injection valve.
Figure 2–4: Removing APH assembly from the sample manager injector valve
Long, flat compression-screw end of the APH assembly
6. Disconnect the column-outlet PEEK tubing from the detector inlet.
7. After allowing sufficient time for cooling, open the column compartment door, and then
disconnect and remove the column (and the column in-line filter, if fitted) from the APH
assembly.
Note: Loosen the #2 locking cap nut on the APH assembly before loosening the #1
compression fitting.
December 4, 2019, 715005052 Version 02 (previously released as Rev.B)
Page 23