15. Unpack the new leak sensor.
16. Align the leak-sensor T-bar with the slot in the leak-sensor reservoir, and press the new
leak sensor into the slot so that the prism sits in the reservoir.
17. Insert the leak-sensor cable through the slot in the column heater housing.
18. Reinstall the column heater by inserting its left-hand side tab into the slot on the left-hand
side of the housing.
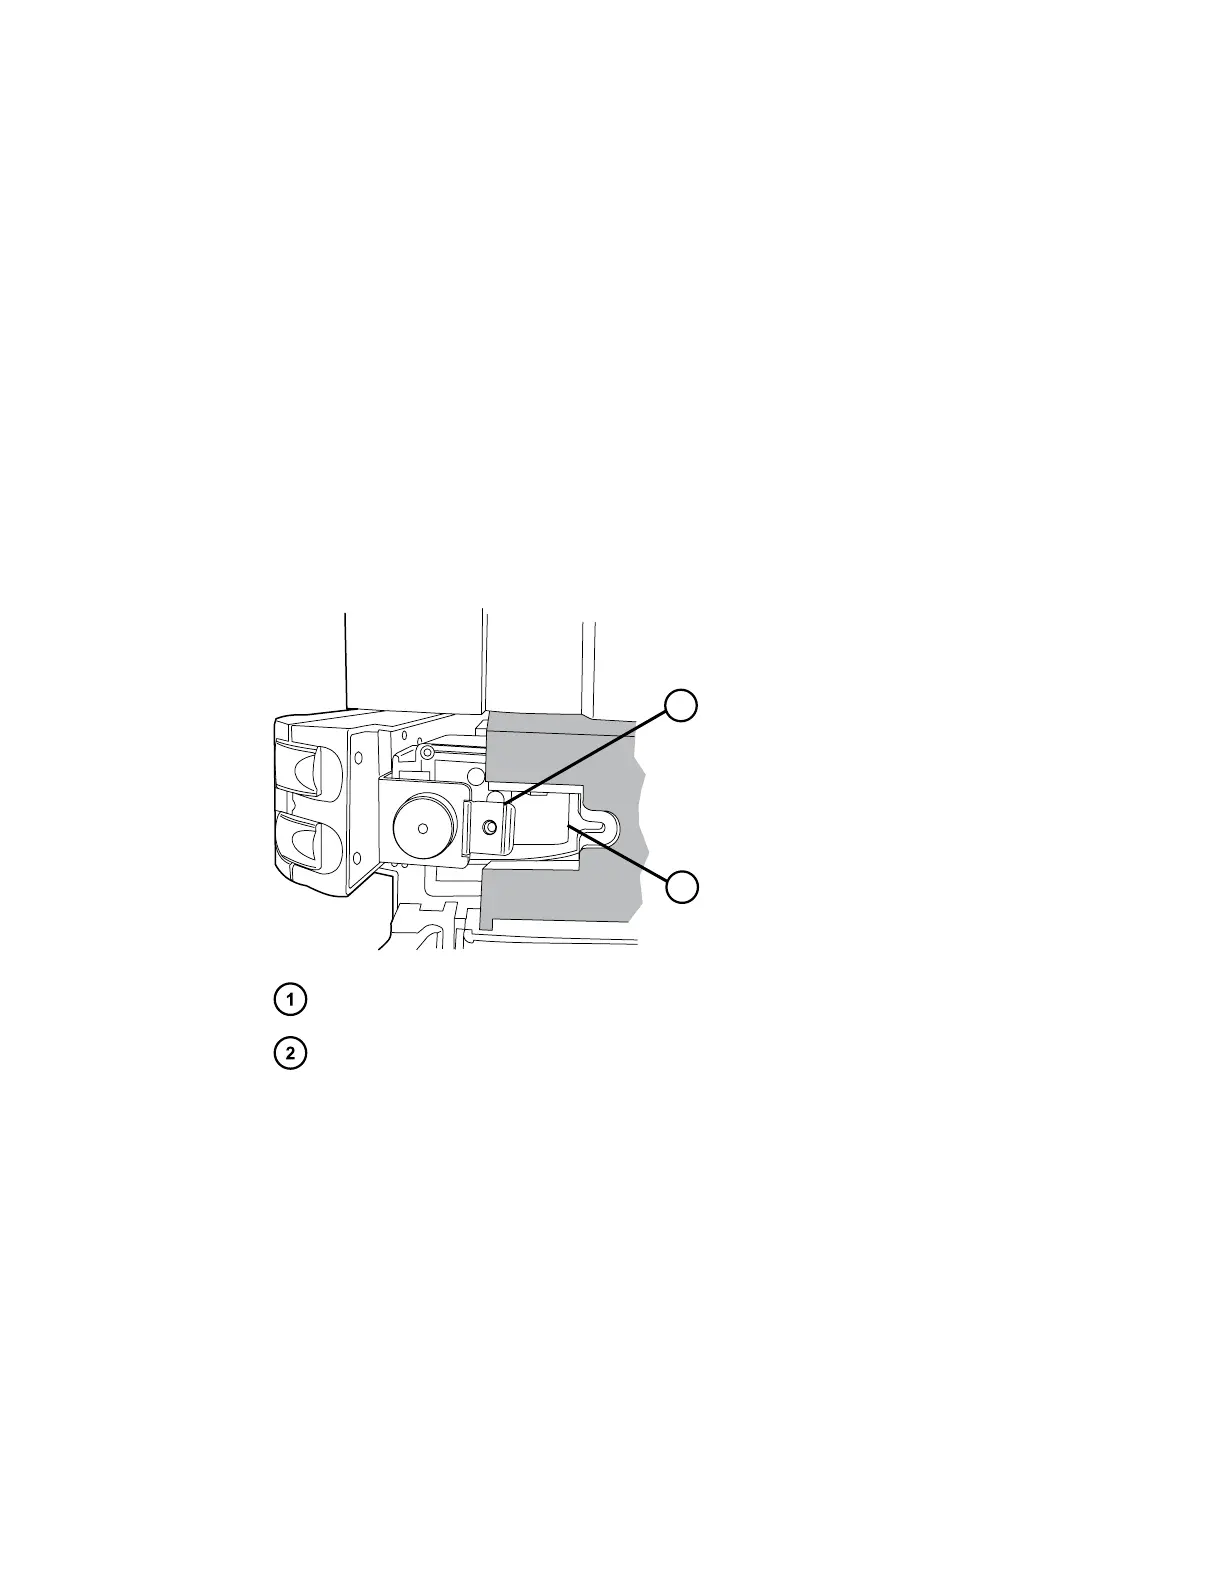
19. Hold the left-hand side of the column heater in the slot, and guide the eCord tab, on the
right-hand side, into the cutout in the column-heater housing.
Tip: If you are unable to seat the column heater into the cutout in the column-heater
housing, use the T20 TORX driver to loosen the TORX screw that holds the tab on the left-
hand, rear side of the column heater, and then press the right-hand side of the column
heater into the housing. Tighten the TORX screw to secure the tab.
Figure 3–5: Guiding the eCord tab into the column-heater housing
Tab
Cutout in column-heater housing
20. Install the TORX screw in the tab and tighten it to secure the column heater to the column-
heater housing.
21. Plug the connector for the leak-sensor cable into the receptacle located on the rear, left-
hand side of the column heater.
22. Plug the 25-pin power and signal cable into its mated receptacle on the rear of the column
heater.
23. Reconnect the APH-inlet tubing to injector port 6 of the sample manager.
24. Reconnect the column-outlet tubing to the detector inlet.
25. Reconnect the eCord fob to its receptacle on the right-hand side of the CH-A.
December 4, 2019, 715005052 Version 02 (previously released as Rev.B)
Page 74