14
TnP-500 User Manual Wavecom
Barcode Generation
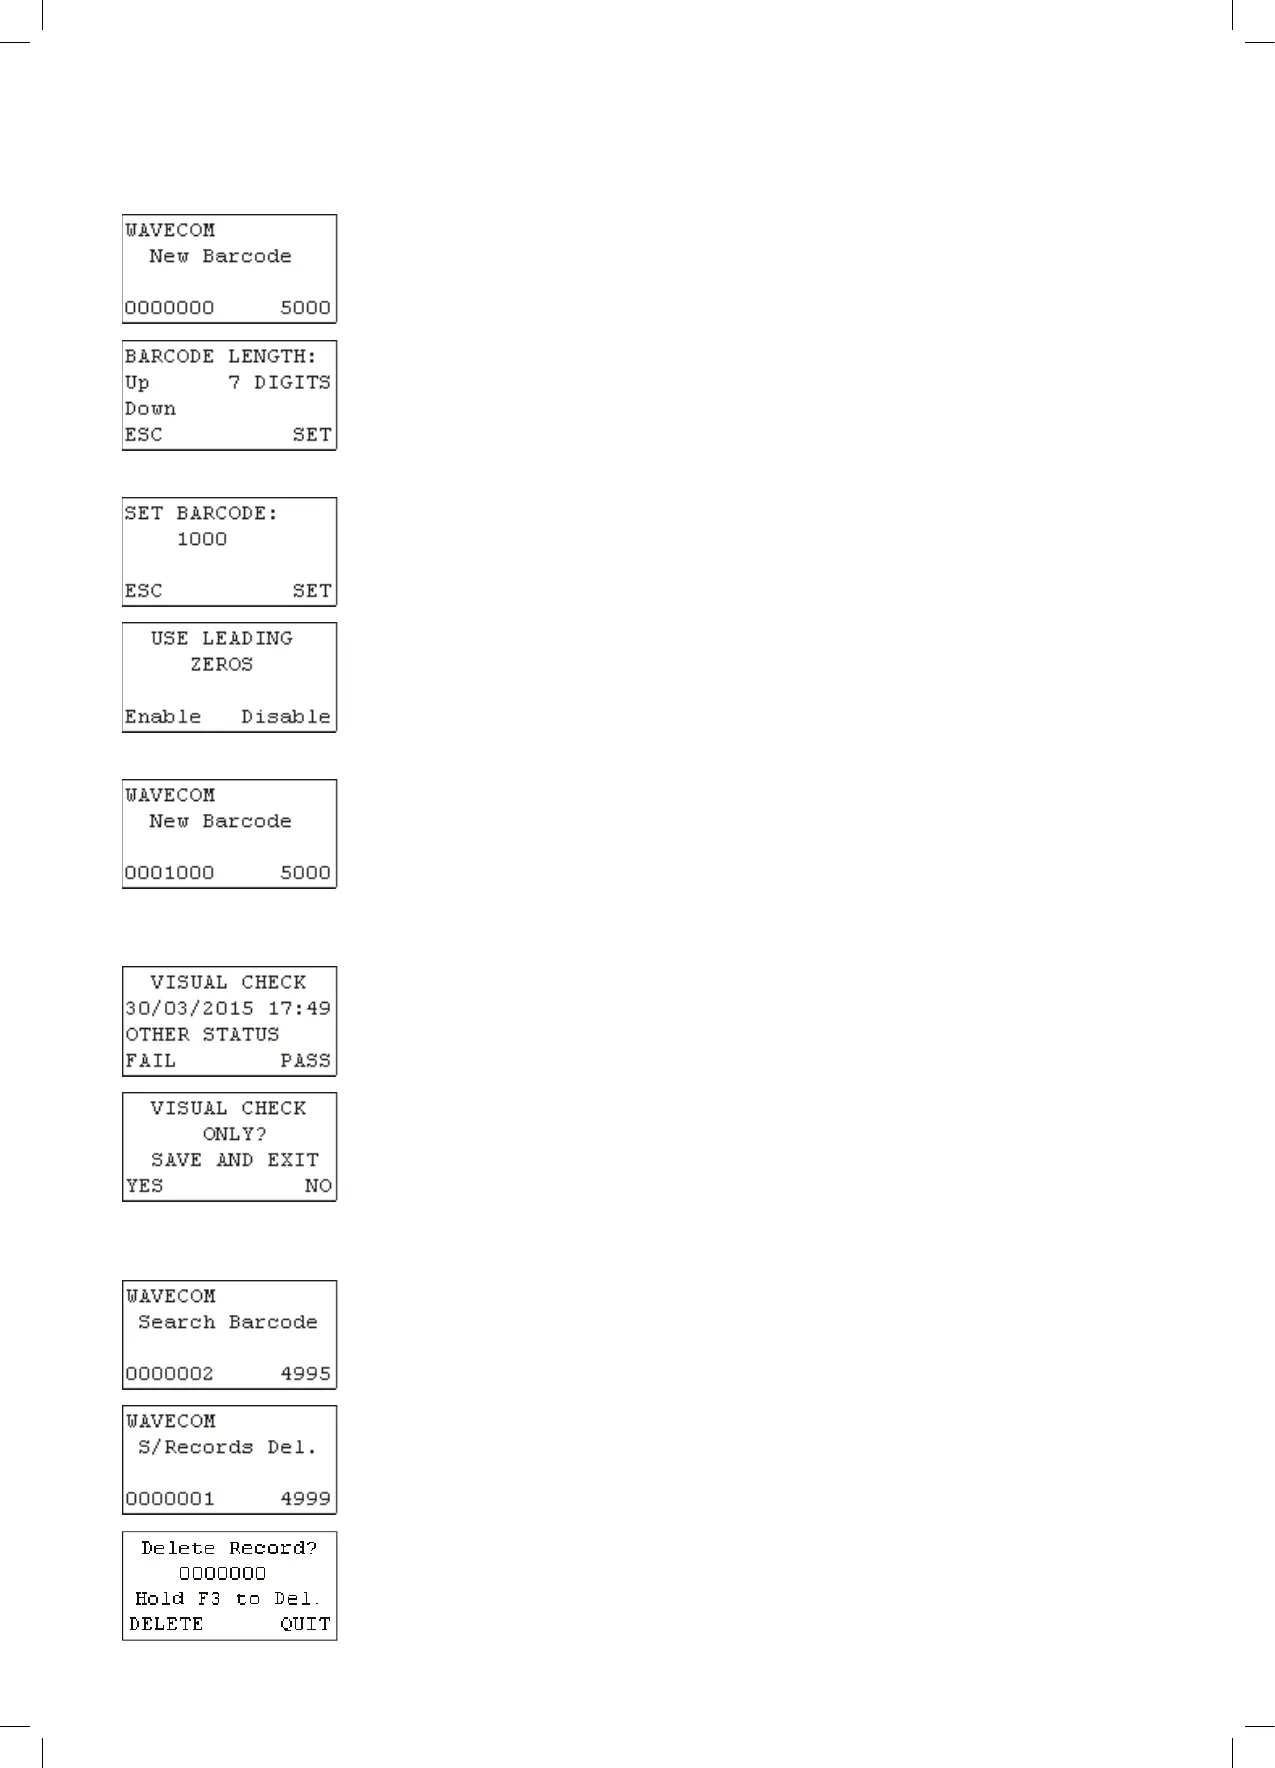
The TnT incorporates an auto generate barcode function which allows barcodes to be
generated sequentially after a barcode has been specified, for example: the specified
barcode is 1000 so the next barcode to be generated will be 1001, 1002, 1003 etc. This can be
accessed by holding F3 for 2 seconds on the Barcode Entry screen.
Once the auto generate menu has been accessed, the user can specify how many digits they
want in the barcode. The auto generate function allows a minimum of 2 and a maximum of 7
digits in the barcode to be generated. To increase the number of digits in the barcode, press
F1. To decrease the number of digits in the barcode, press F2. To proceed, press enter, or to
return to the Barcode Entry screen, press F3
If Enter was pressed, the user can now set the barcode that will begin the sequence. Key in a
barcode and press Enter to continue, or F3 to return the Barcode Entry screen.
If Enter was pressed, the user can specify whether or not to use leading zeros in the auto
generated barcode. For example: If the user selected 7 digits in the barcode and entered
1000 as the barcode, the barcode will be 0001000 if leading zeros are enabled. To enable
leading zeros, press F3. To disable, press enter. The current barcode that will be generated is
displayed in the bottom left hand corner of the Barcode Entry screen.
The current barcode that will be generated is displayed in the bottom left hand corner of
the Barcode Entry screen.
Visual Check Only
Items can be passed with a visual check only (no testing required). You must be at the
visual check screen shown on the left. To do a visual check only press and hold Enter for
2 seconds.
Pressing (enter) will take you back to the visual check screen. Pressing (F3) will complete
the test. Print out a tag if you have a zebra printer. Then go back to the new barcode screen.
Deleting Items
From the search barcode screen press and hold the Enter key. Then press the F1 key. The
feature cannot be selected when new barcode is displayed.
The search barcode will change to S/Record Del.
Scan or type the barcode that needs to be deleted. If the record does not exist or is in the
wrong site a message will be displayed saying nothing was found.
When a match is found a last warning message will be displayed. To delete the record hold
the F3 key for 2 seconds. To cancel press Enter.