Scheps Omni Channel / User Guide
Using Presets
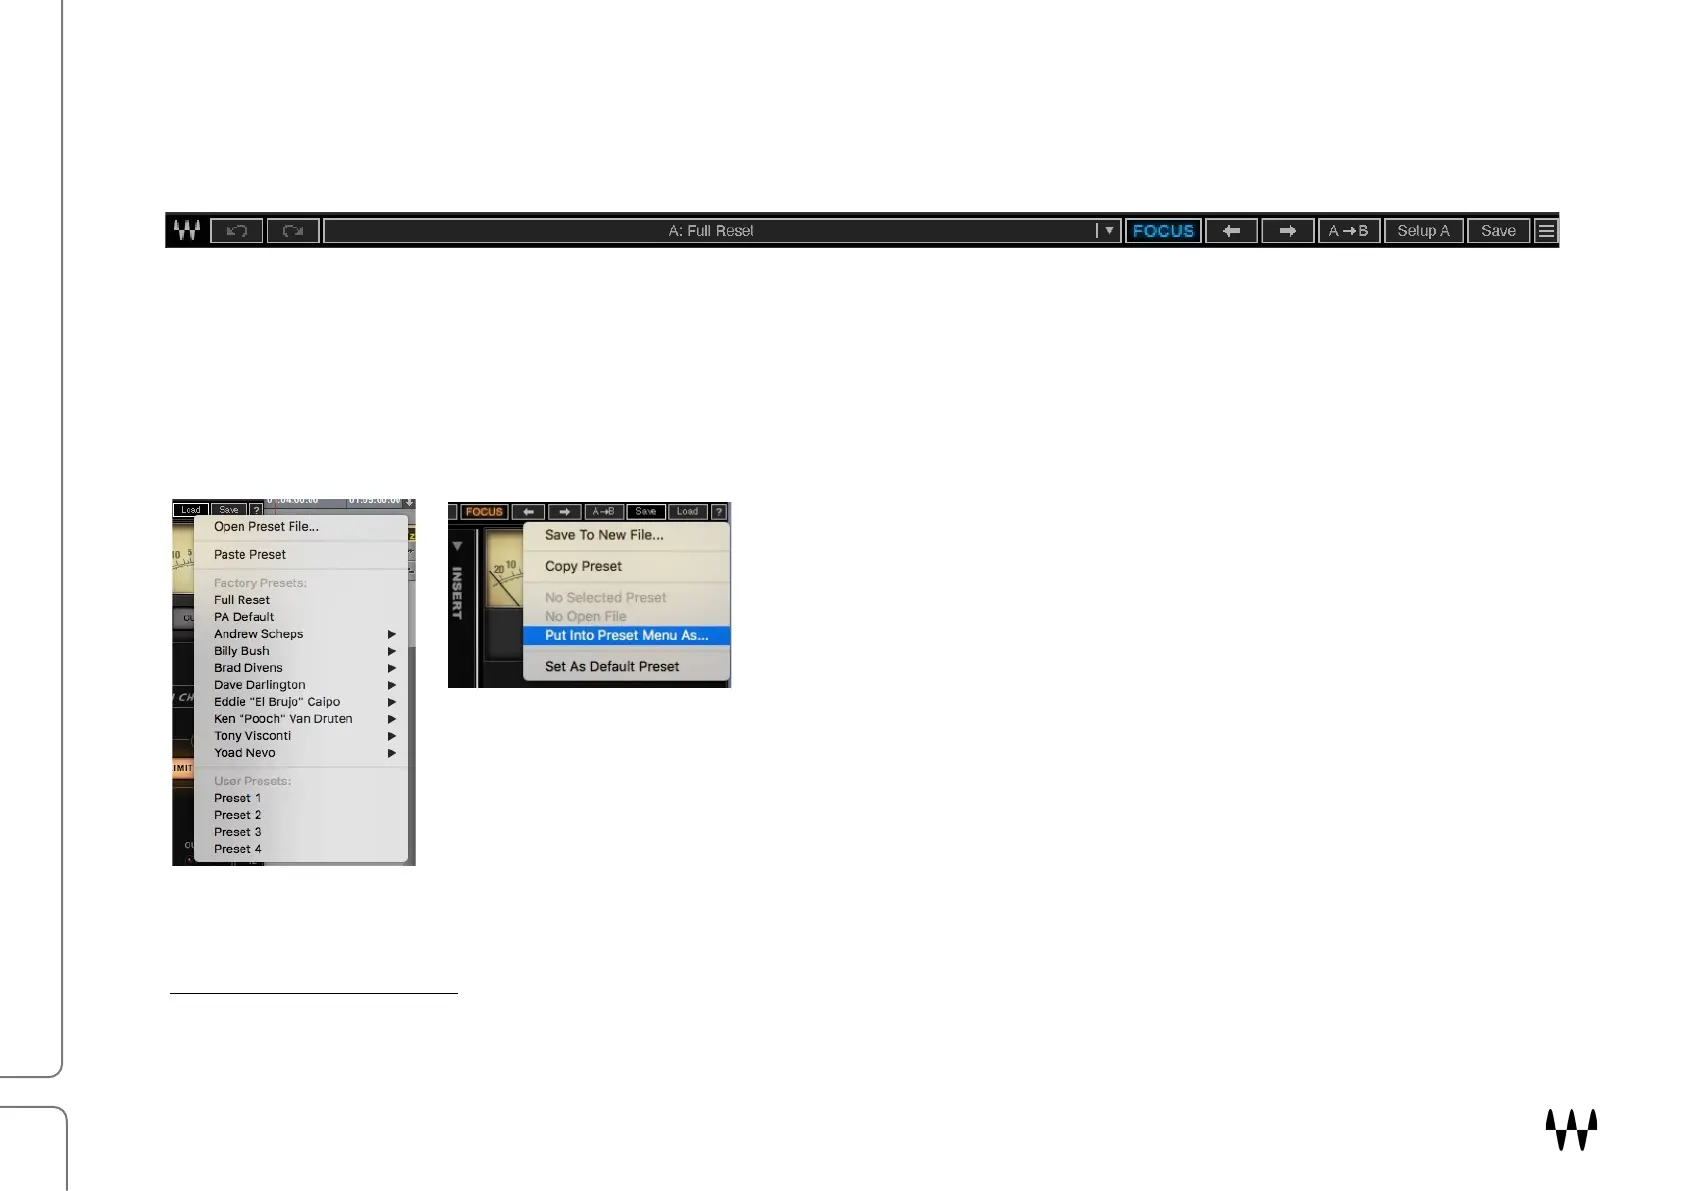
Use the WaveSystem Toolbar at the top of the plugin to save and load presets, compare settings, undo and redo steps, and
resize the plugin.
Saved presets can easily be shared between instances, whether in the same session, in a different session, or in a
different host application.
1
To learn more about managing presets, click the icon on the upper-right corner of the
window and open the WaveSystem Guide. This tiny toolbar can really help you, so it’s worth investigating.
The arrows on the left side of the toolbar provide 32 levels of undo and redo. This includes all plugin functions,
including resequencing the Omni Channel modules.
All presets—factory and user-created—are recalled from the
P
resets menu (far left) Access the Presets menu with the big
button in the middle of the toolbar. To restore all controls to
their factory default status, select “Full Reset.”
Use the Save menu to create presets from existing plugin
settings and to copy presets to other instances of Scheps
Omni Channel. To delete a preset, hold Cmd while opening the
Presets menu (Mac).
“Set as Default Preset” saves the current settings as the default preset. It will load each
time Scheps Omni Channel is instantiated. Stereo and mono components have different
default presets. If you do not want any default preset, use the host computer’s operating
system to delete the file. Preset files are located here:
Mac: Users>Shared>Waves>Plug-In Settings
Windows: C:\Users\Public\Waves Audio\Plug-In Settings
1
When working with Pro Tools, you must close and relaunch the application after creating a user preset in order to hear
the results.