5Startup
WU017834 Rev. 05 July 2023 Wayne Fueling Systems | Dover Fueling Solutions 33
5 STARTUP
5.1 INITIAL CHECKOUT
Before applying power to the dispenser, double-check the wiring to ensure it is correctly routed and termi-
nated. Ensure that all conduits have the washer pushed up against the vapor barrier. Turn on the dispenser
control power at the circuit breaker and the submersible pump or suction pump motor circuit breakers. Verify
the dispenser powers on and all lights work. The dispenser displays will show some numbers, usually the
last sale run during factory test.
The dispenser template, which configures the dispenser, has been loaded in the dispenser and tested at the
factory. The dispenser will have the necessary data such as unit prices and blend ratios to allow the dis-
penser to operate in stand-alone at installation to purge product lines and test operation. At start-up, the pro-
cedures in this section should be performed in sequential order to ensure proper operation before the
dispenser is switched over to control system operation.
5.2 TURN ON POWER AND CHECK VOLTAGE
1. Turn on the breaker that supplies power to the dispenser.
2. Verify that the incoming voltage is within +10% of the rated voltage. If the voltage is not within the
acceptable range, take the appropriate corrective measures before using the dispenser.
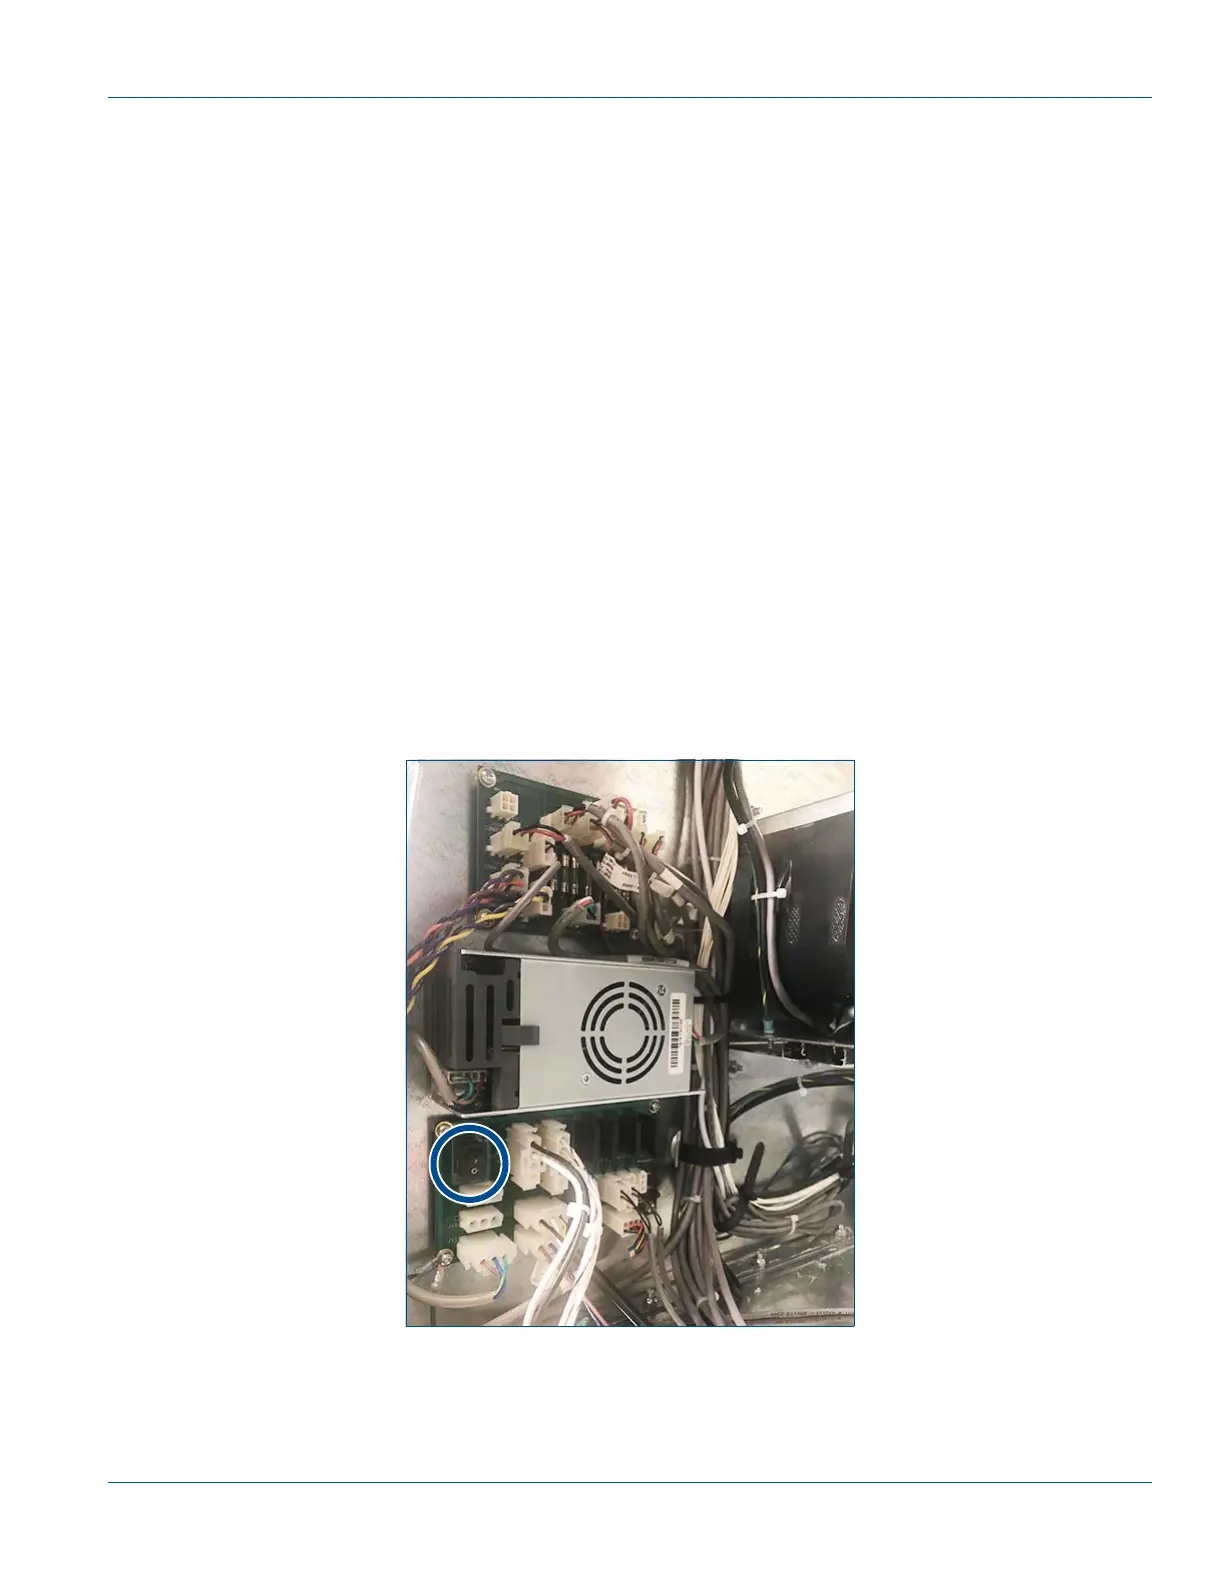
5.2.1 Dispenser ON/OFF Switch
A power switch to each dispenser is located on the AC Distribution & Motor Control board on Side A of the
dispenser. The board is located on the bottom of the left wall of the dispenser if facing side A.
Figure 5-1 Dispenser ON/OFF Switch on A/C Power Distribution Board
 Loading...