WWW.WEBER.COM
®
29
ANNUAL MAINTENANCE
BURNER TUBE CLEANING
OR REPLACEMENT (continued)
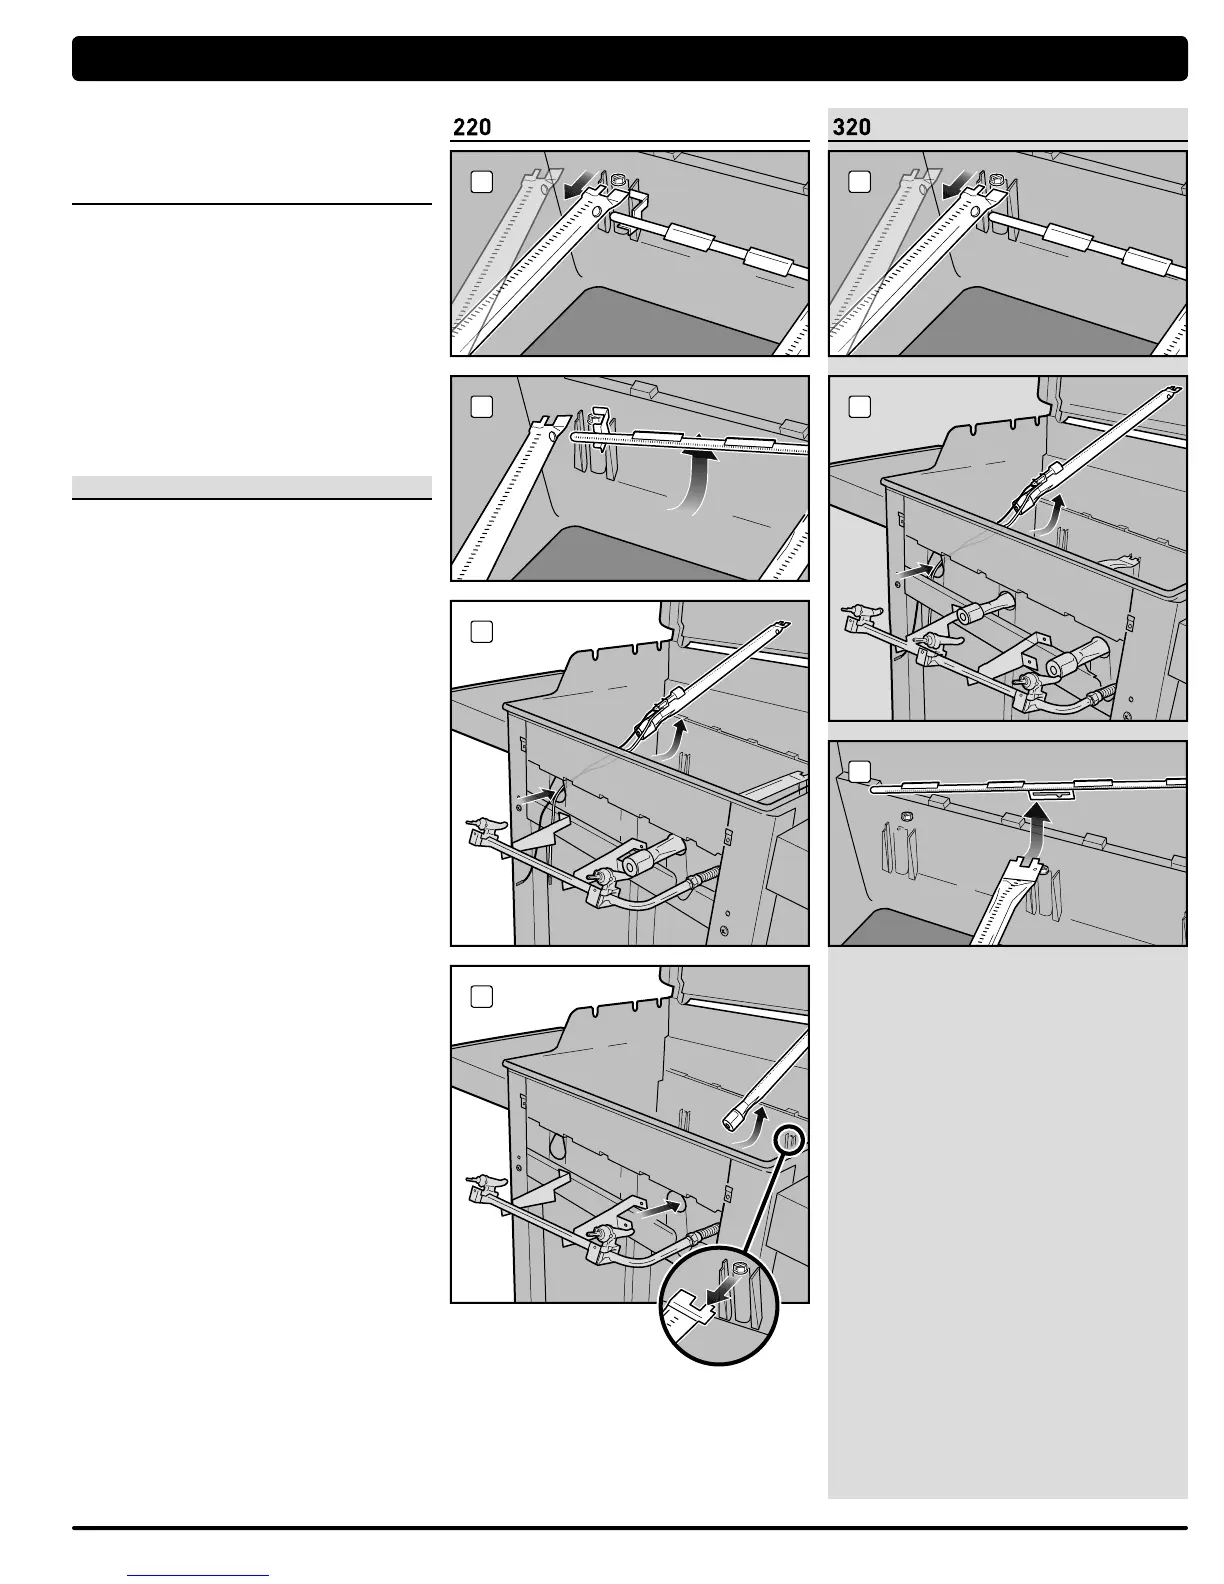
Reinstall Burner Tubes
For Spirit
®
grills with 2 burners:
A) Put burner tube 2 inside cookbox and pass the front
end of tube out through burner tube 2 opening. Note:
Single row of burner ports should be facing up. Slide
burner tube 2 under the guide screw and washer(1).
B) Put burner tube 1 inside cookbox and pass igniter
wires and the front end of tube out through burner
tube 1 opening(2).
C) While holding burner tube 1, insert left side of
Crossover
®
tube into Crossover
®
burner hole(3).
Guide right side of Crossover
®
tube into Crossover
®
burner hole in burner tube 2 (not pictured). Note: The
Crossover
®
tube burner ports should face the front of
the cookbox.
D) Slide burner tube 1 under the guide screw and
washer(4).
For Spirit
®
grills with 3 burners:
A) Put burner tube 2 inside cookbox and pass the front
end of tube out through burner tube 2 opening(1).
Note: Single row of burner ports should be facing up.
B) Slide Crossover
®
tube alignment guide over the end of
burner tube 2 (2). Note: The Crossover
®
tube burner
ports should face the front of the cookbox. With
Crossover
®
tube attached, slide burner tube 2 under
the guide screw and washer(3).
C) Put burner tube 3 inside cookbox and pass the front
end of tube out through burner tube 3 opening (not
pictured). Insert right side of Crossover
®
tube into
Crossover
®
burner hole in burner tube 3. Slide burner
tube 3 under the guide screw and washer(4).
D) Put burner tube 1 inside cookbox and pass igniter
wires and the front end of tube out through burner tube
1 opening (5).
E) While holding burner tube 1, insert left side of
Crossover
®
tube into Crossover
®
burner hole. Slide
burner tube 1 under the guide screw and washer(6).
4
3
2
1
1
2
3
 Loading...