7
Getting Started
LP Tank Installation &
LeakChecking
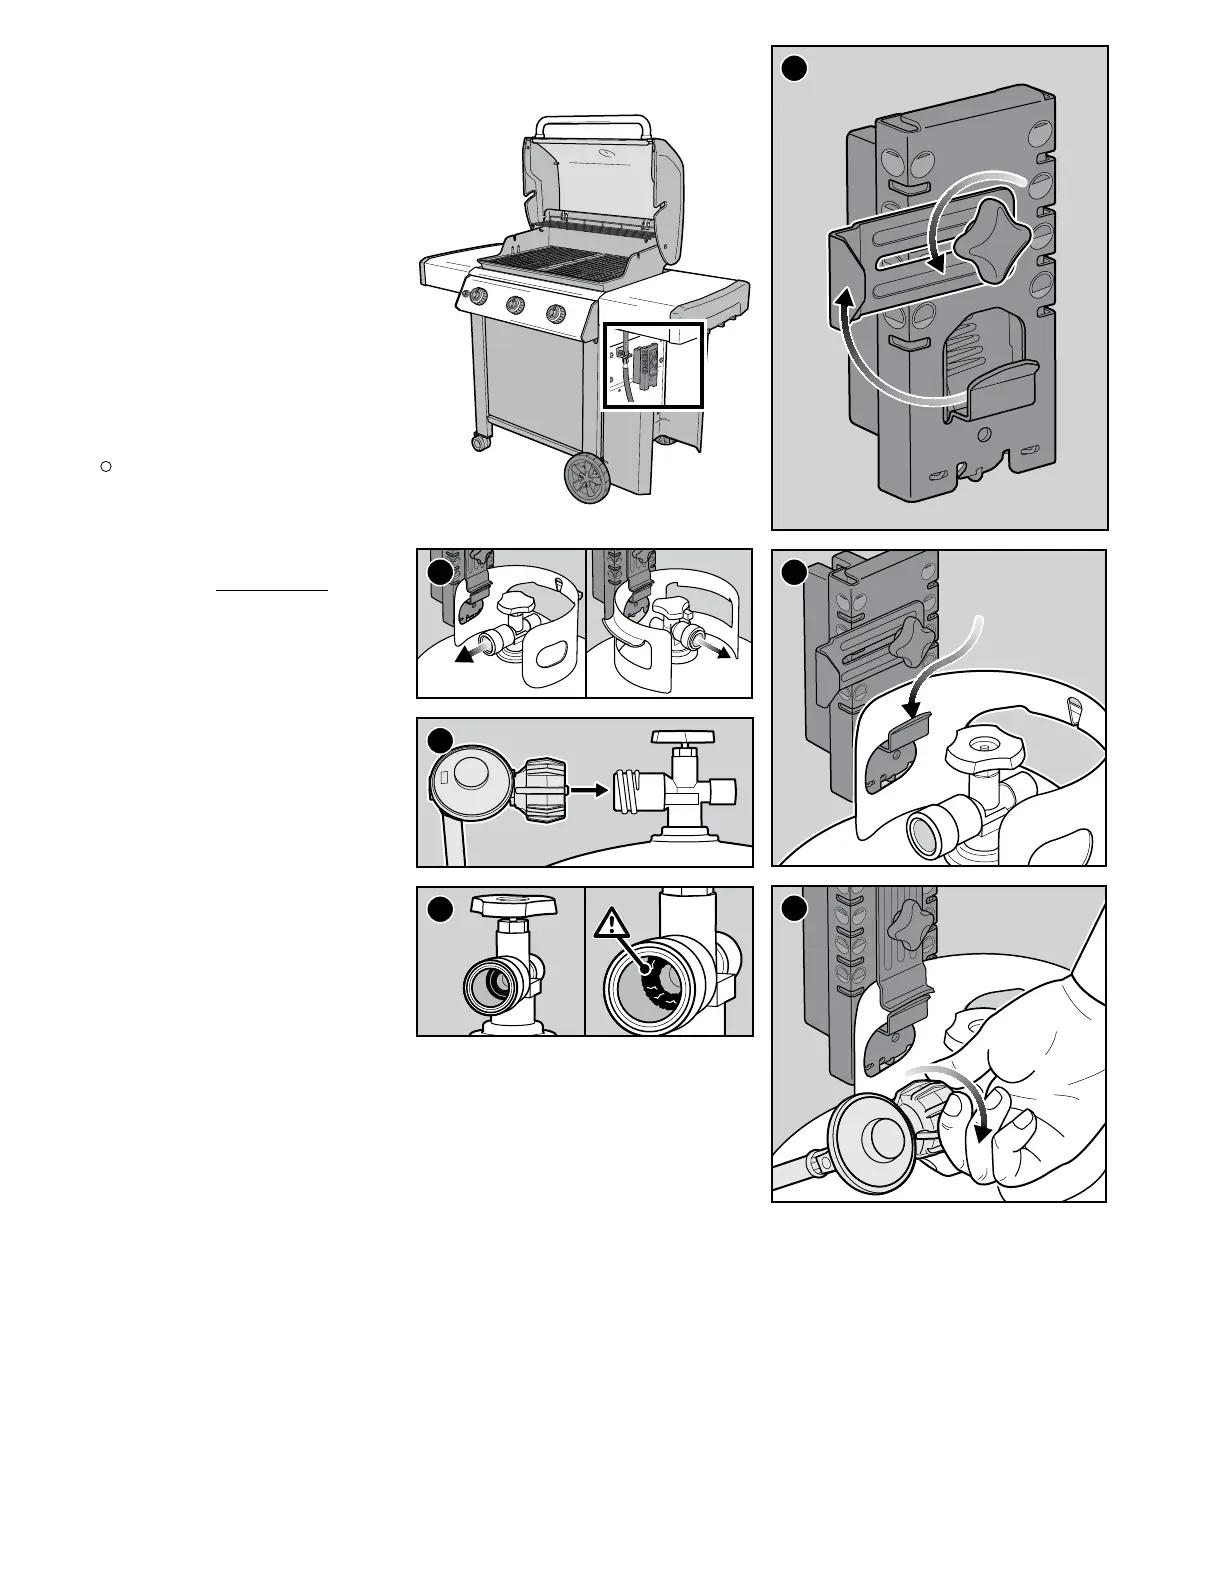
Installation Location
The tank is hung onto the tank scale which is located
outside the cabinet base under the right side table.
The shape of the collar assembly (the metal protective
ring around the tank valve) determines one of two
directions in which the tank will correctly hang on the
tank scale (A).
Inspect the Tank
1) Confirm that the tank valve is fully closed. Close by
turning valve clockwise.
2) Confirm that the tank valve is the proper mating
type for the regulator (B).
3) Inspect the tank valve, including the internal rubber
seal for damage or debris (C). If damaged, return
tank to local retailer.
Install The Tank
1) Check that all burner control knobs are in the
o position. Check by pushing in and turning
knobs clockwise.
2) Loosen hand nut and rotate tank lock up(D).
3) Lift tank into position on the tank scale (E).
4) Rotate the tank lock down. Tighten the hand nut.
5) Screw the regulator coupling onto the tank valve,
turning clockwise (F). Hand-tighten only. Using a
wrench could damage the regulator coupling and
could cause a leak. Proceed to “CHECKING FOR
GASLEAKS.”
A
B
C
D
E
F