7
Parameters (Optional HMI):
1. Set P220 = 1 Always Remote
2. Set P230 = 1 Digital Inputs
3. Set P263 = 1 DI1 Start (three wires)
4. Set P264 = 1 DI2 Stop (three wires)
Programming via dipswitches and trim pots:
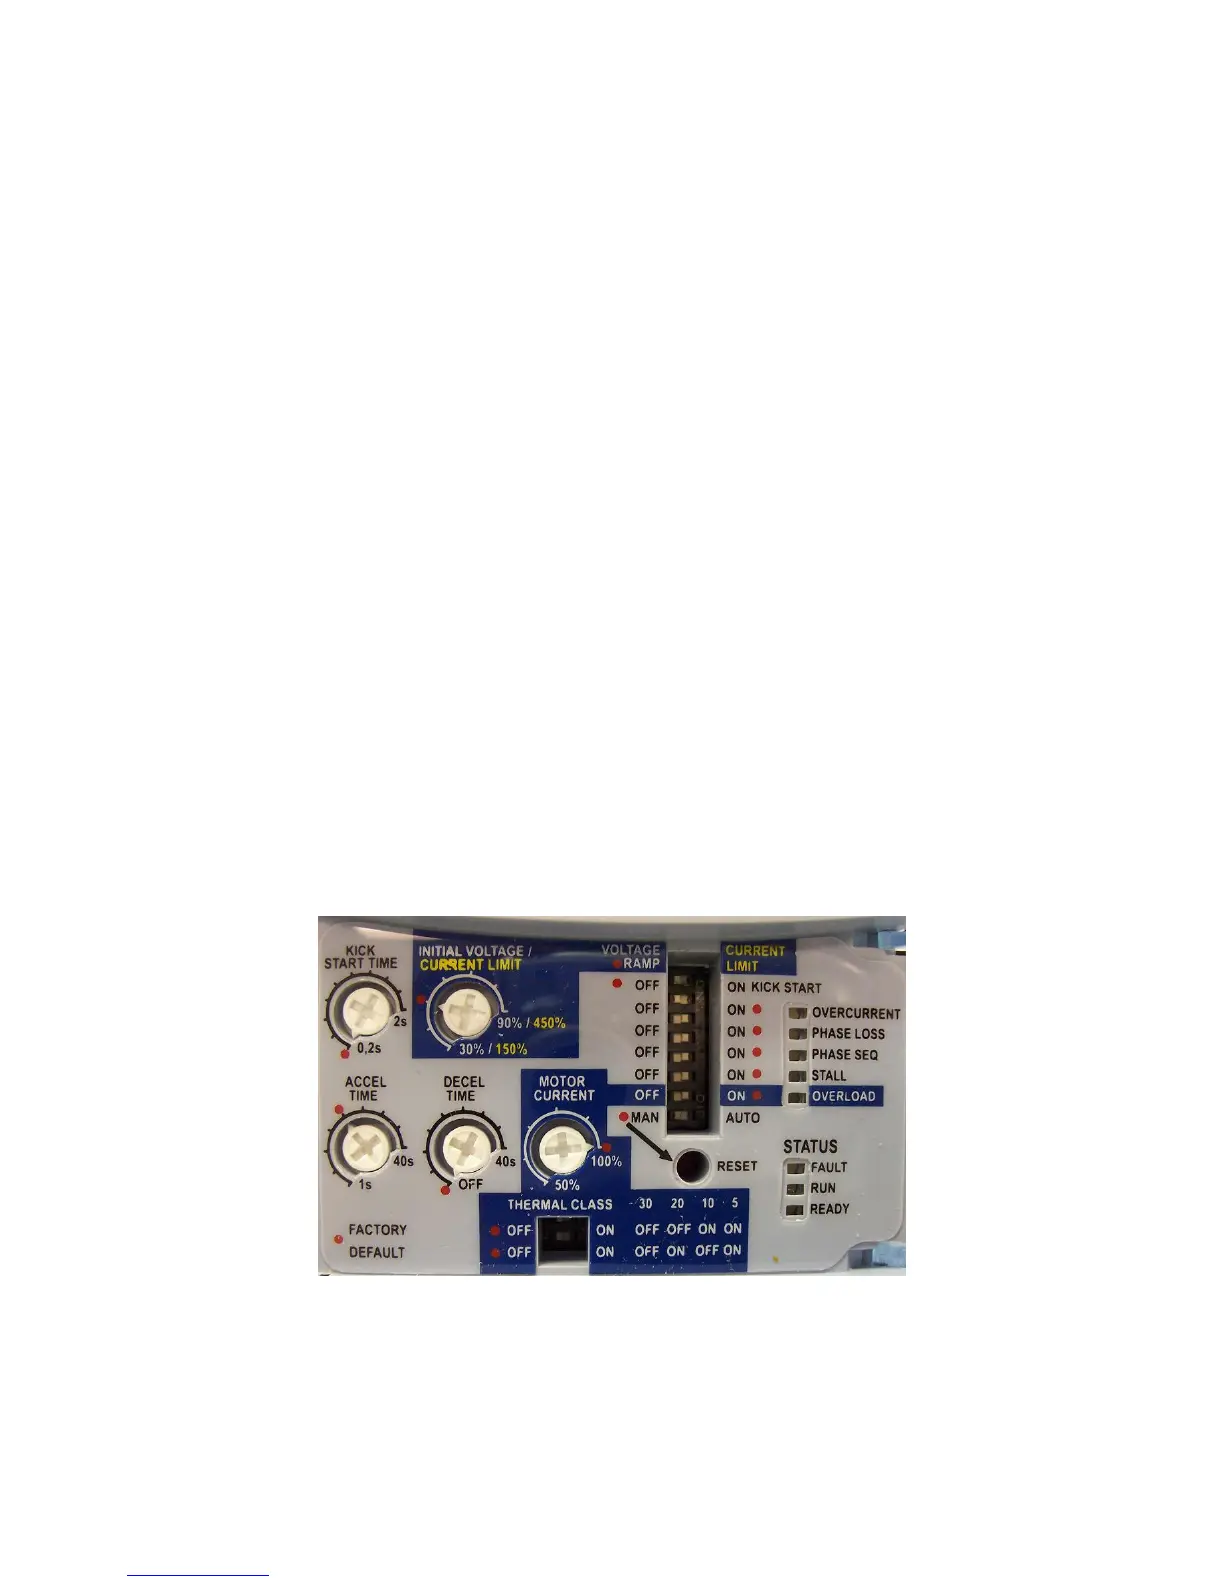
To program DI2 for 3-wire control, refer to Figure 5 and perform the following:
1. Press and hold the reset button on the front of the SSW07 for 5 seconds to enter the programming mode.
Note: The reset button must remain pressed during programming.
2. When the programming mode is entered, two LED’s will illuminate (over-current and phase loss), indicating
that DI2 is programmed for fault reset.
3. To re-program for 3-wire control, switch the over-current dip-switch and return to the previous position. Three
LED’s will illuminate (over-current, phase loss, and phase sequence), indicating that DI2 is now programmed
for 3-wire control.
4. To change DI2 programming back to fault reset, switch the kick start dip-switch and return to the previous
position. Two LED’s will illuminate (over-current and phase loss), indicating that the DI2 is programmed for
fault reset.
5. Release the reset button to complete the programming.
Figure 5 – Trim-Pots and Dip Switch Locations
 Loading...