37
instructions for the user
ENGLISH
9
Machine programming
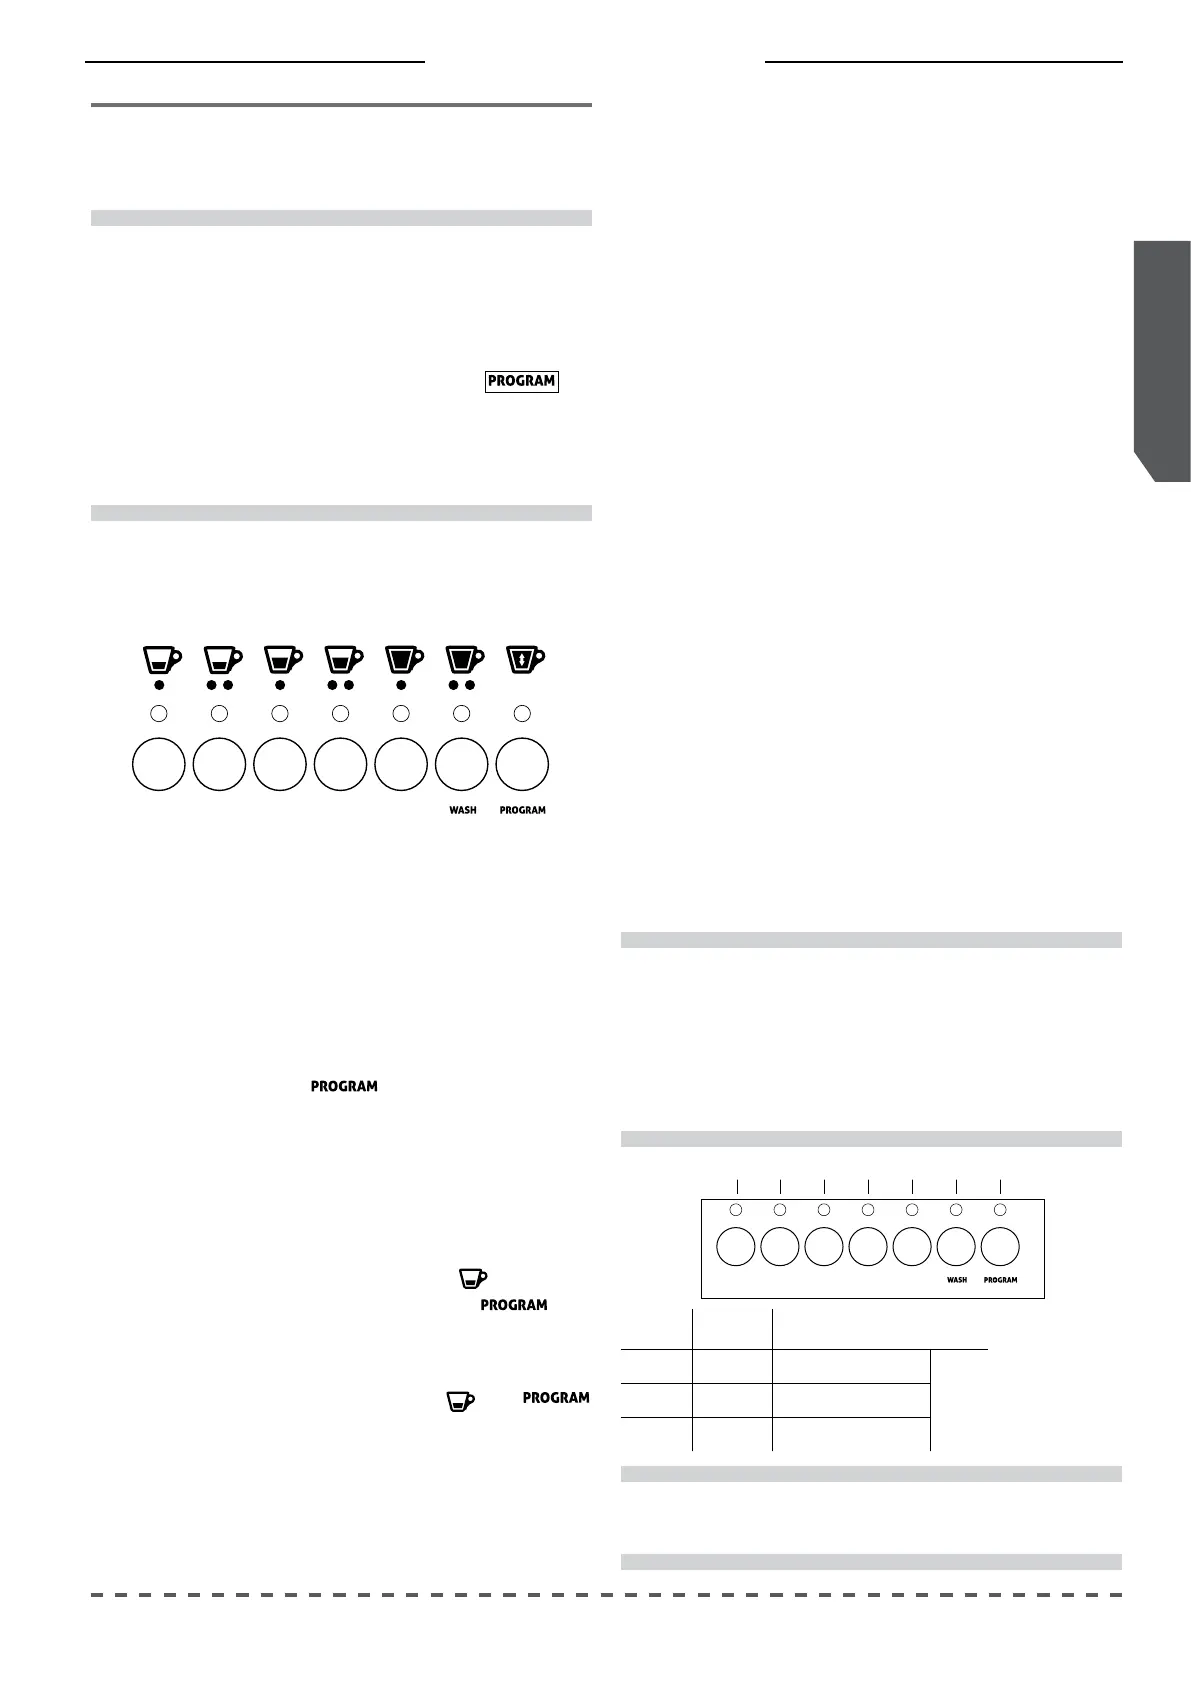
9.1 Programming coee doses
• Hold down button for at least 5 seconds
(all LEDs on the push button panel turn o);
• lift the lever of the unit, insert a pod, and lover
the lever of the unit again (all the leds of the
programmable buttons turn on);
• put the coee cup under the dispensing spout;
• press the desired dose button (e.g.
): the LEDs
of the selected button and of button turn
on;
• upon reaching of the desired dose, conrm by
pressing the selected button
or
again;
• repeat this above operations for the other dose
buttons.
!
The programming of each serving must be done
with a new pod and not with previously used pods.
Both push button panels can be programmed
independently and simultaneously.
To exit programming, press the button or
wait 30 seconds from the last operation.
The dose button LEDs turn o as the various doses
are programmed.
Button LED
Value Example
1 Hundreds 0 Flashes = 0
94°C2 Tens 9 Flashes = 90
3 Ones 4 Flashes = 4
Example of
warning with
temperature
set at 94 °C
i
The unit temperature is set by default at 94 °C.
!
By performing the operation with the right keyboard,
after conrming the operation with button (7), also
the temperature of the left heating block will be
automatically changed.
To set dierent temperatures, rst program the right
button panel, and then the left one.
9.2
Programming the unit temperature
Lower the lever of the unit before proceeding with temper-
ature programming.
The right hand unit also allows the temperature adjustment
of the left hand unit; the latter, however, only allows to program
the temperature.
To program the unit temperature proceed as follows:
• Turn on the machine while pressing the keys (3) and (5) of
the unit you want to program;
• the ashing LED of buttons (1), (2) and (3) indicates the
temperature of the unit, set respectively as hundreds, tens
and units;
• to change the temperature, wait until the LEDs stop ashing,
and then, when button (7) LED is on, press buttons (1) and
(2) in particular:
- to increase the temperature press button (1)
- to decrease the temperature press button (2)
• The temperature will increase or decrease by 1 °C with each
press of the buttons;
• after the change, always check the temperature set by the
number of LED ashes;
• to conrm and exit the programming, when button (7)
LED turns on, press button (7) continuously for at least 3
seconds: the ashing LED of buttons (1) (2) and (3) indicate
successful programming.
2 (-) 3 4 75 61 (+)