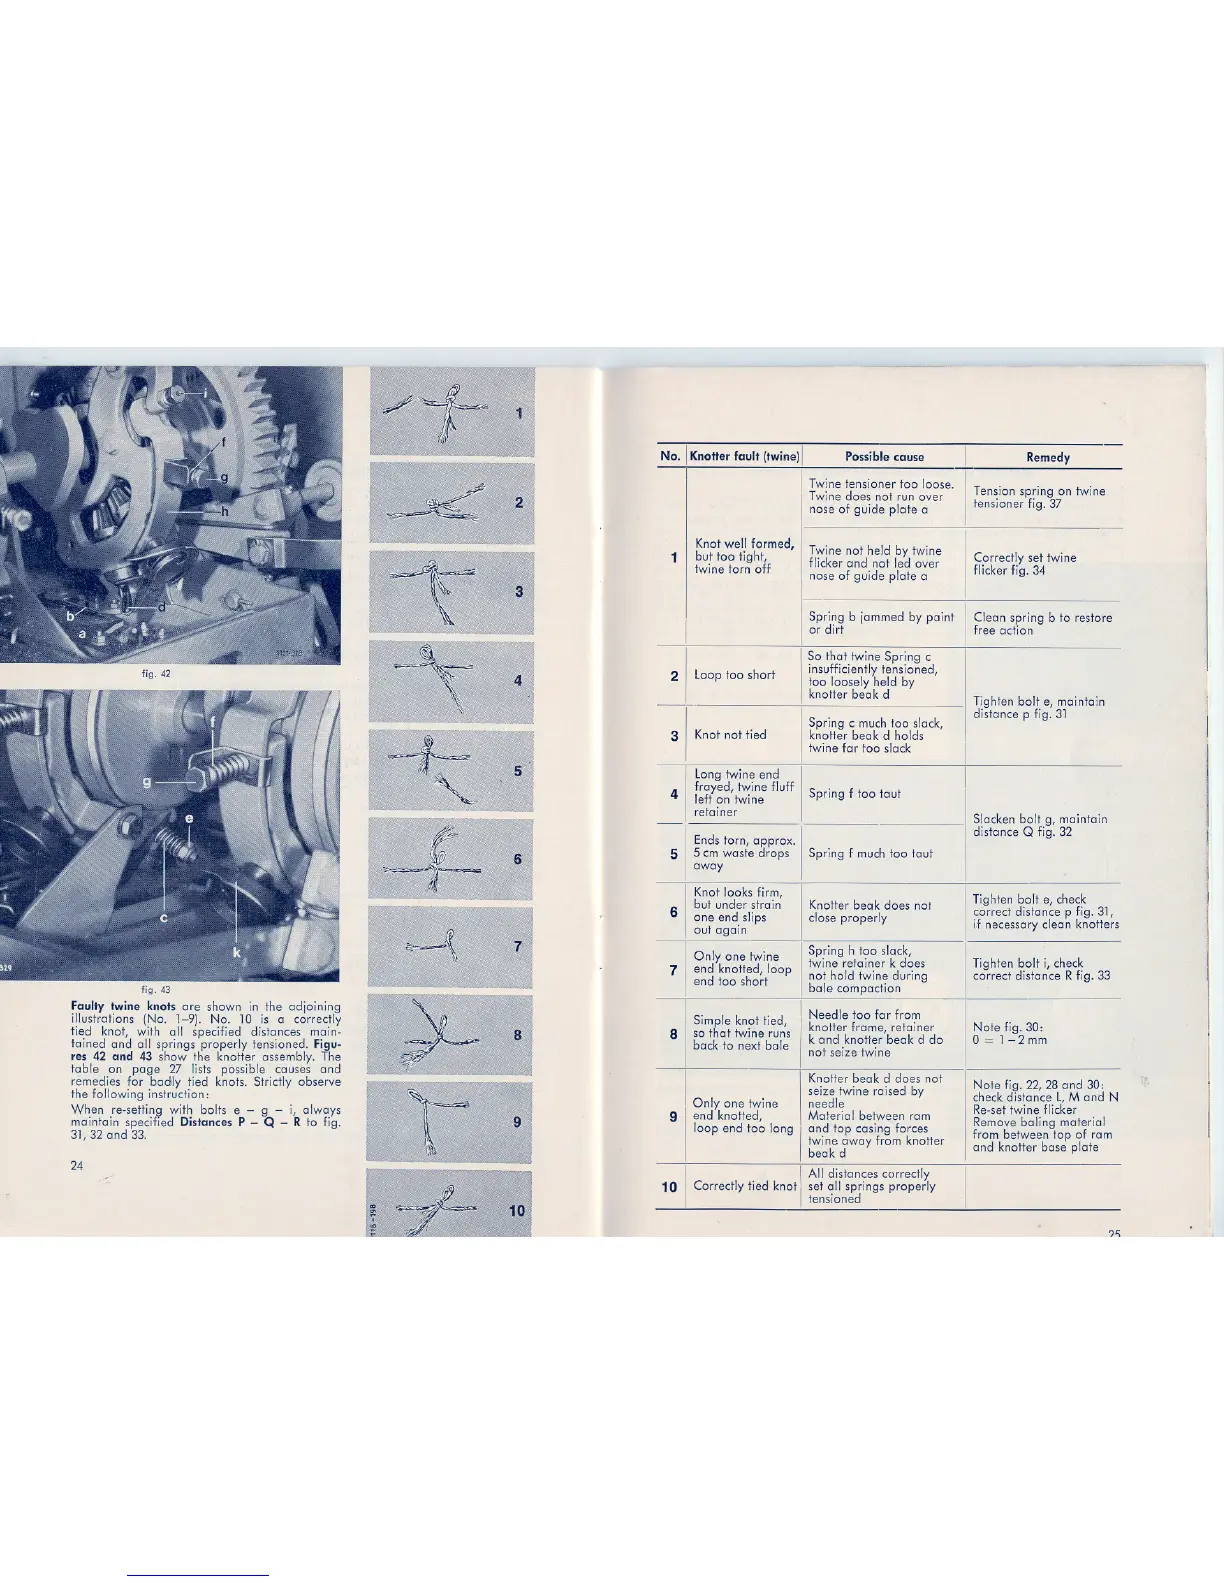
fig.42
fig. 43
Faulty twine knots are shown in the adjoining
illustrations (No. 1-9). No. 10 is a correctly
lied knot, with oll specified distances main-
tained end all springs properly tensioned. Figu-
res 42 and 43 show the knotter assembly. The
fable on page 27 lists possible causes end
remedies tor badly lied knots. Strictly observe
the following instruction:
When re-setting with bolts e - 9 - i, always
maintain specified Distances P - Q - R to fig.
31,32 end 33.
24
('
Remedy
~
No.! KnoHer fault (twine) I Possible cause
I Twine tensioner too loose.
Twine does not run over
nose of guide pfote a
1
Knot weil forrned,
but too fight,
twine tom off
Tension spring on twine
tensioner fig. 37
1
!
2
Loop too short
I Correctly set twine
I flicker fig. 34
Spring b jammed by point
I
Clean spring b to restore
or dirt free action
Twi.ne not held by twine
flicker end not led over
nose of guide plate a
So thaI twine Spring c
insufficiently tensioned,
too loosely held by
knotter beak d
Spring c much too slack,
knotter beak d holds
twine far too slack
",
3
Knot not lied
Knotter beak does not
dose properly
Spring h too slack,
twine retainer k does
not hold twine during
bole compaction
Needle too far frorn
knotter frame, retainer
k end knolfer beak d do
not seize twine
Knotter beak d does not
seize twine raised by
needle
Material between rom
I
' end top casing forces
twine away from knotter
beak d
I
I All distances correctly
10 Correctly lied knot
I
set ',8'"springs properly
tensloned
6
Knot looks firm,
but under strain
one end 'slips
out again
7
Only one twine
end knotted, loop
end too short
8
Simple kn?t lied,
so thai twlne runs
back to next bole
9
Only one twine
end knotted,
loop end too long
Tighten bolt e, maintain
distance p fig. 31
Slacken bolt g, maintain
distance Q fig. 32
Tighten bolt e, check
correct distance p fig. 31,
if necessary clean knotters
Tighten bolt i, check
correct distance Rfig. 33
Note fig. 30:
0 = 1 - 2 mm
Note fig. 22, 28 end 30:
check distance L, M end N
Re-set twine flicker
Remove ba,ling material
from between top of rom
end knotter base pfote
'J'\
Long twine end
4 I frayed, twine fluff IS . f t t t
left on twine pnng 00 au
reta'iner
Ends tom, approx.
5 I 5 cm weste drops ISpring f much too taut
away